Automatic Refund Guide
Note: Due to version changes, there might be slight differences in the screenshots in this article, but the steps on how to do it have not changed.
Whether it is an overpayment or underpayment, UniPayment can generate a refund form manually and automatically according to your settings. Below is a detailed instruction to automatically generate refund slips.
Step 1:
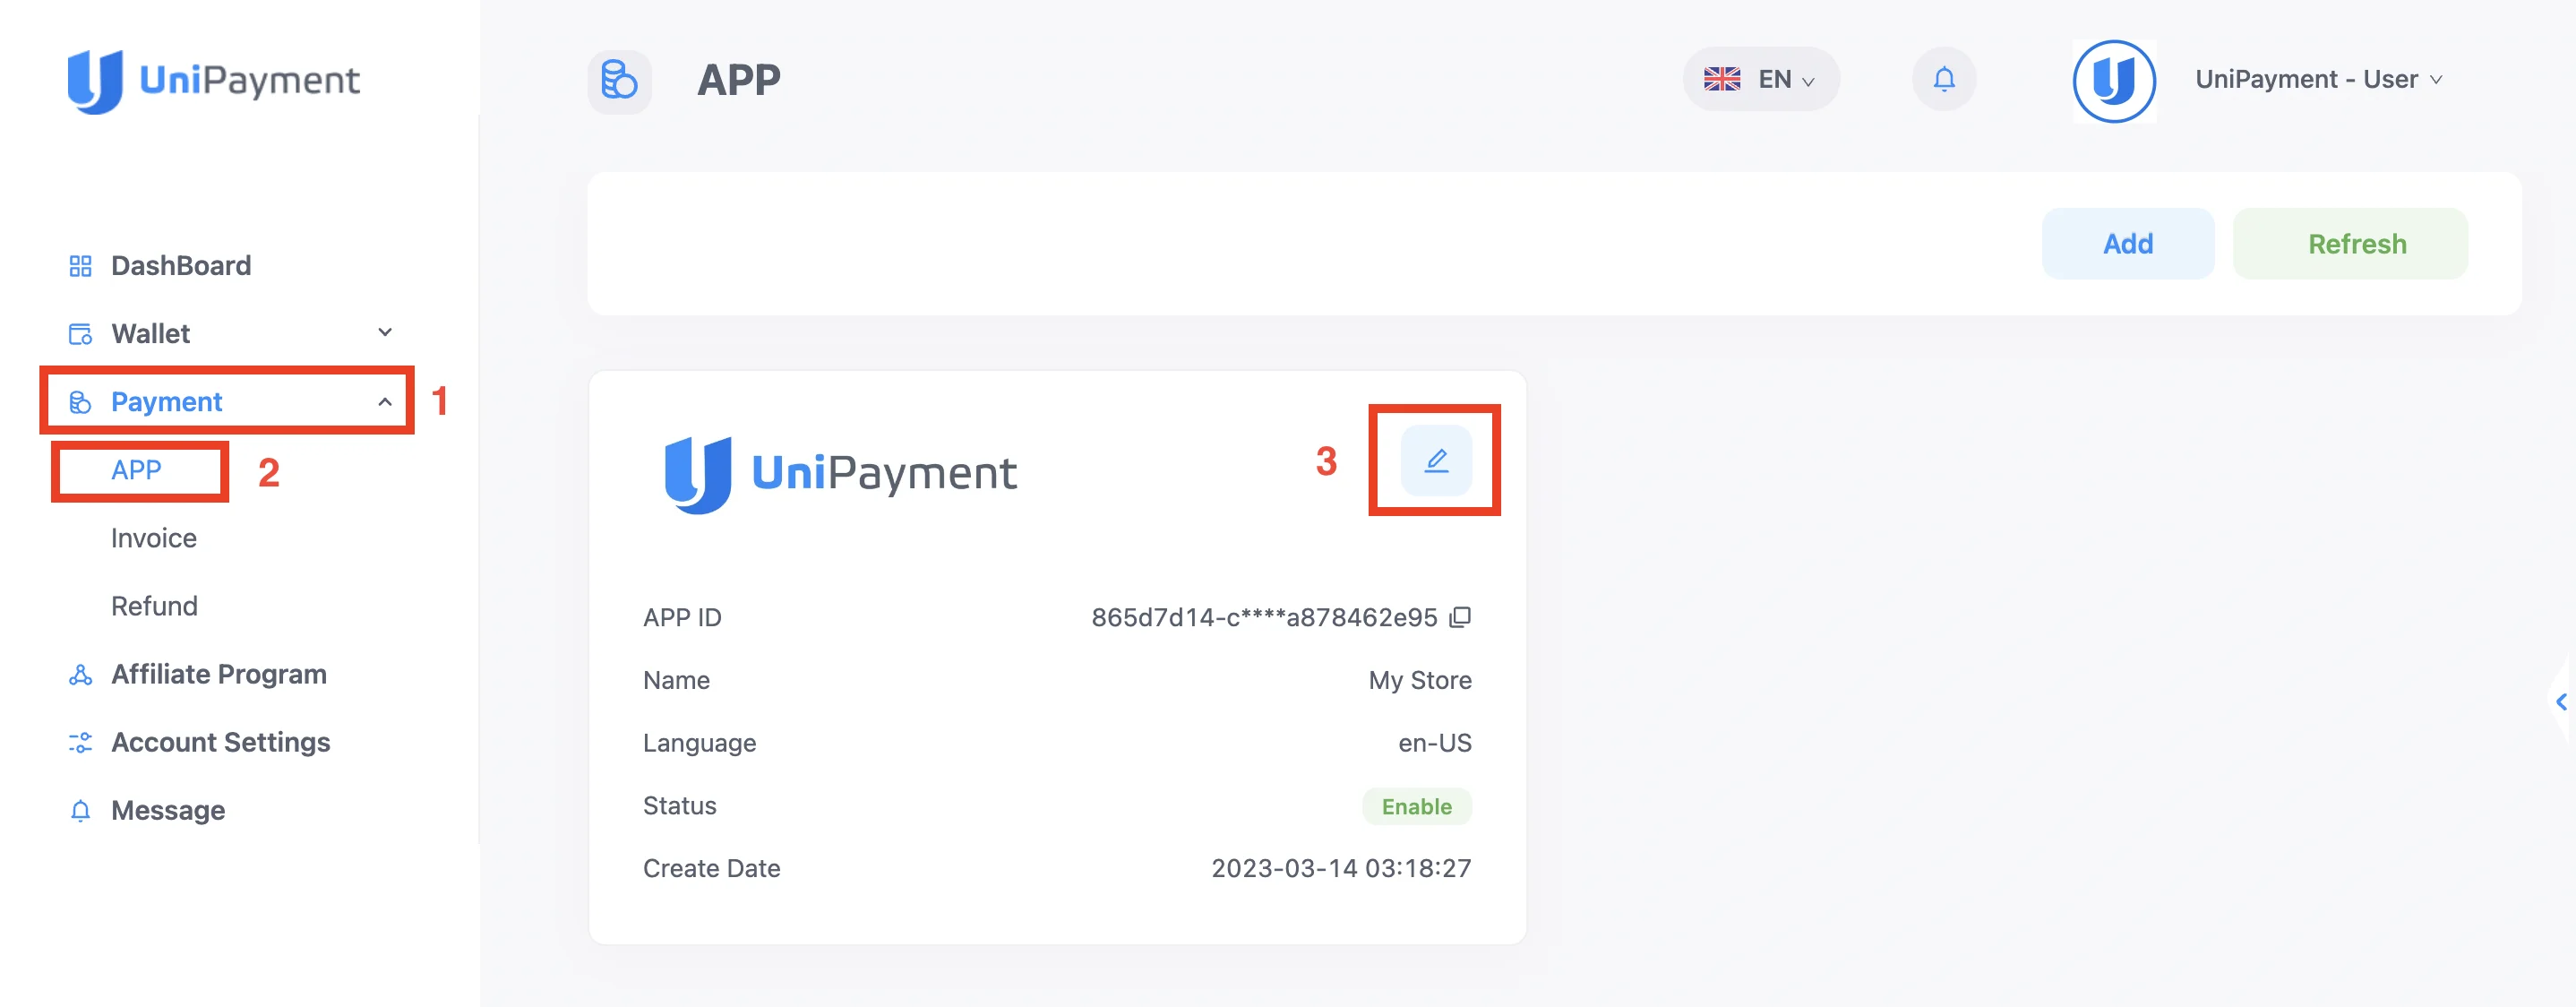
On the Navigation, click “Payment”(1) then “APP ”(2) on the Payment menu. Once on the APP page, click the “Edit” (3) icon of the APP you want to set the automatic refund option.
On the next page, click on the “Payment” option.
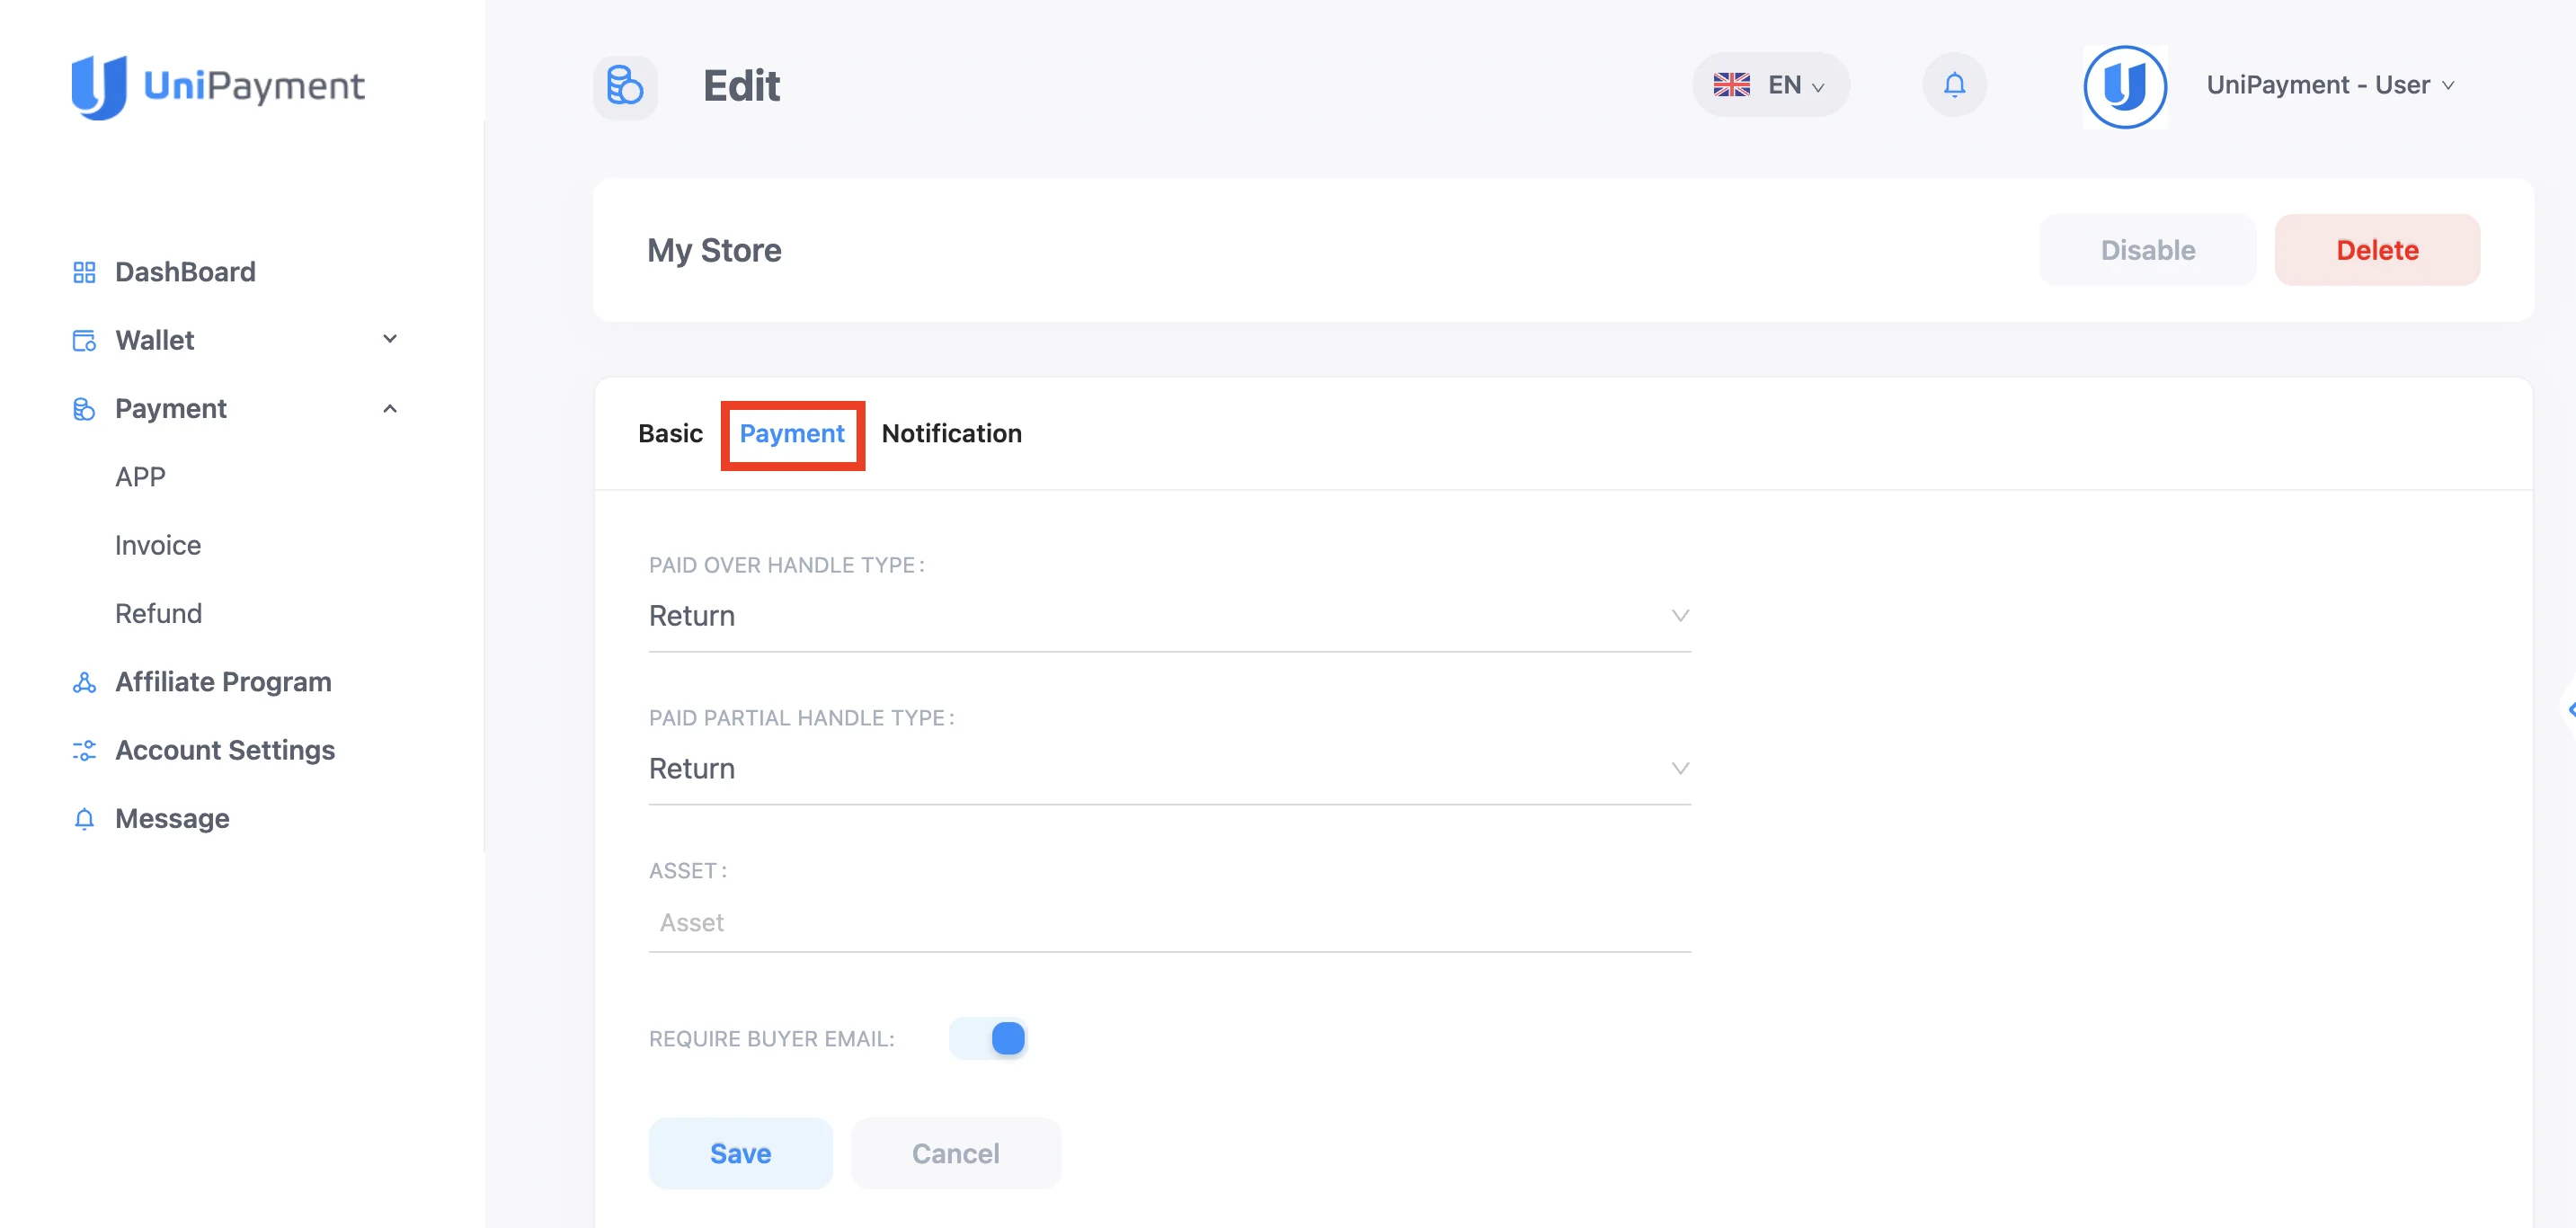
Step 2: Setting parameters
You can set the parameters of your payment APP on how you want invoice overpayments and underpayments to be processed and refunded automatically.
Paid Over Handle Type
The “Paid Over Handle Type” has two options: Return and Settle Into Account, depending on your preference for an automatic refund for overpayments.
1. Return
To select the Return option, click on the drop-down arrow under “Paid Over Handle Type” (1) and choose “Return” (2). If your customer pays more than your current invoice amount, and your setting is set to “Return”, a refund will be automatically generated to your customer, if the refund amount can cover the withdrawal fee, all excess funds will be credited into their account.
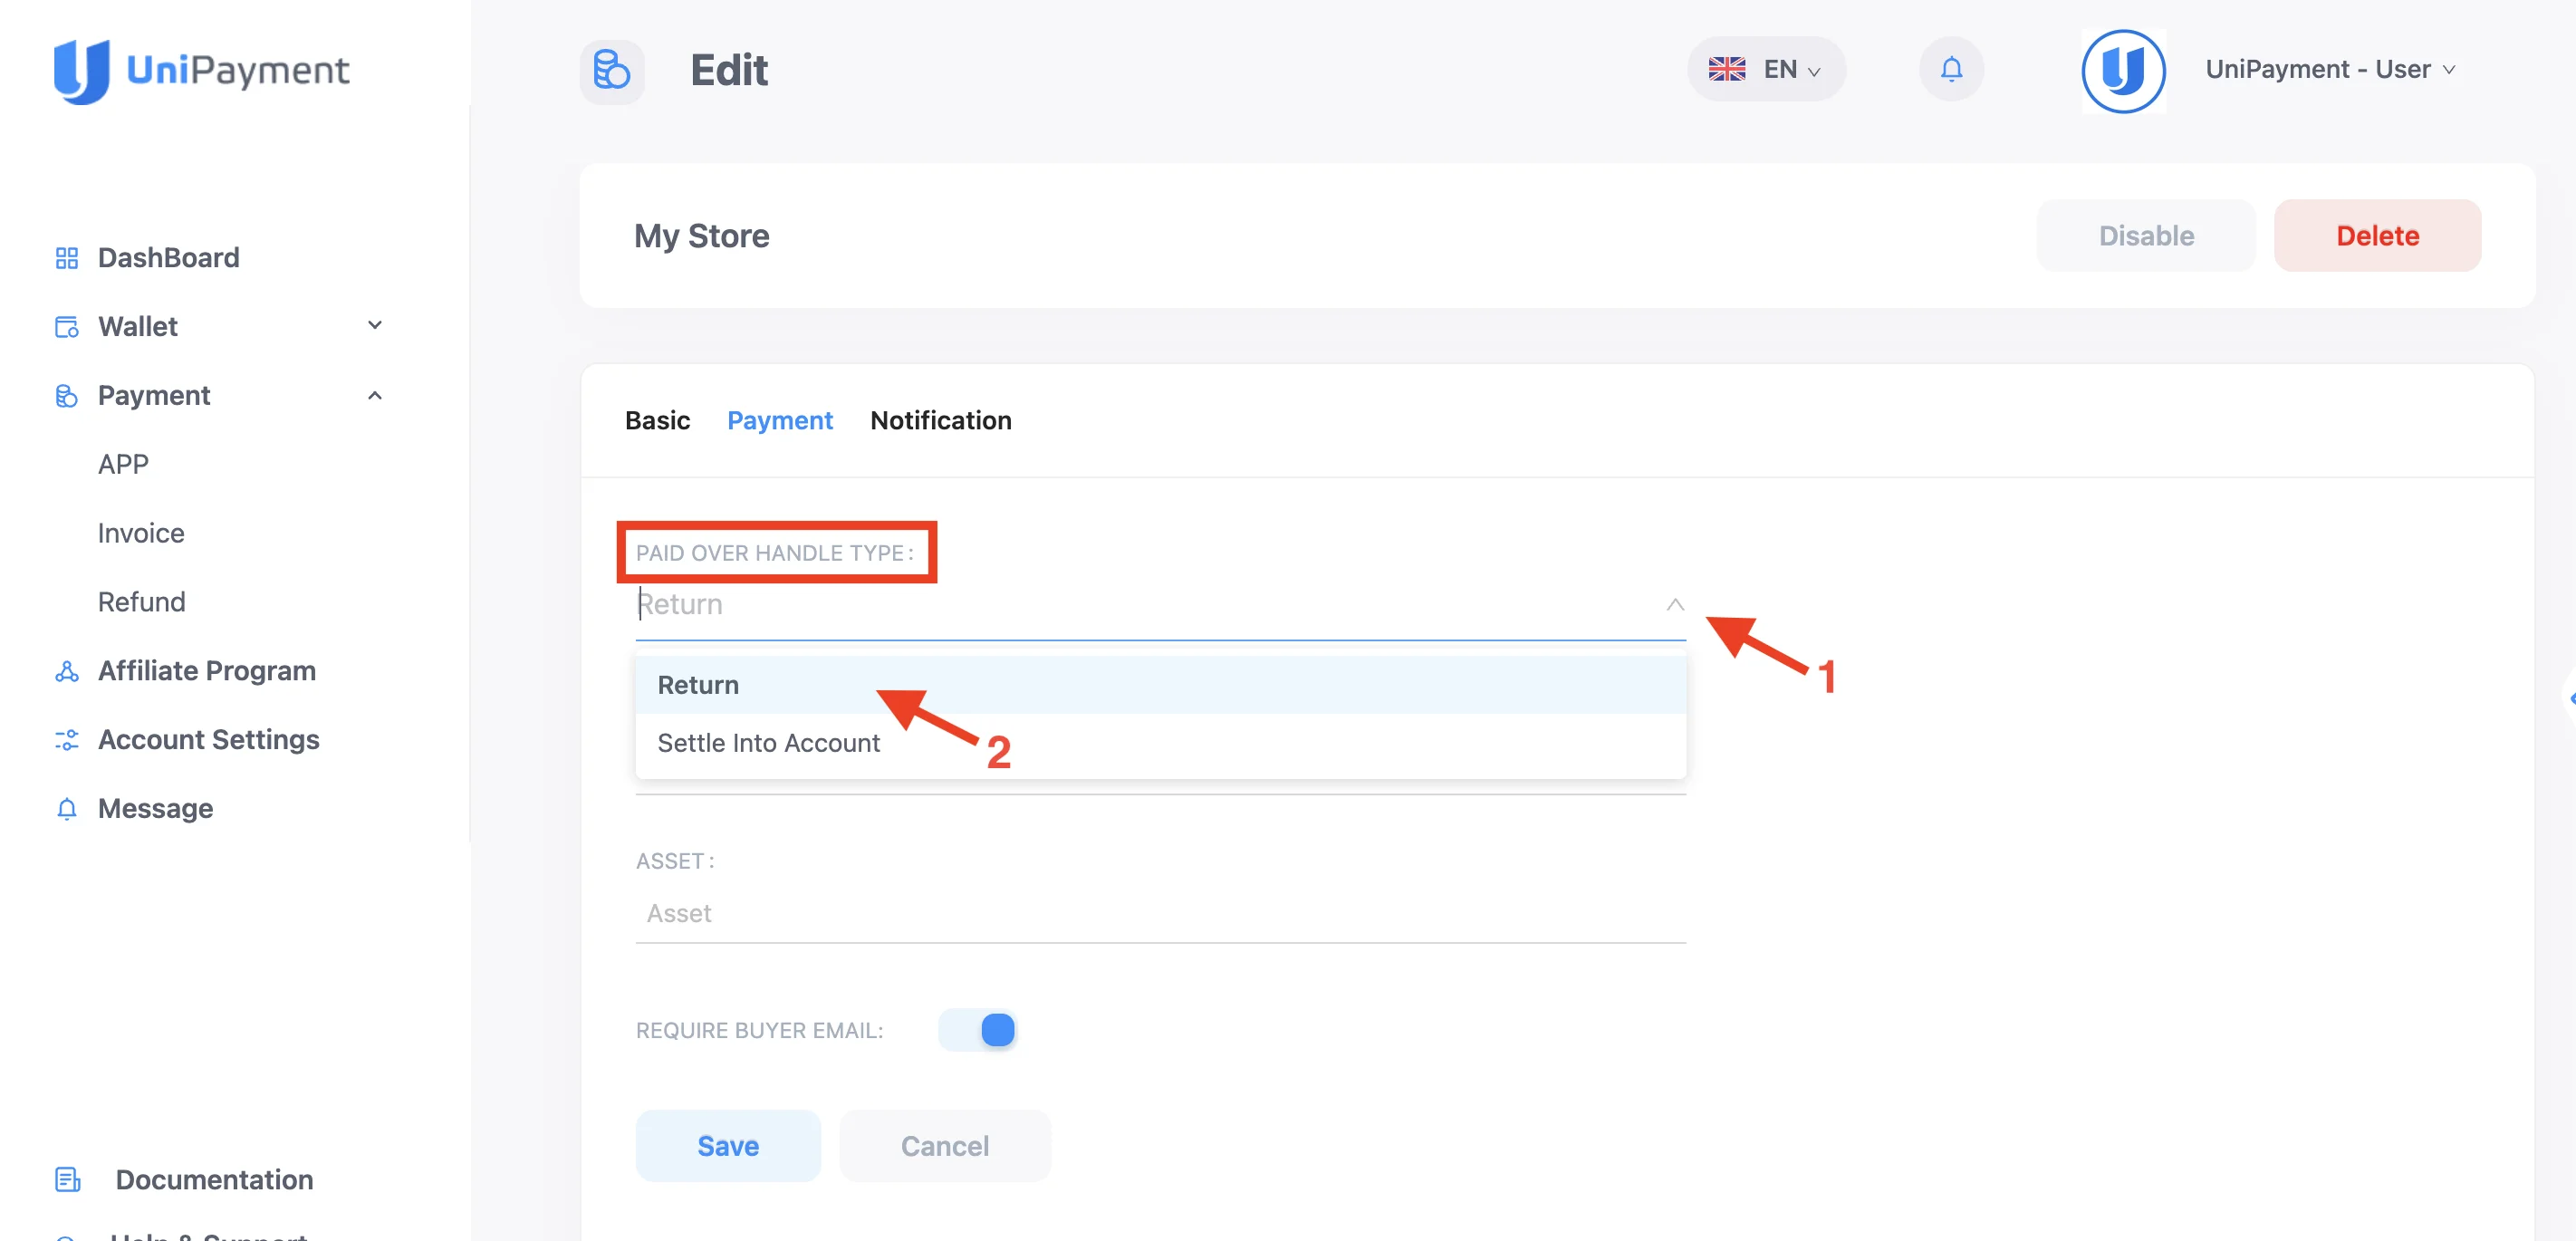
When you select “Return”, you cannot set parameters for the refund option. For example, the current invoice is $100, and the customer pays $102, if you choose “Return”, the $100 will be credited to your account, and a $2 refund will be generated at the same time (assuming that $2 has been fully covered the corresponding blockchain network withdrawal fees).
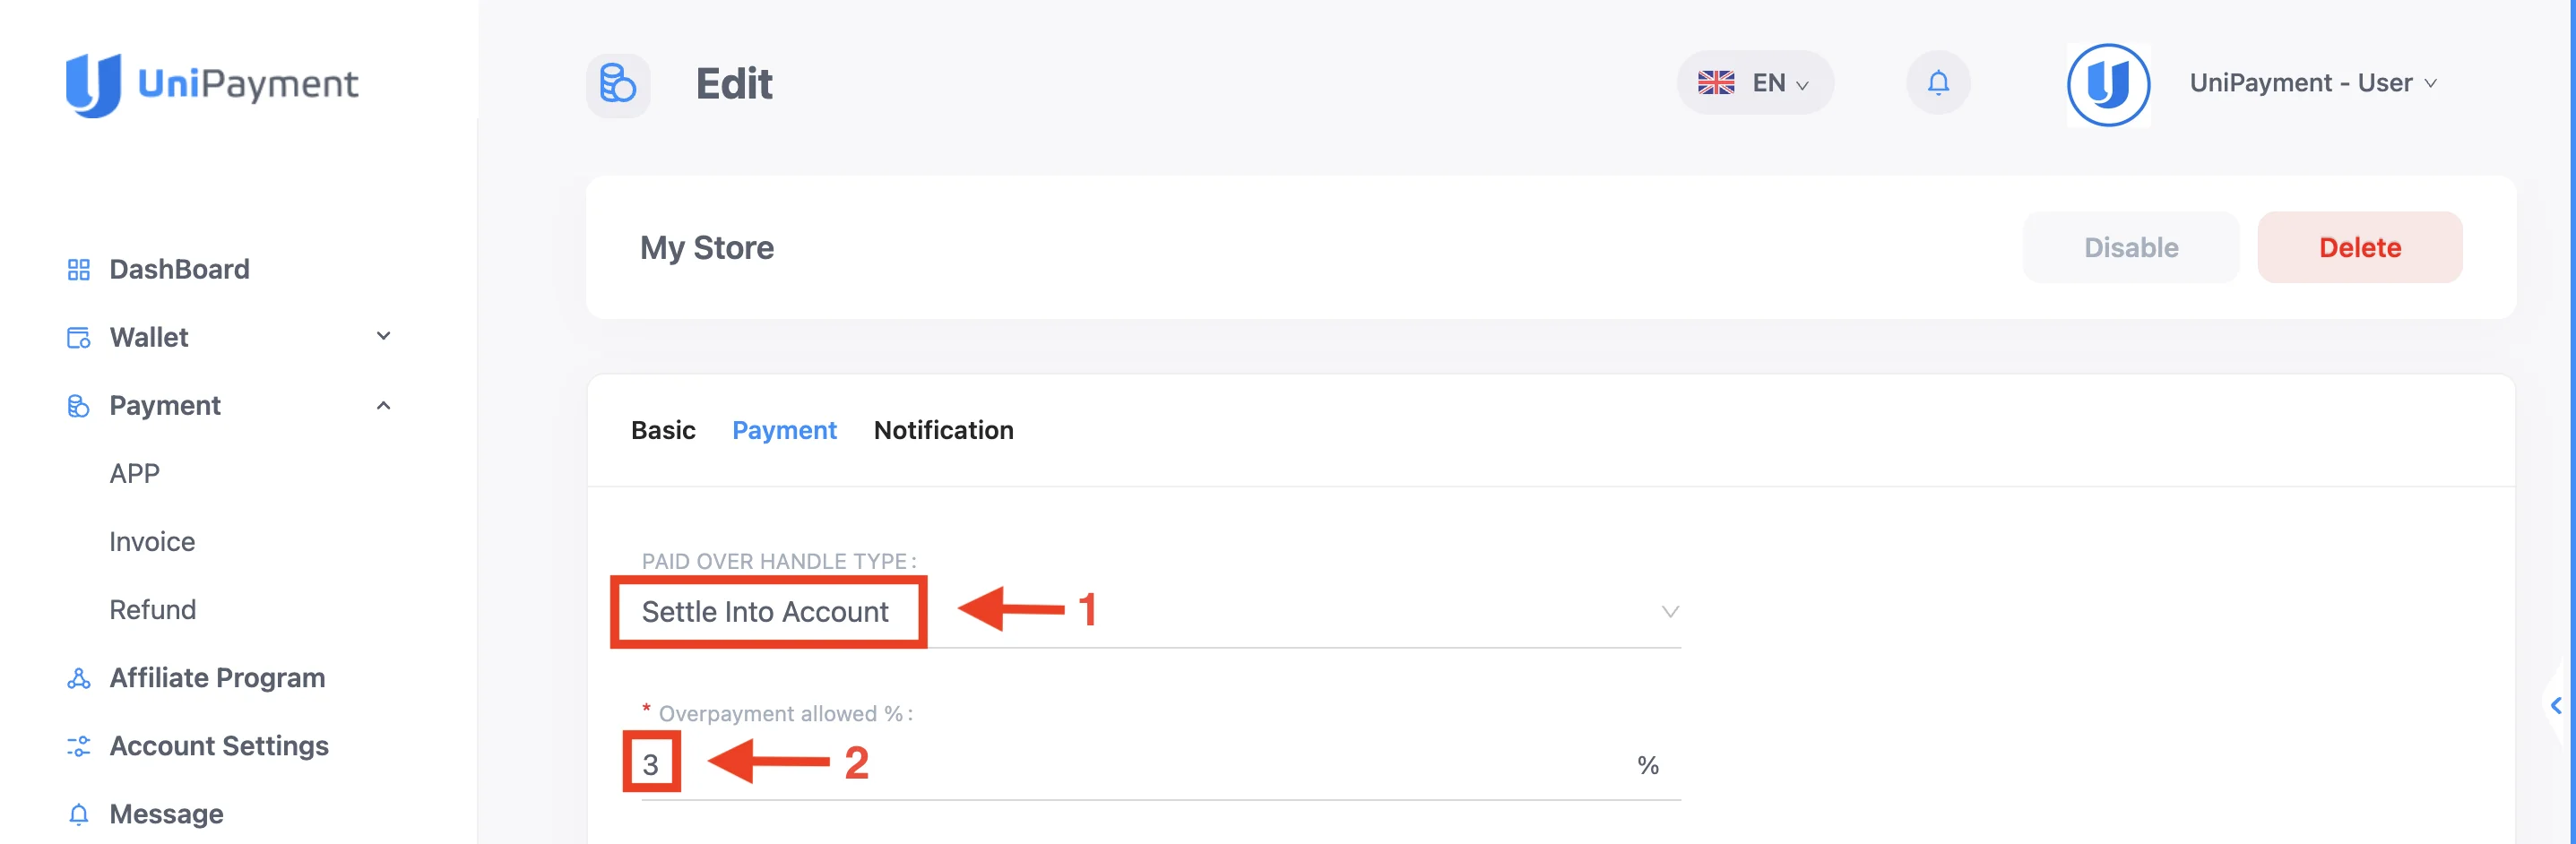
2. Settle Into Account
To select the Settle Into Account option, click on the drop-down arrow under “Paid Over Handle Type” and choose “Settle Into Account” (1). If your customer pays more than your current invoice amount, and your setting is set to “Settle Into Account”. whether or not an automatic refund form can be generated depends on the parameter you set in the “Overpayment allowed ratio”. You can set the overpayment ratio from 0% to 100% (2).
Example:
You set the “Overpayment allowed ratio” to 3%, and the invoice amount is $100.
Situation 1:
If your customer pays $102, then all $102 will be credited to your account, and no refund will be generated. You need to refund the $2 manually. Please refer to Manual Refund Guide.
Situation 2:
If your customer pays $103, then $100 will be credited to your account, and a refund of $3 will be automatically generated.
Paid Partial Handle Type
The “Paid Partial Handle Type” has two options: Return and Mark As Complete, depending on your preference for automatic refunds for overpayments.
1. Return
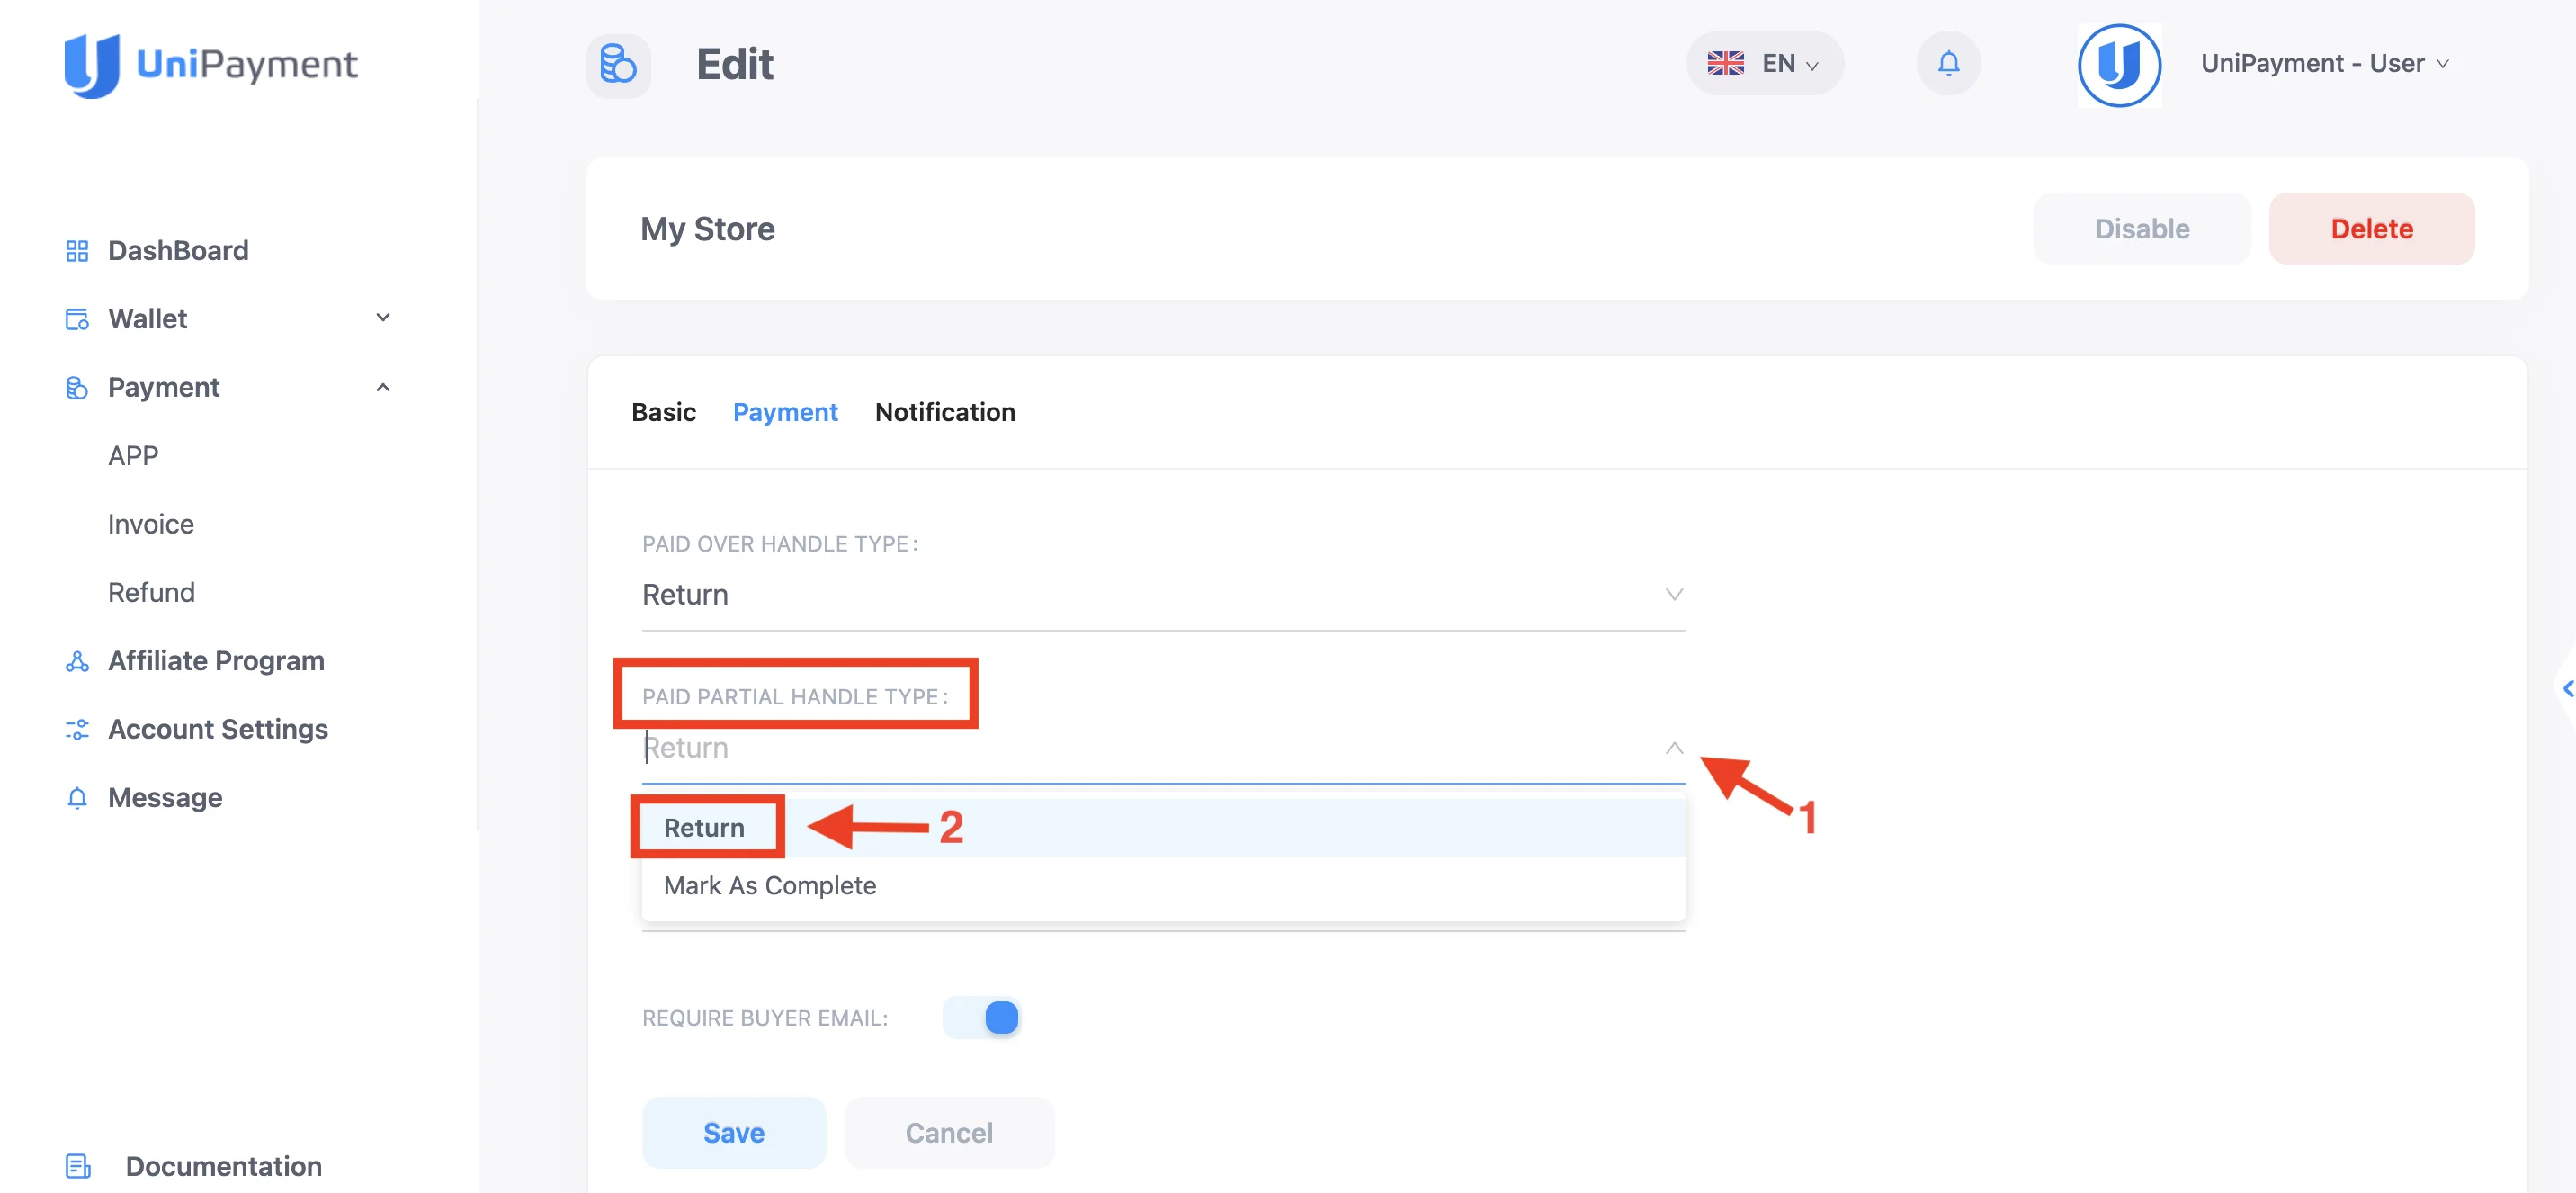
To select the Return option, click on the drop-down arrow under “Paid Partial Handle Type” (1) and choose “Return” (2). If your customer underpays your current invoice amount and your setting is set to “Return”, the funds you receive will be automatically refunded to your customer in full.
2. Mark As Complete
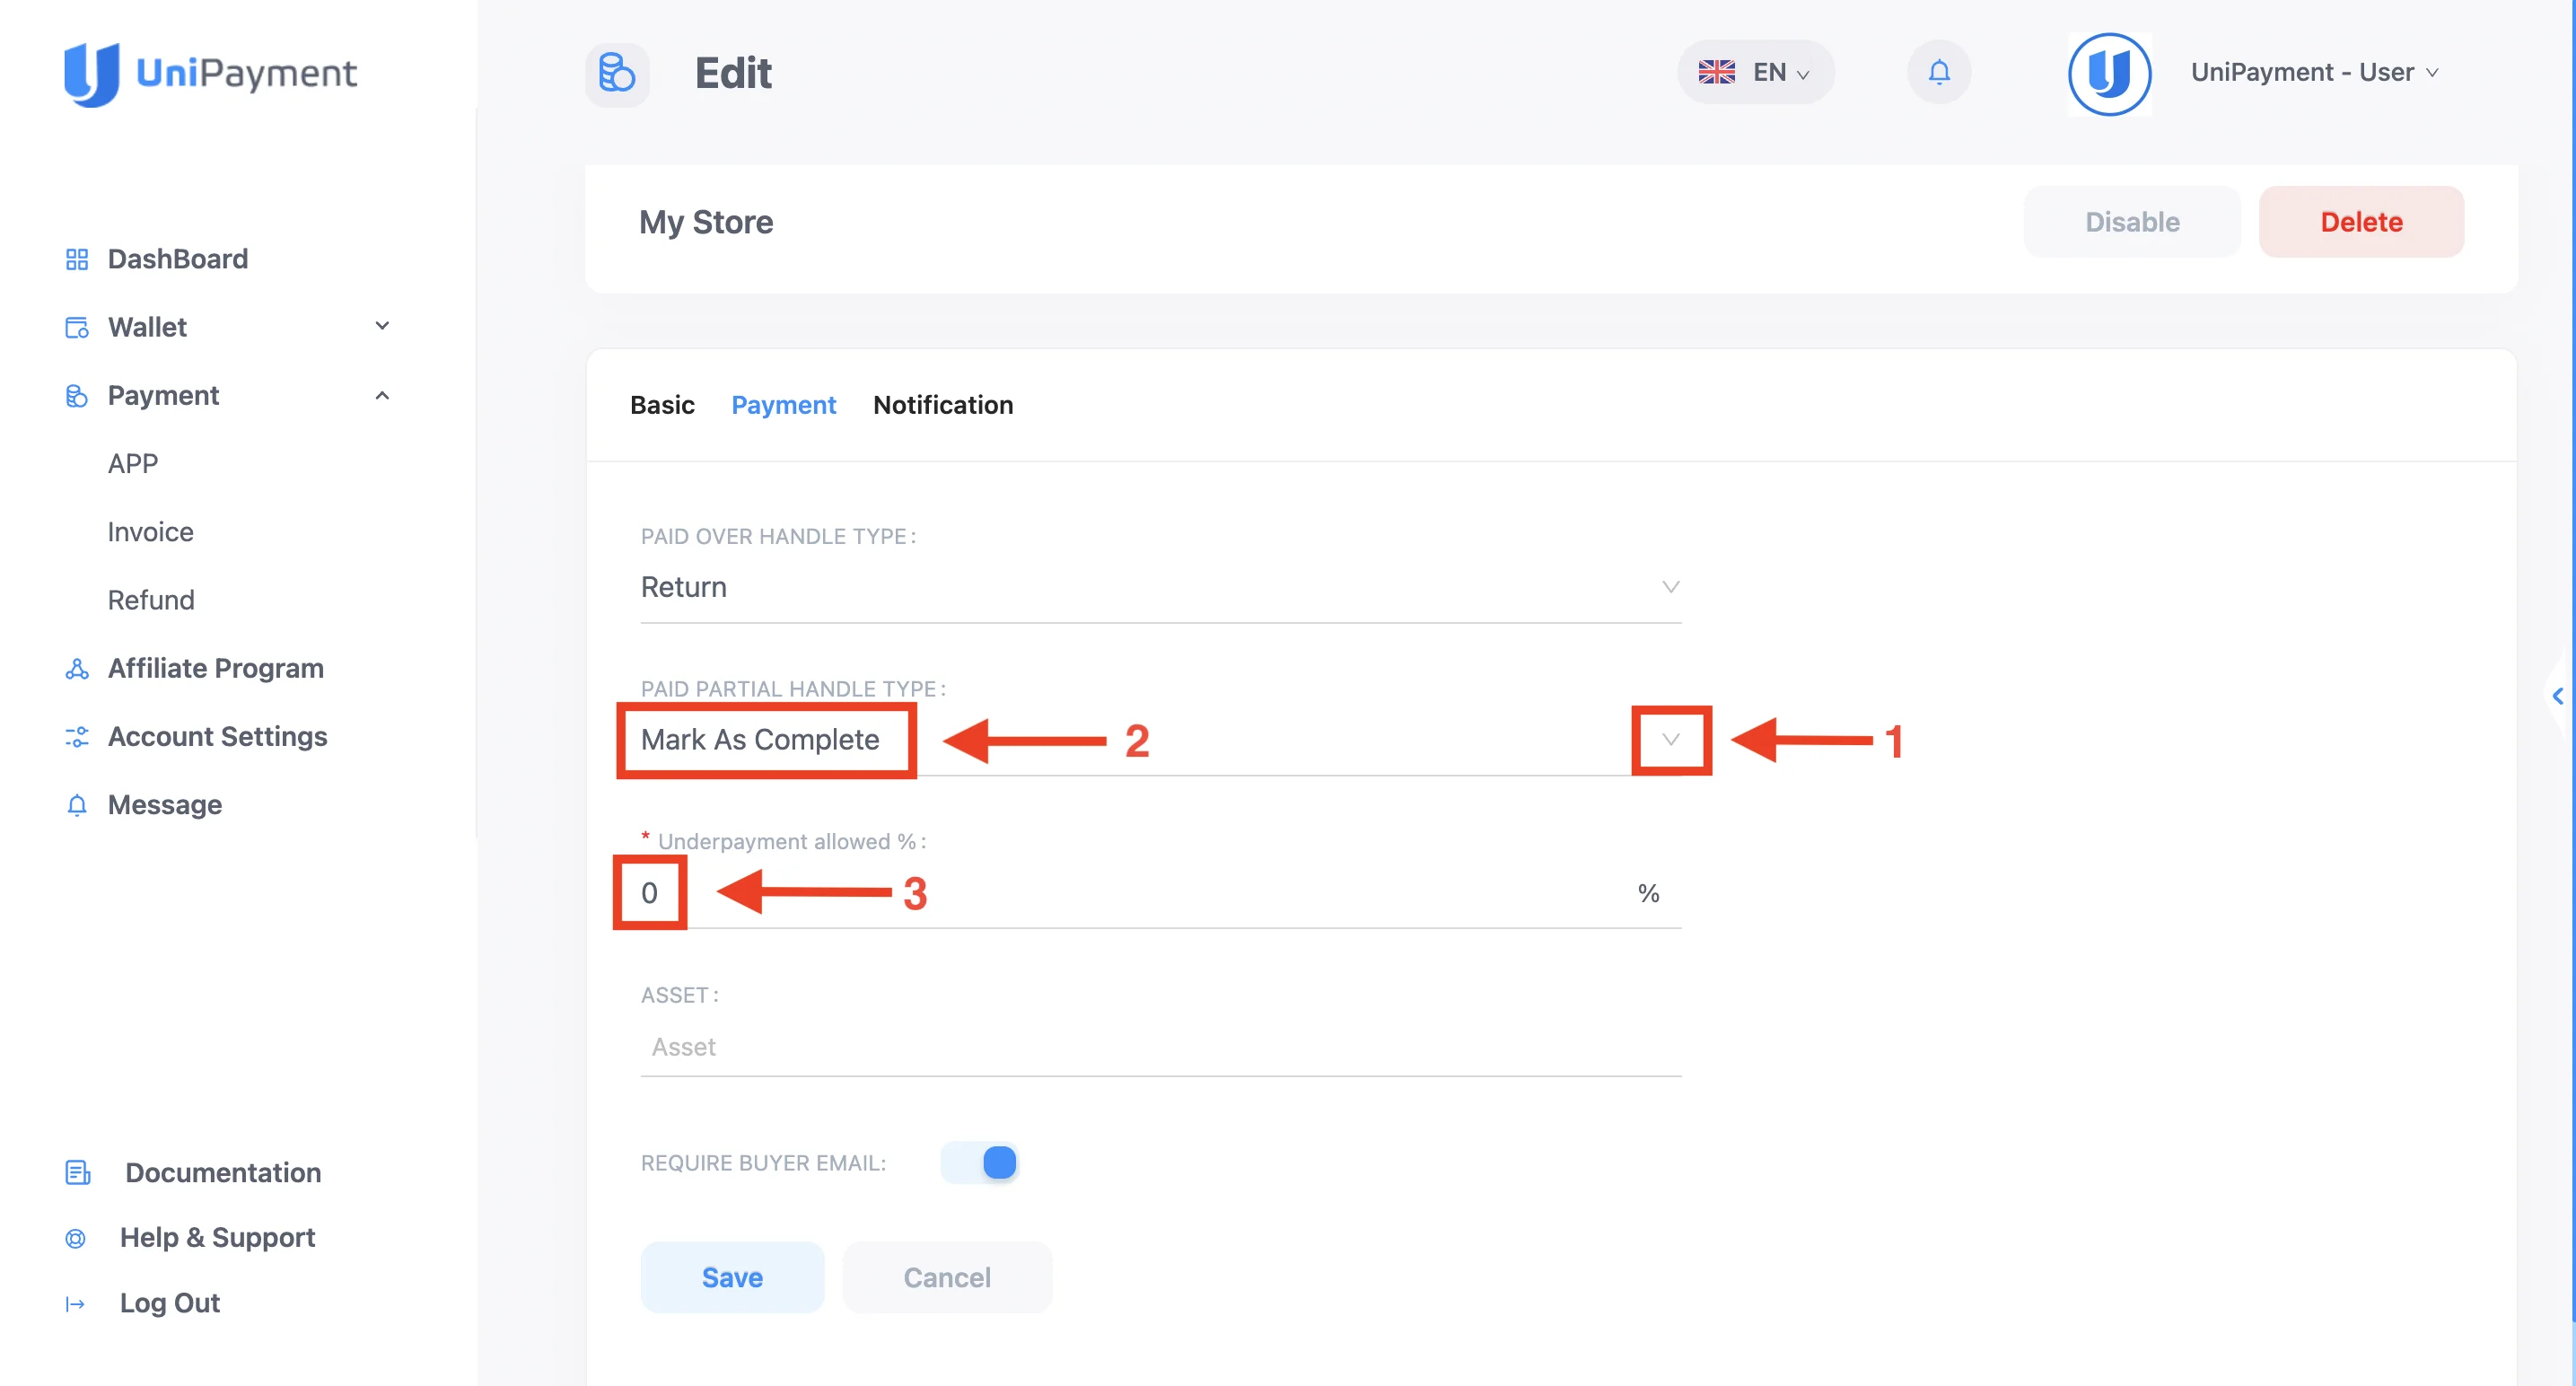
To select the Mark As Complete option, click on the drop-down arrow under “Paid Partial Handle Type” (1) and choose “Mark As Complete” (2). Suppose your customer underpays your current invoice amount and your setting is set to “Mark as Complete”. In that case, the funds you receive will be automatically credited depending on the parameters you set in the “Underpayment allowed ratio”. You can set the underpayment ratio from 0% to 100% (3).
For example, if you set 3%, it means that when the payment ratio is greater than 97%, the funds received will be automatically credited, and the order status will be displayed as “Complete(Paid Partial)”.
If the payment ratio is less than 97% and the amount can cover the withdrawal fee of the corresponding blockchain network, an automatic refund form will be generated, and the order status will display “Expired (Paid Partial)”. In this case, the invoice status cannot be changed manually.
If the payment ratio is less than 97% but cannot cover the current network withdrawal fee, the funds will be credited in full, and the order status will display “Expired (Paid Partial)”. The invoice status cannot be changed manually here. If you need to make a refund, please refer to Manual Refund Guide.
Step 3:
Once your customer overpays or underpays, and it satisfies the conditions you set in the parameters, a refund will automatically be generated. An email notification with the refund information will be sent to your guests automatically. To learn about the Refund Process, you may click here.
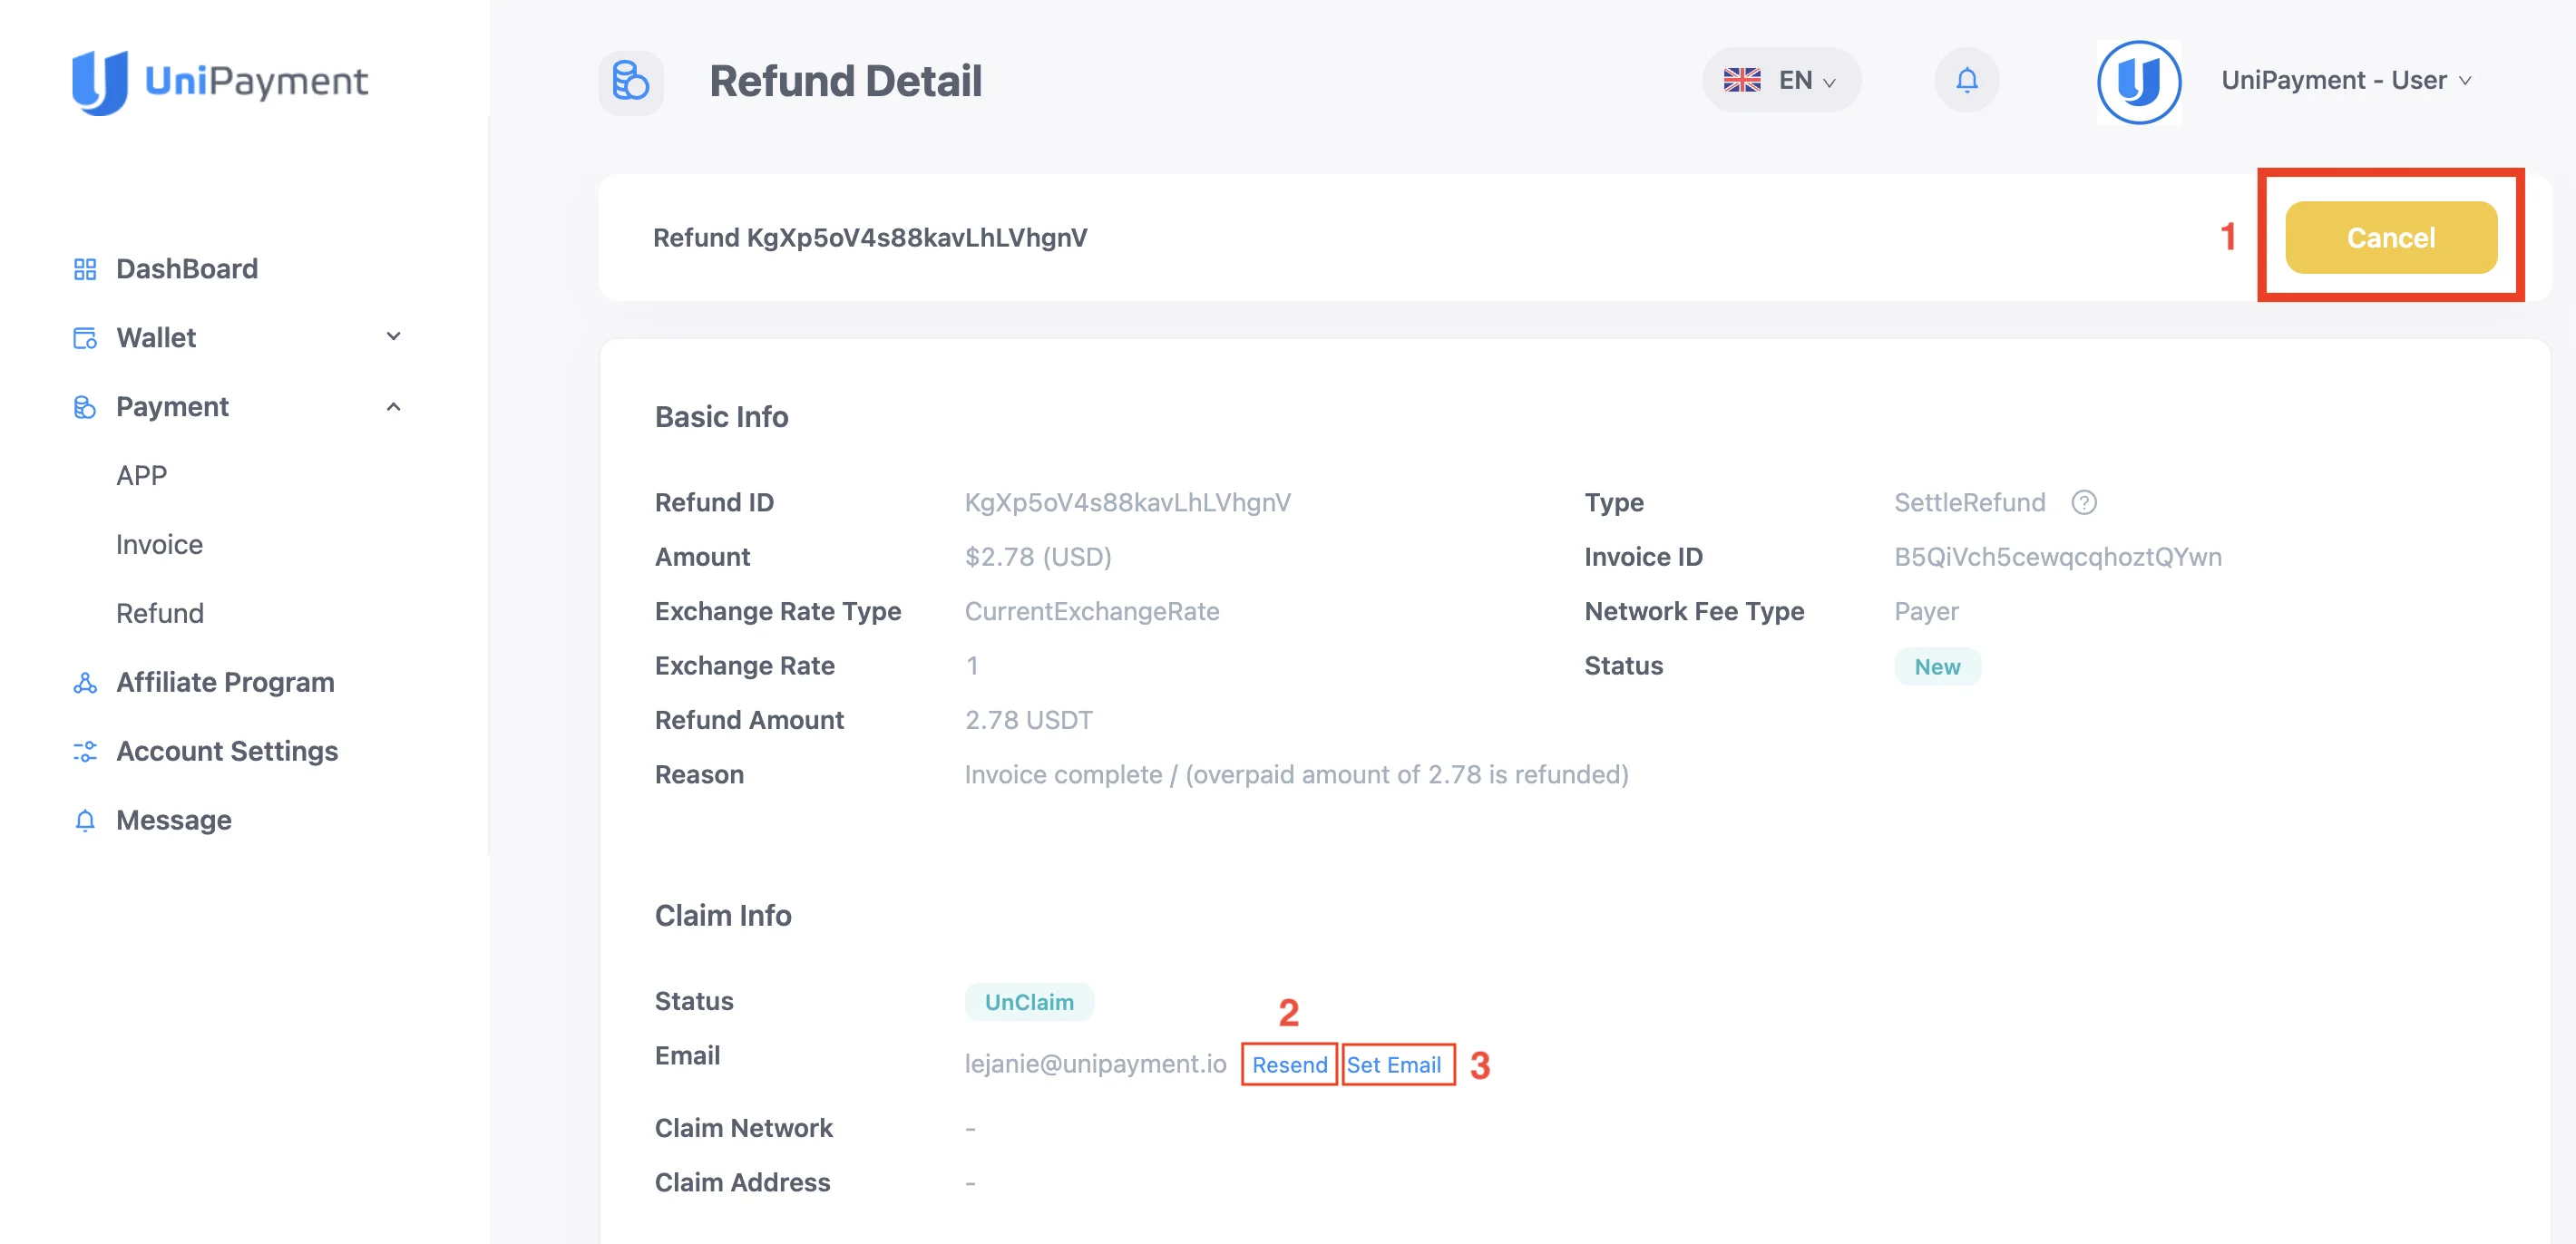
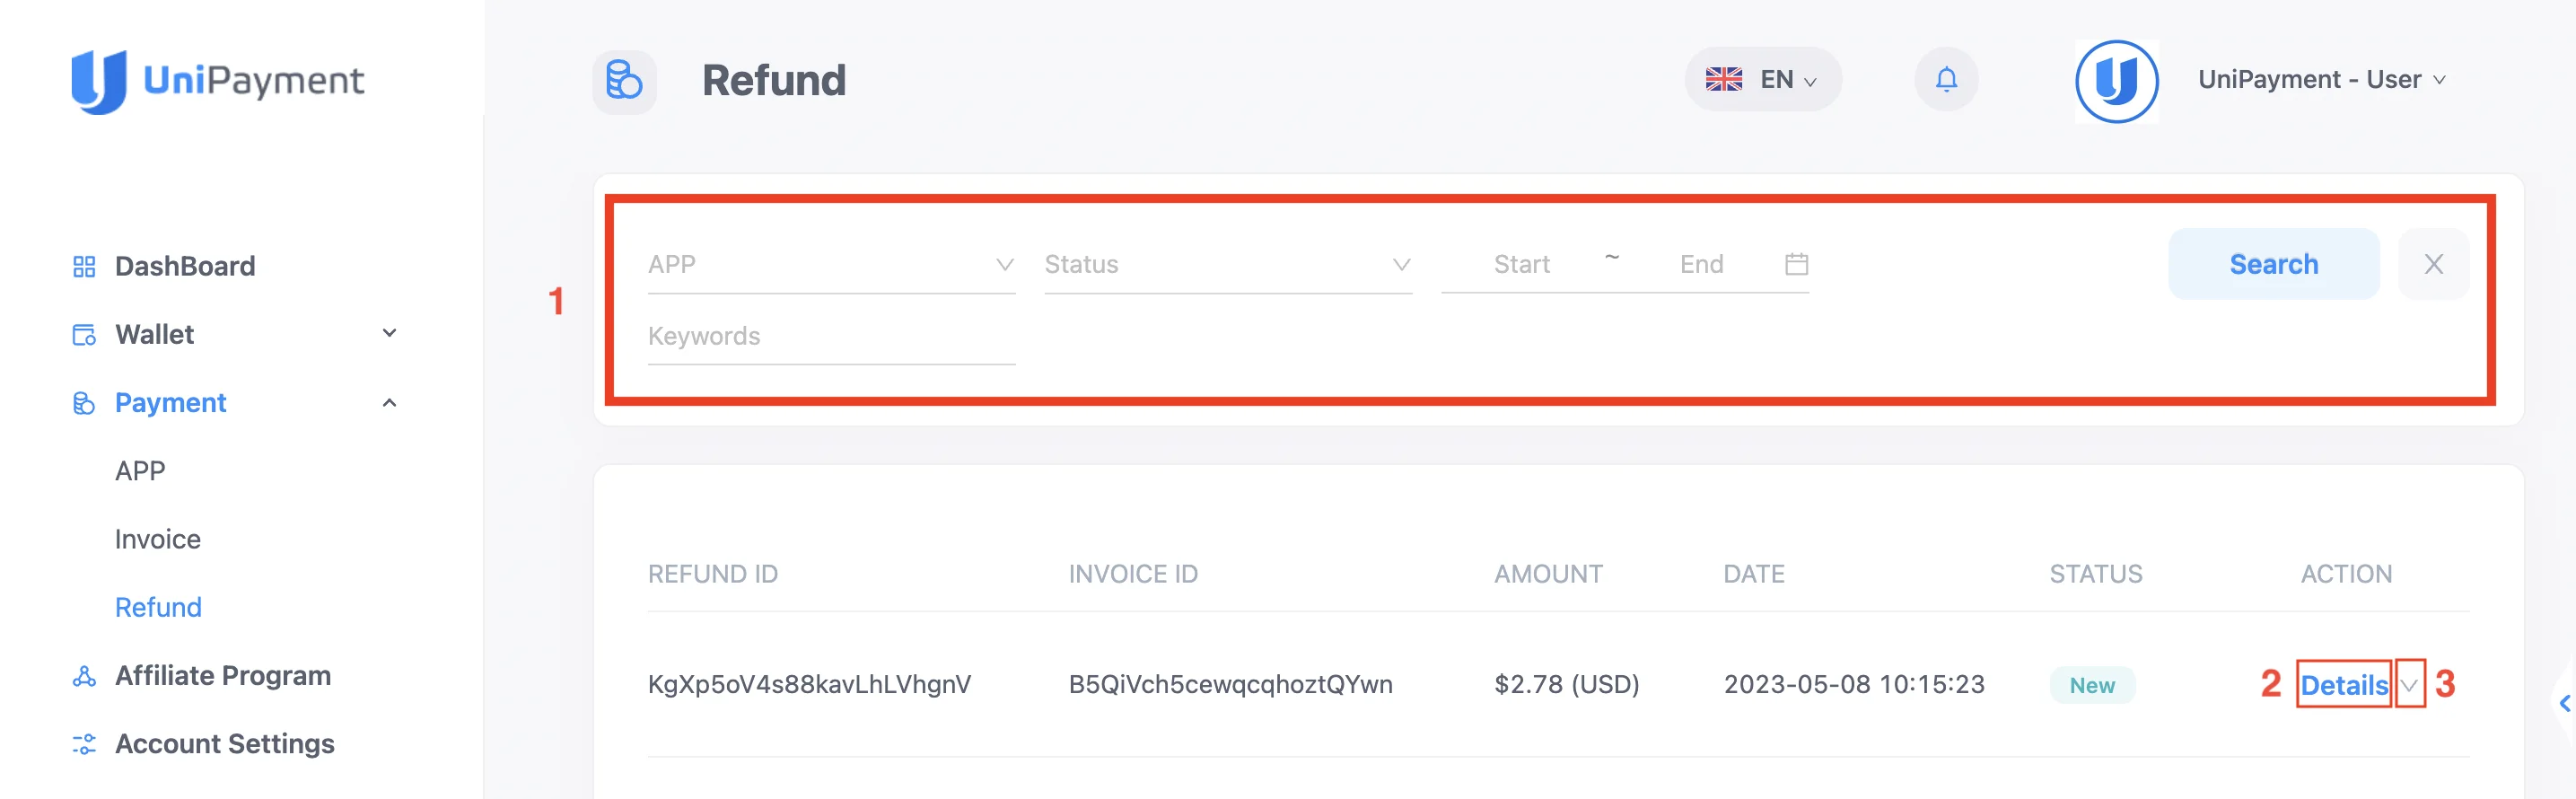
The new refund will be listed on the Refund page. You can input filters on the search bar (1) to quickly find the refund you are looking for. To view the basic information and status of the refund, you may either click on the drop-down arrow (2) beside “Details” or click on “Details”(3) to display it on full page.
Resend, Set Email, or Cancel Refund
On the Refund Detail page, you have the option to resend the refund to your customer’s email address, set a new email address for your customer, or cancel the refund.
A. Resend refund and change your customer’s email address
To resend the refund email to your customer, click “Resend”. If your customer changed their email address, you can update it by clicking “Set Email”. On the next page, enter the new email address and click “Confirm”. The refund form will be sent to the new email address.
B. Cancel Refund
If for any reason you need to cancel the refund, you may click “Cancel” on the Refund Detail page. You can cancel refunds anytime, as long as your customer has not confirmed the refund yet.
Note: If you cancel the refund after the email of the refund form is sent, the Refund Claim will be invalid and your customer will not be able to proceed with the refund process.