How to create and set up Payment APP
Note: Due to version changes, there may be slight differences in the screenshots in this article, but the operation steps have not changed.
What is APP? What can it be used for?
UniPayment allows users to create and set up their own APP to create and manage various categories of orders and process payments/refunds. To explain briefly, if you have three stores and each of the three stores has its own Cashier, the corresponding three cashiers are equivalent to the three APPs you created in UniPayment.
UniPayment has prepared your first APP, which you can personalize to suit your usage. Then, you can create and set up your APP.
How to create an APP?
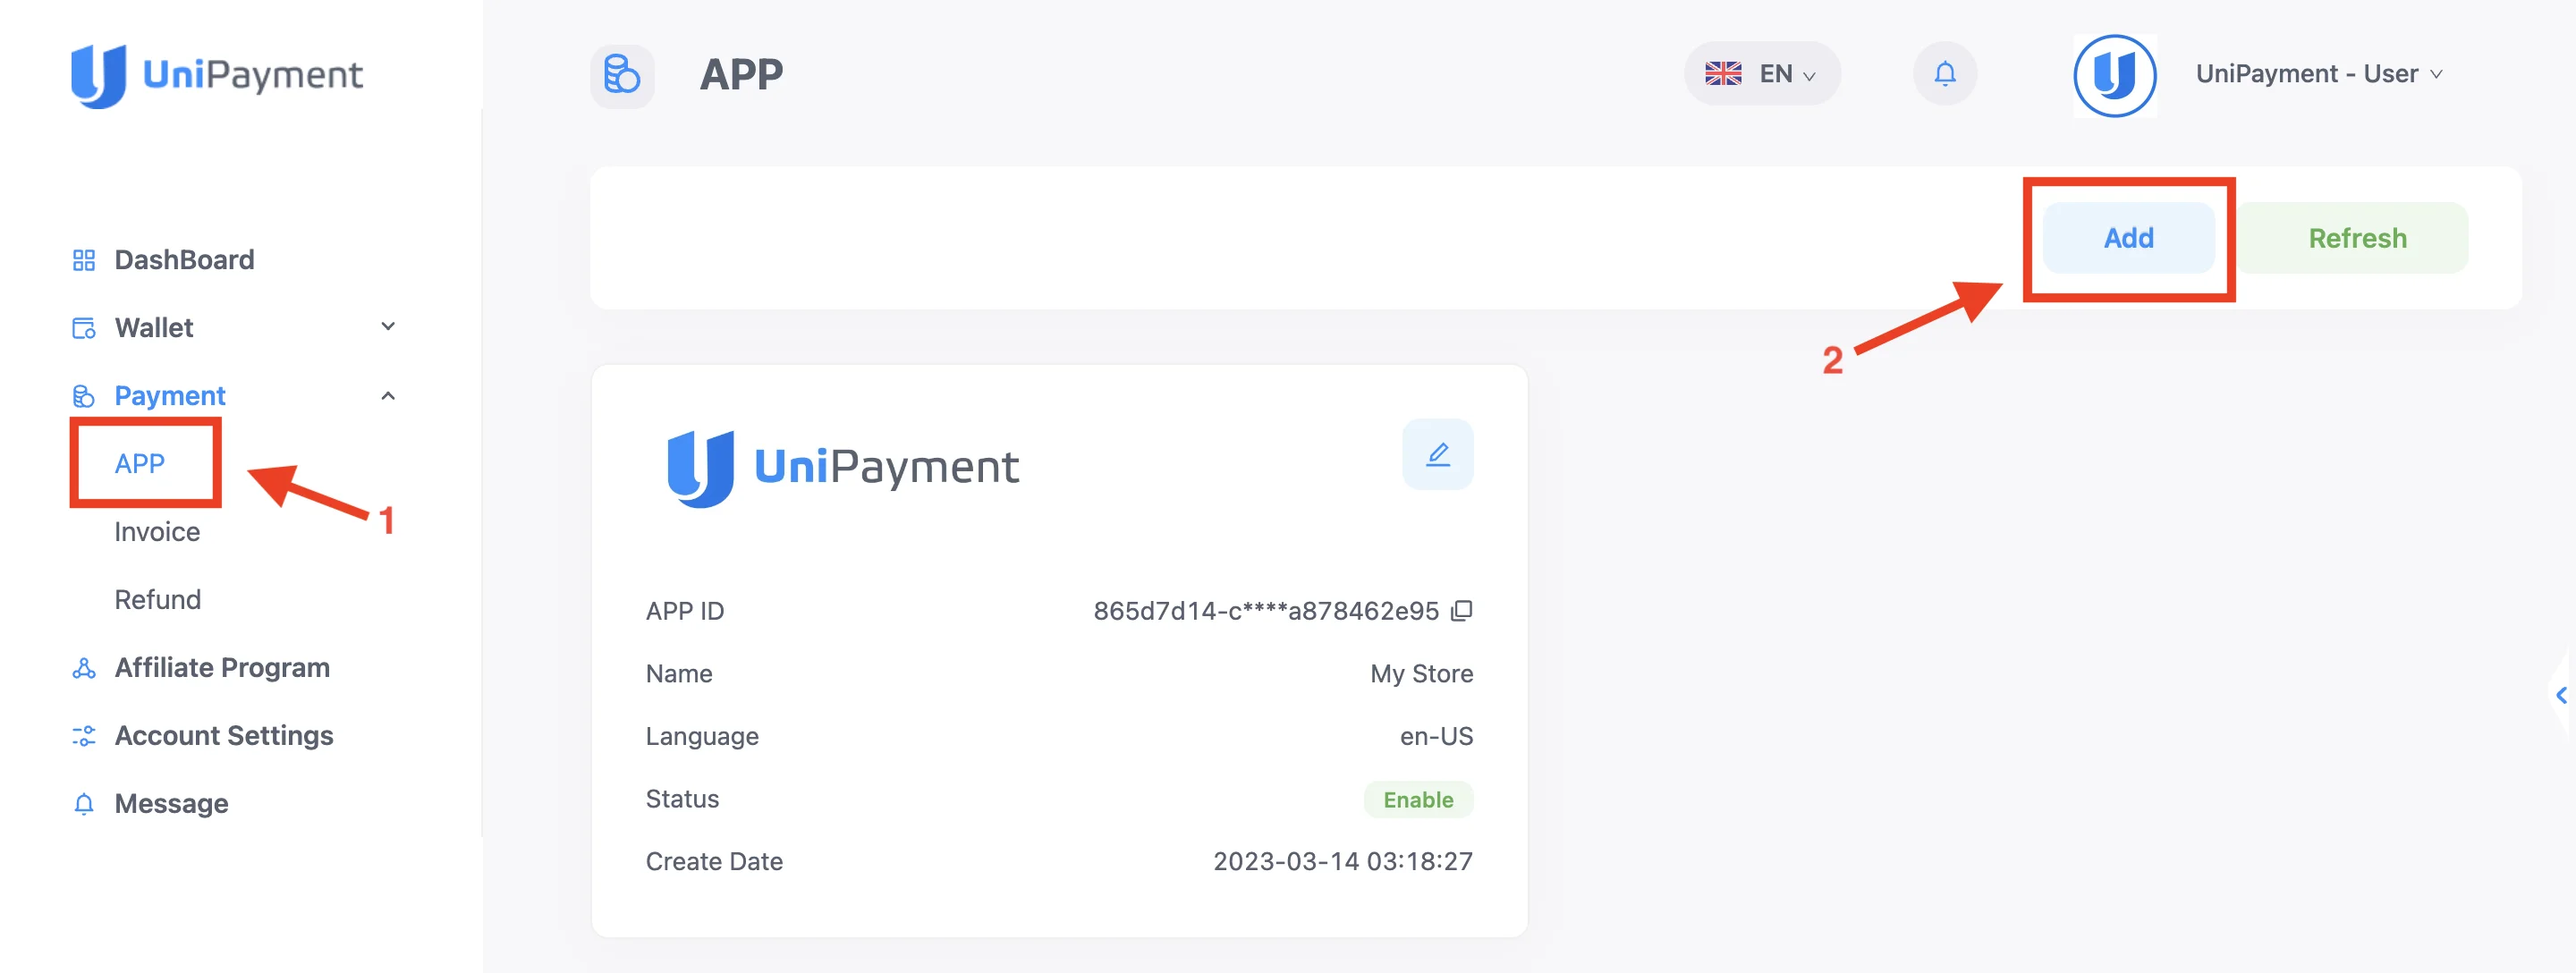
Step 1:
To create a new APP, click “Payment” on the Navigation, then click “APP” on the Payment menu. On the APP page, click the “Add” button.
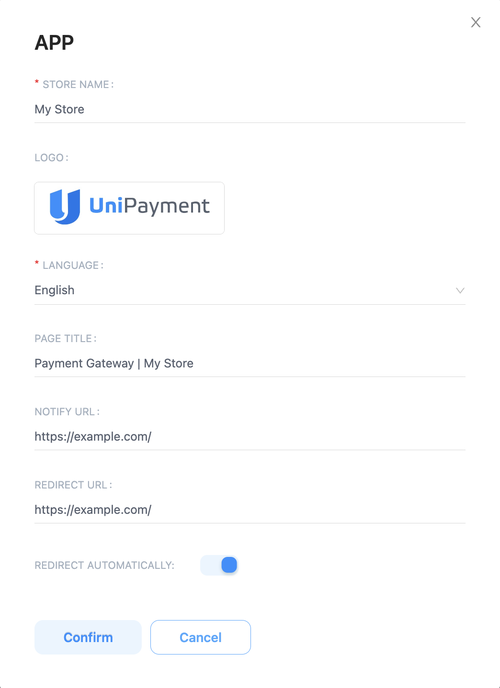
Step 2:
On the next page, fill in the relevant information.
- Store name - The name of your store
- Logo - The logo of your store
- Language - The language you prefer your invoice to be translated
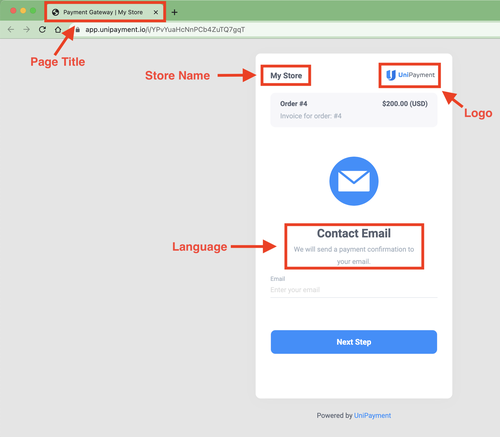
- Page Title - The title that will appear on the page of your invoice
- Notify URL - The URL where the payment gateway will send Instant Payment Notification
- Redirect URL - The page you want to redirect cutomers automatically after payment is completed
- Redirect Automatically - This option is on by default, you can turn it off at any time.
Step 3:
After you filled in all the necessary details, click “Confirm”.
Congratulations! Your new APP is created.
How to edit APP details?
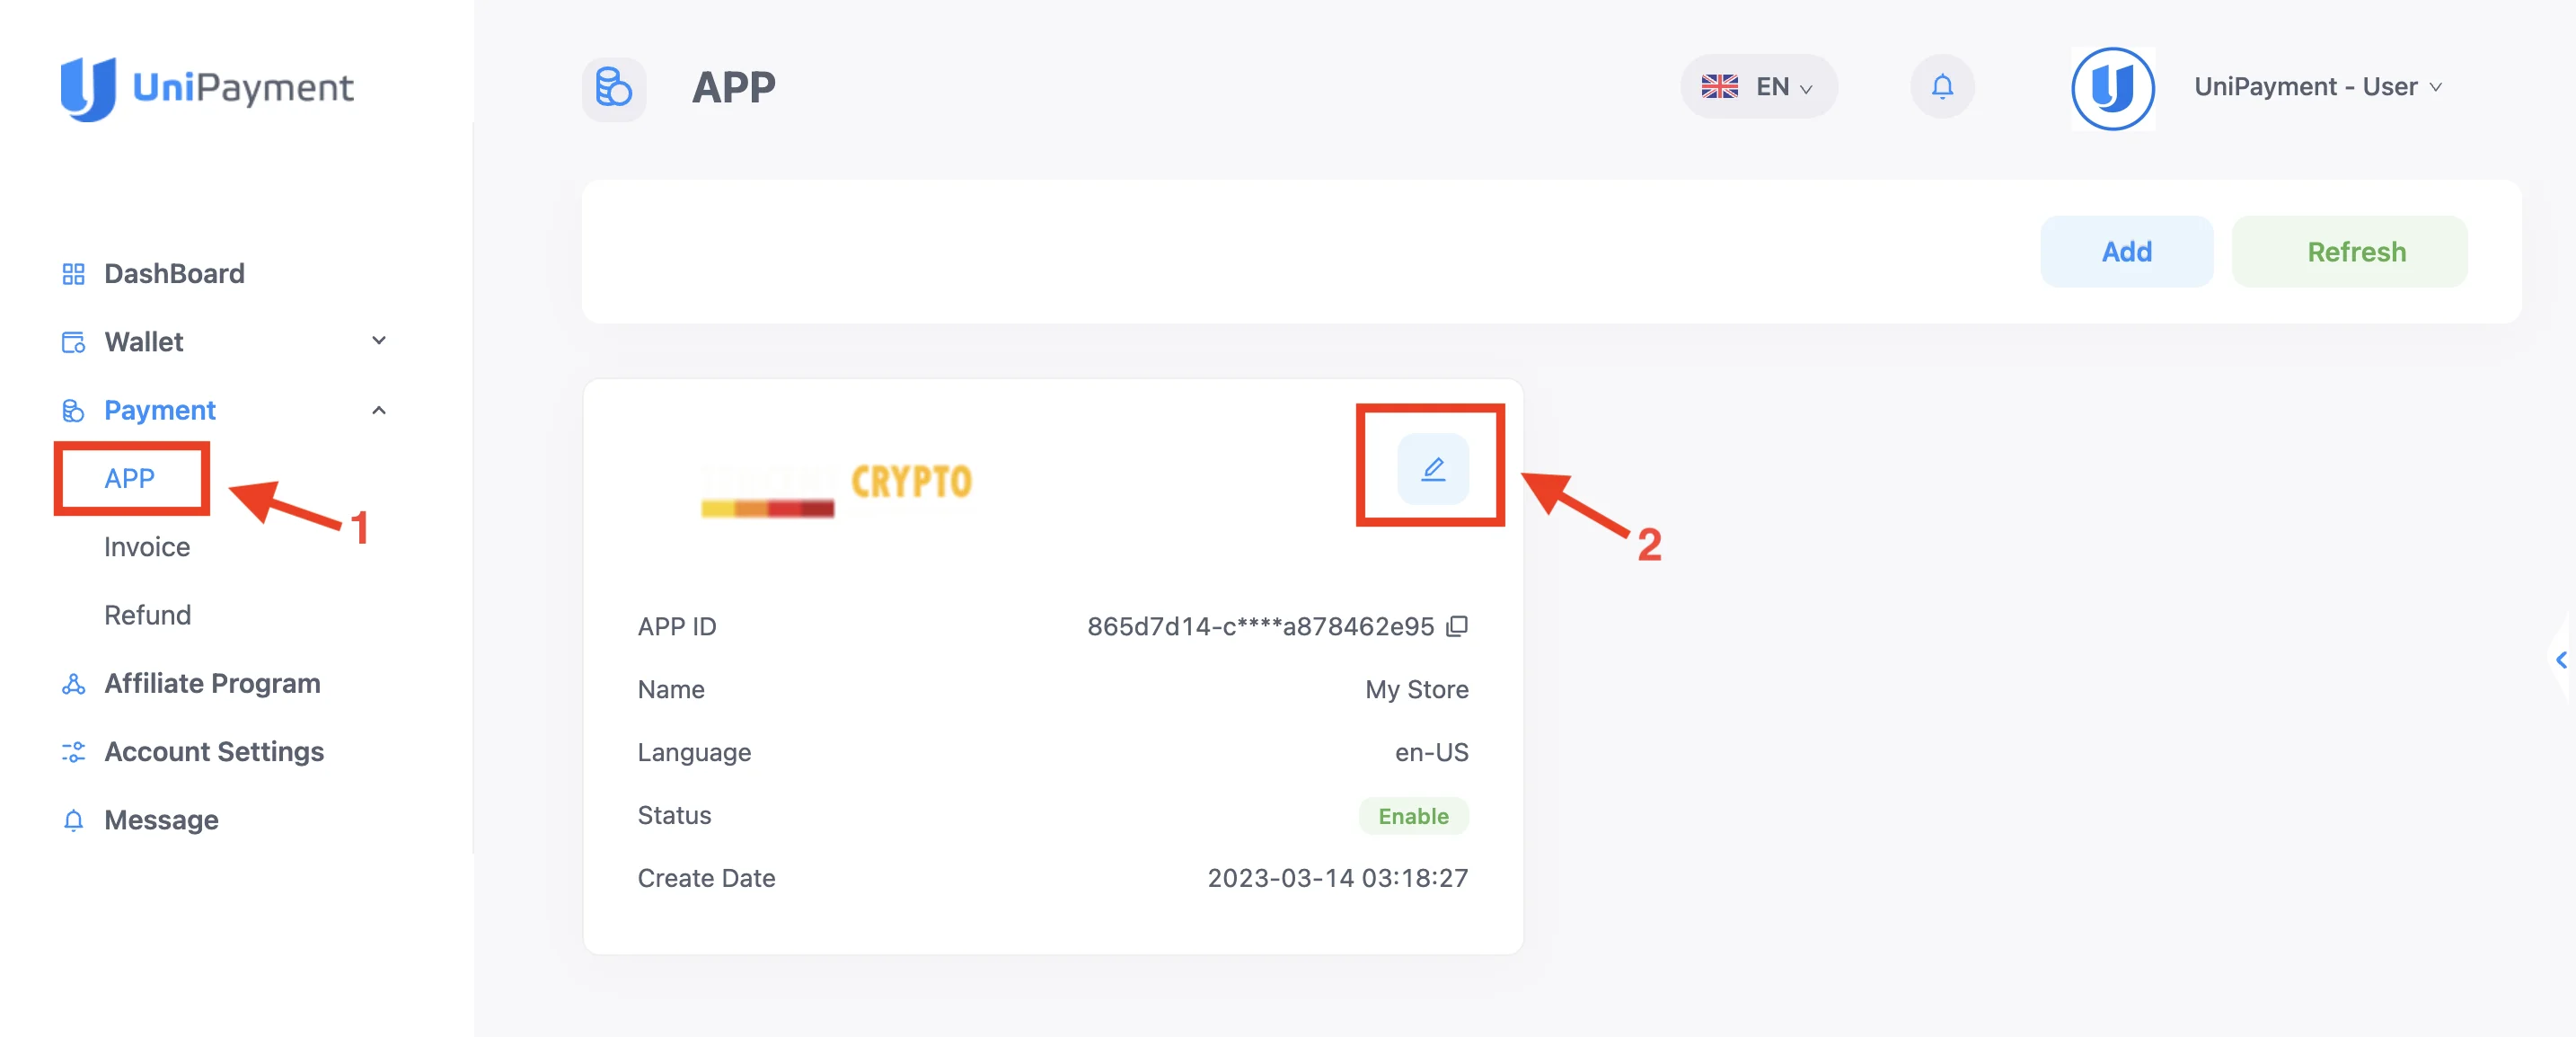
Step 1:
Select “Payment” on the right side of the dashboard, and click “APP” on the Payment menu (1). Then, click the edit icon of the APP you want to edit (2).
Step 2:
On the next page, you can edit the Basic, Payment, and Notification features of your APP. You can also Disable or Delete the APP on this page.
Note: After disabling or deleting the APP, you will not be able to create and send an invoice, nor can you initiate a refund automatically or manually. Nevertheless, the funds and transaction records already received by the APP will not be affected.
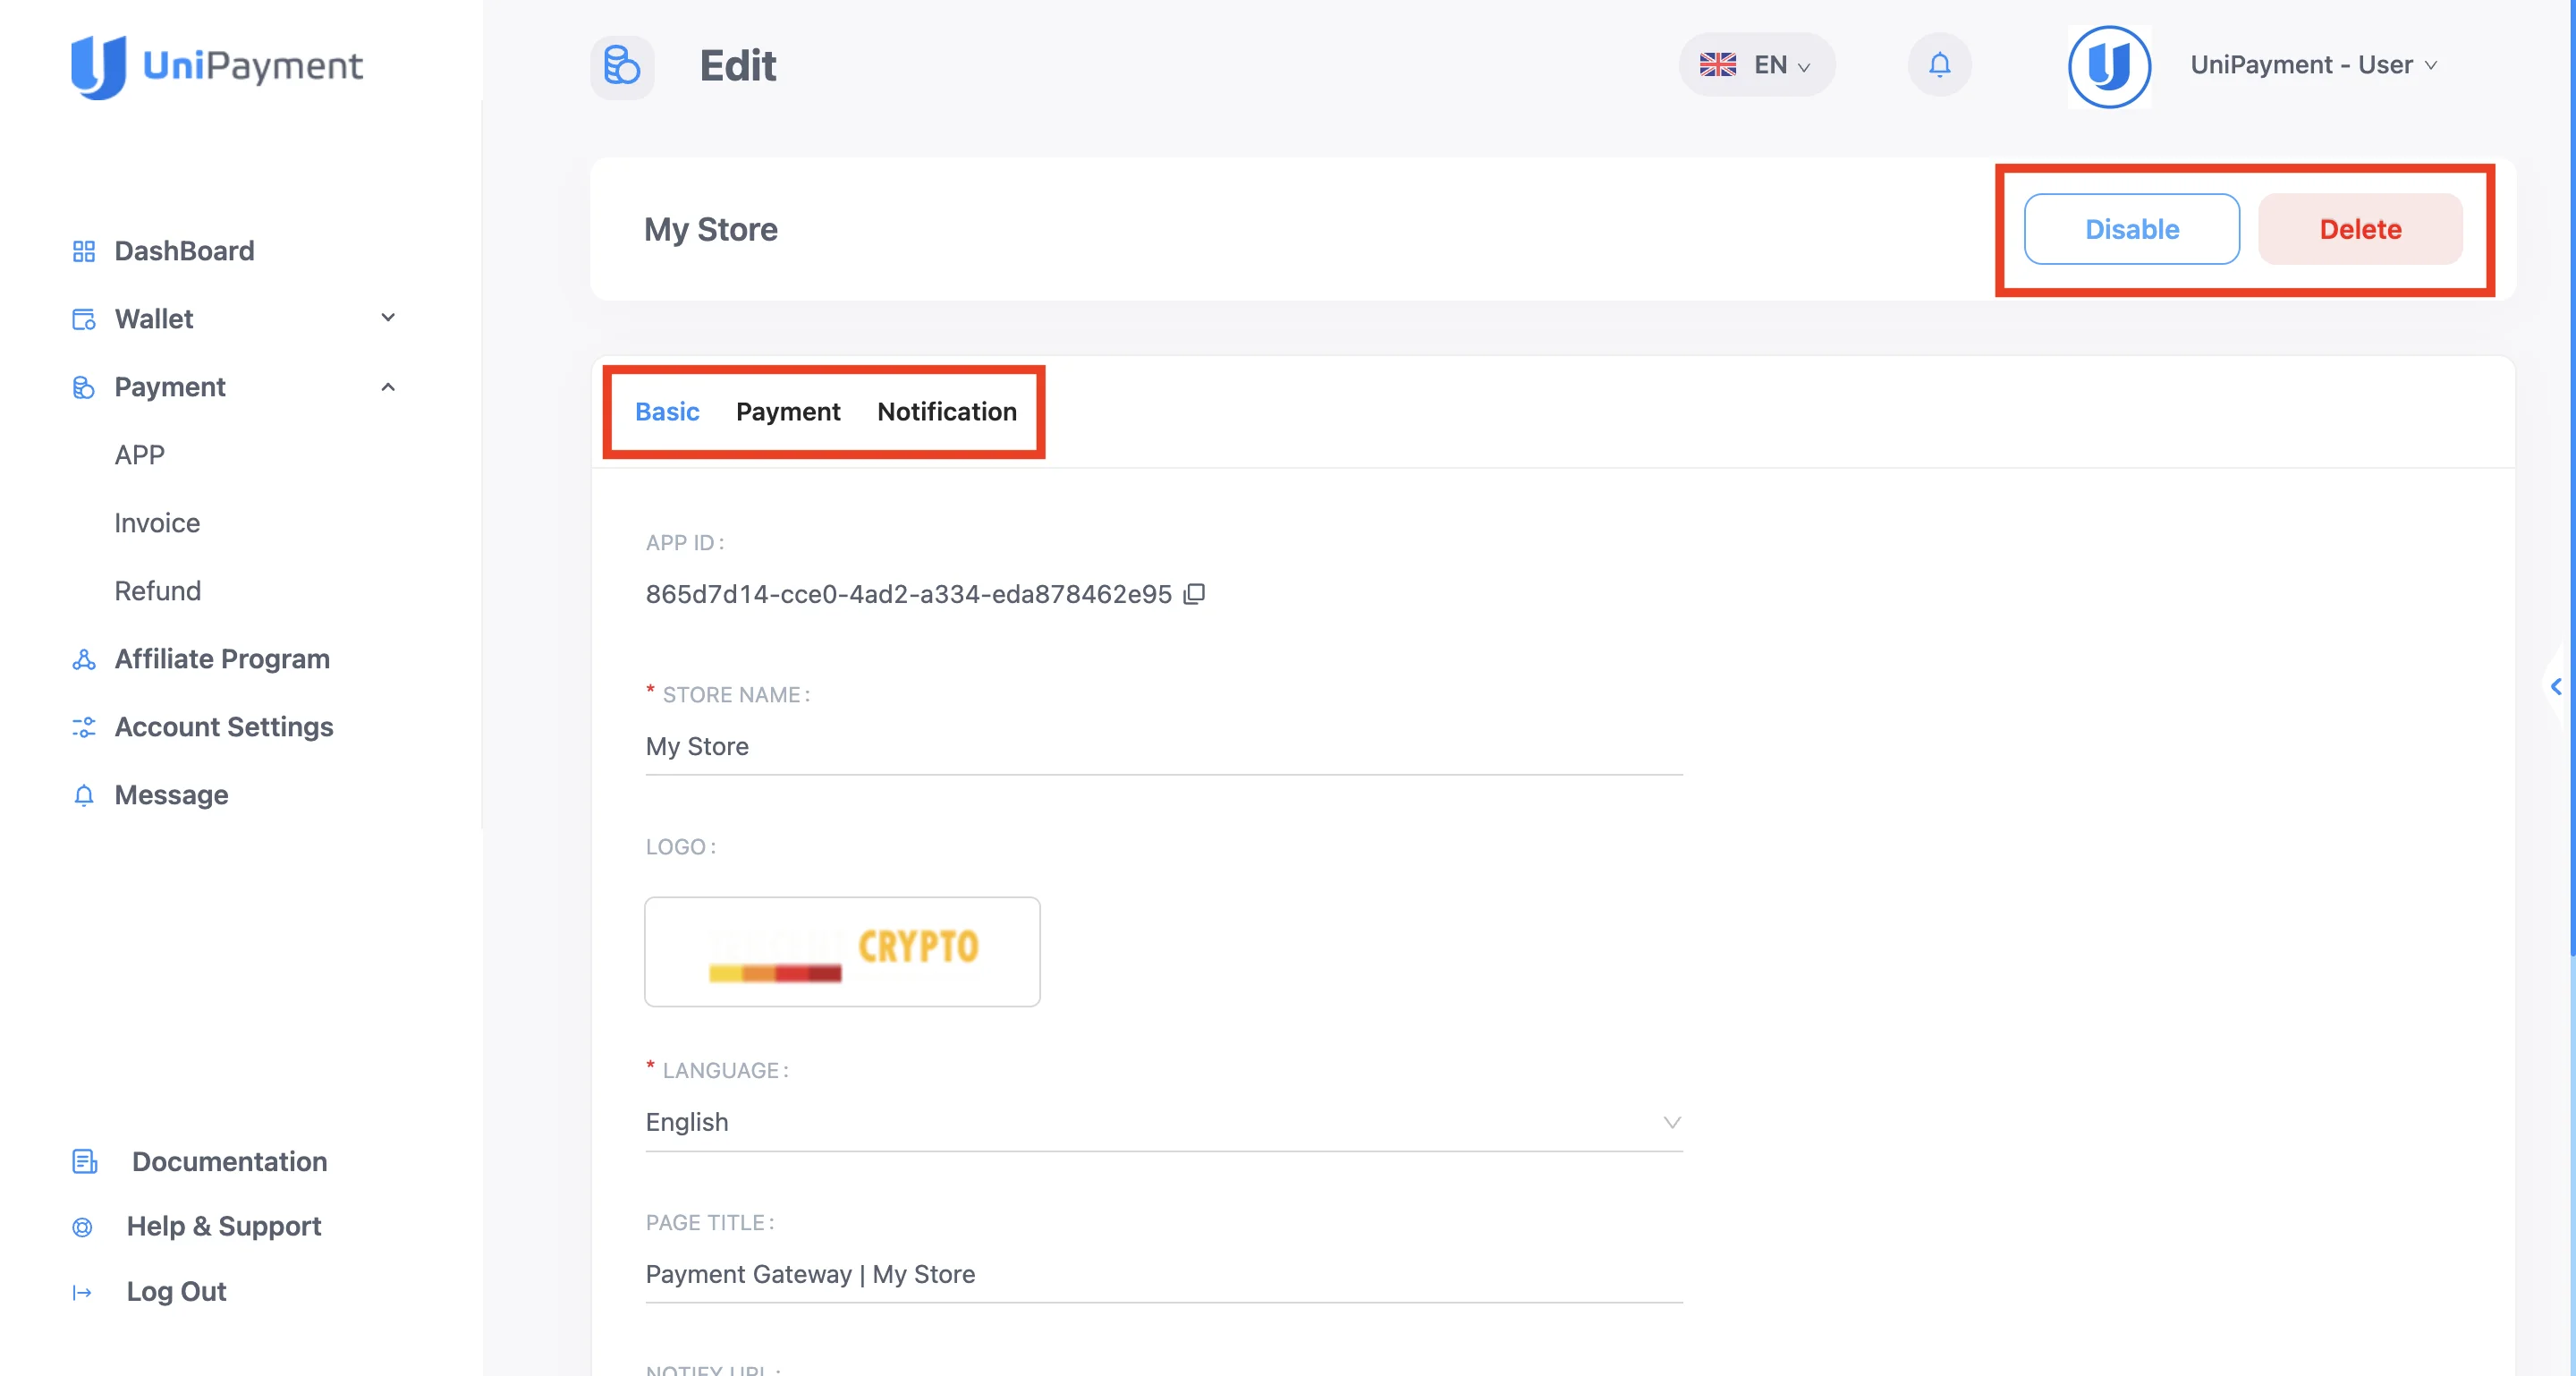
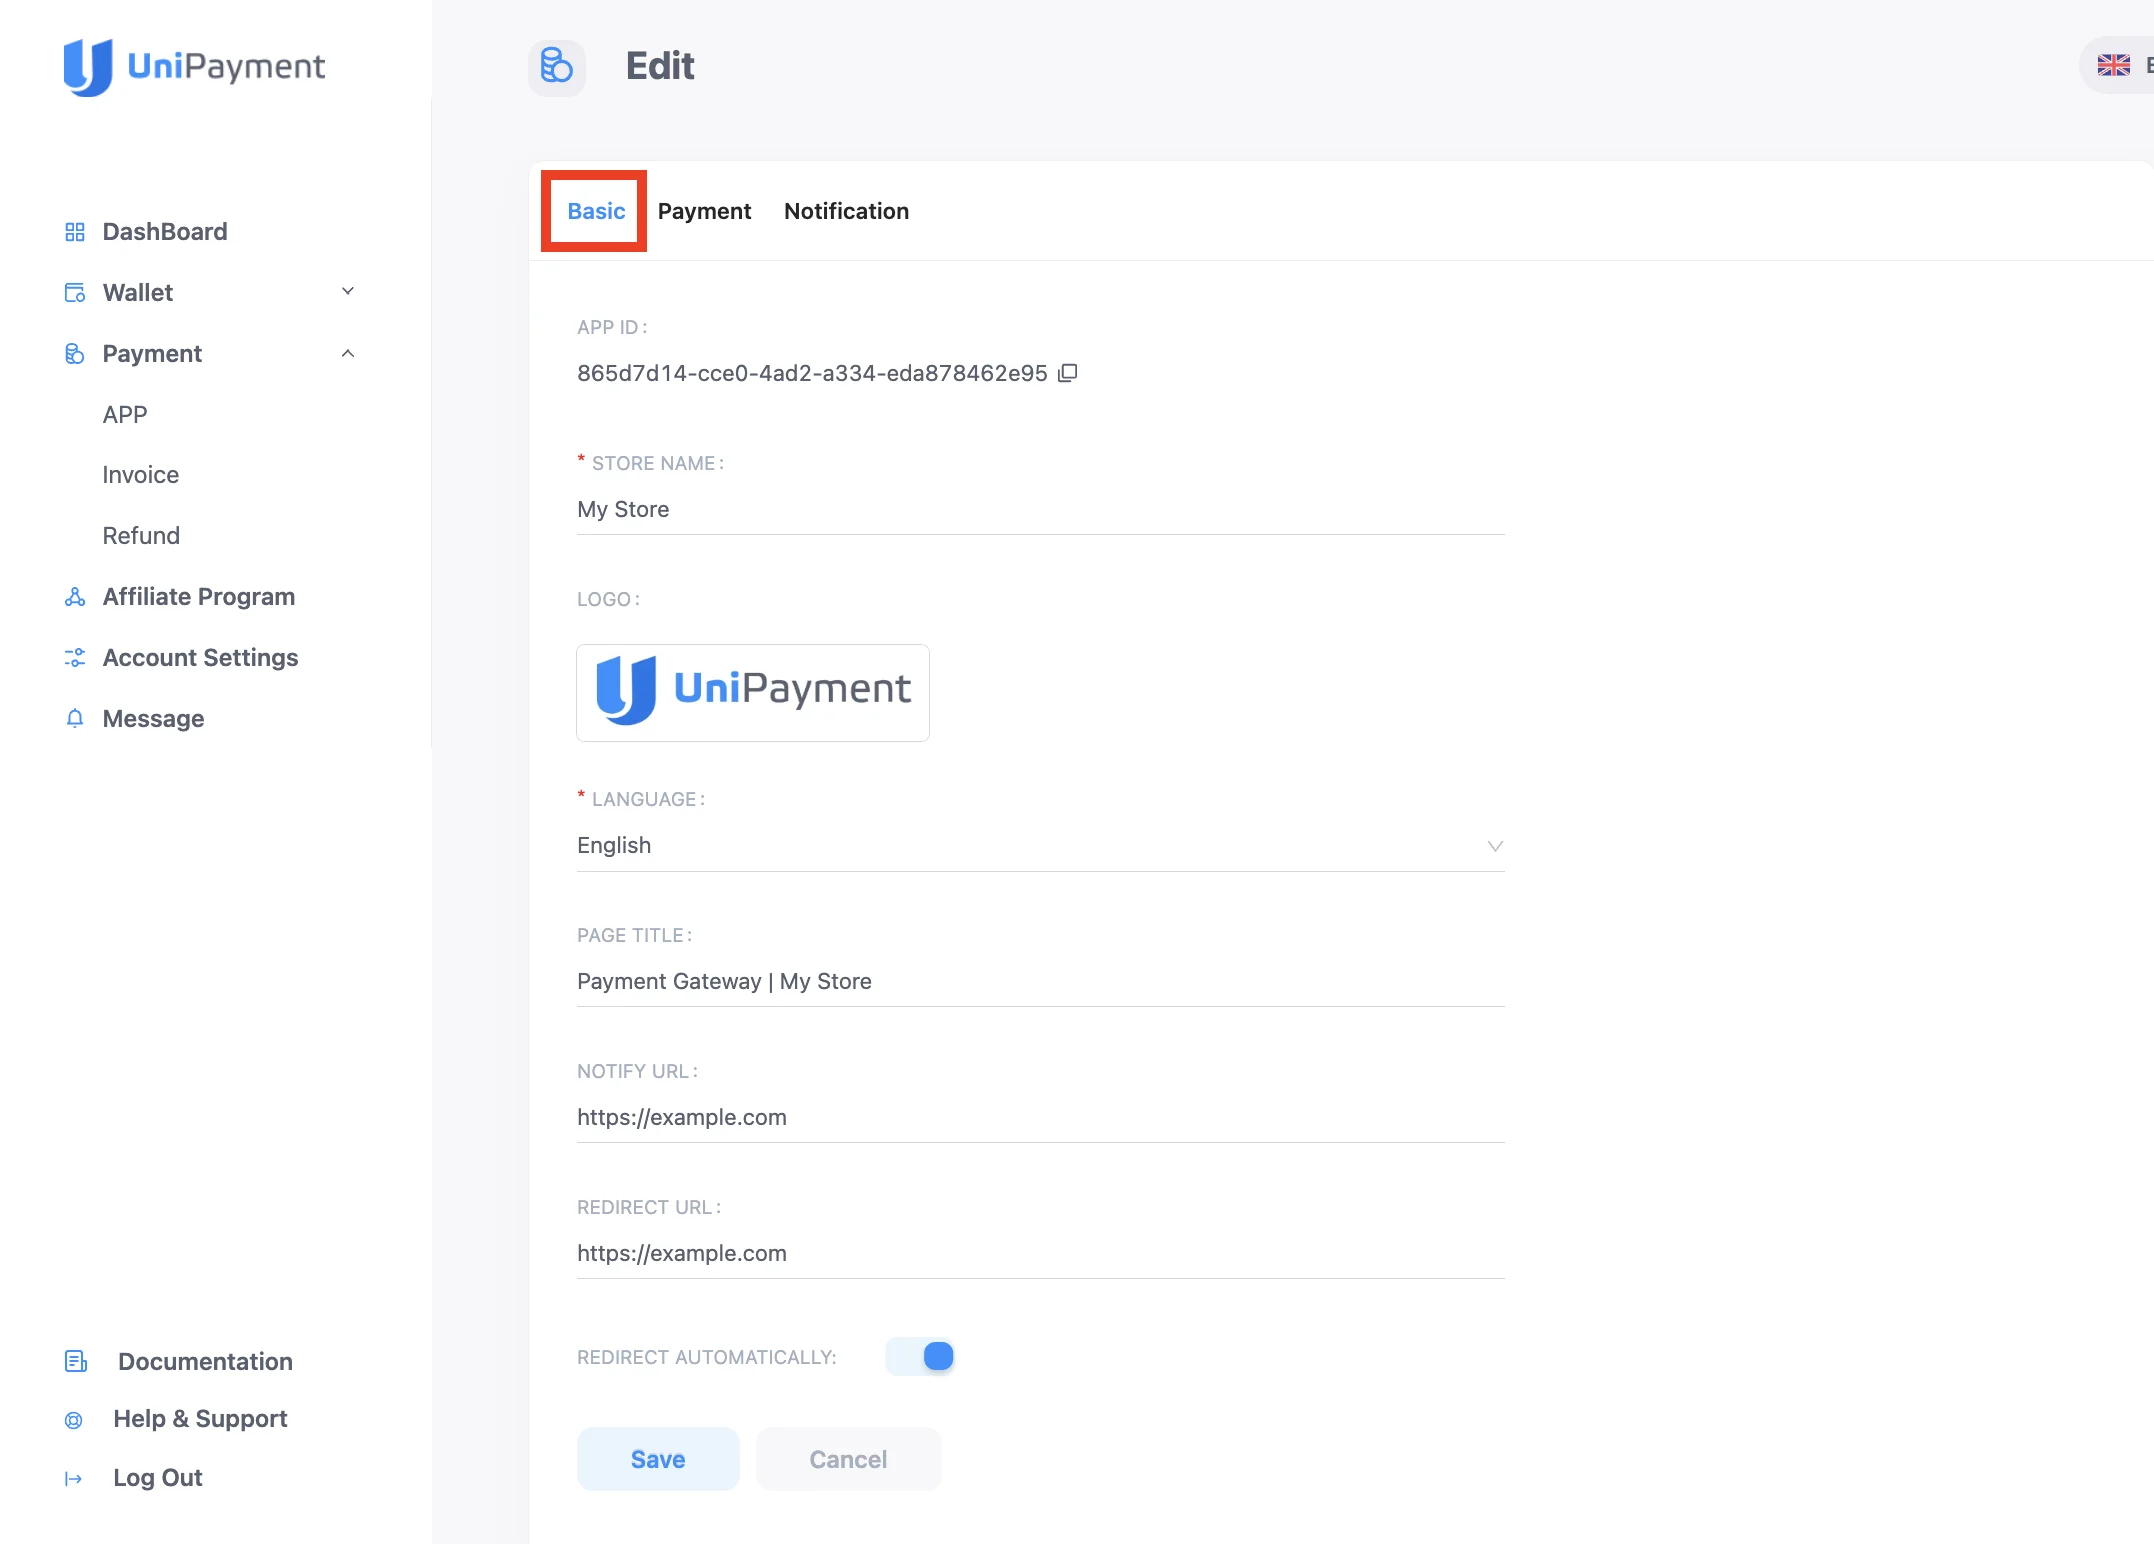
Section: Basic
In the Basic feature, you can personalize the following:
- Store name - The name of your store
- Logo - The logo of your store
- Language - The language you prefer your invoice to be translated
- Page Title - The title that will appear on the page of your invoice
- Notify URL - The URL where the payment gateway will send Instant Payment Notification
- Redirect URL - The page you want to redirect customers automatically after payment is completed
- Redirect Automatically - This option is on by default, you can turn it off at any time.is completed
- Toggle Redirect Automatically on and off
Section: Payment
In the Payment section, you can customize how you want to automatically process refunds for overpayment and underpayment of your customers. Below is a detailed instruction for these configurations.
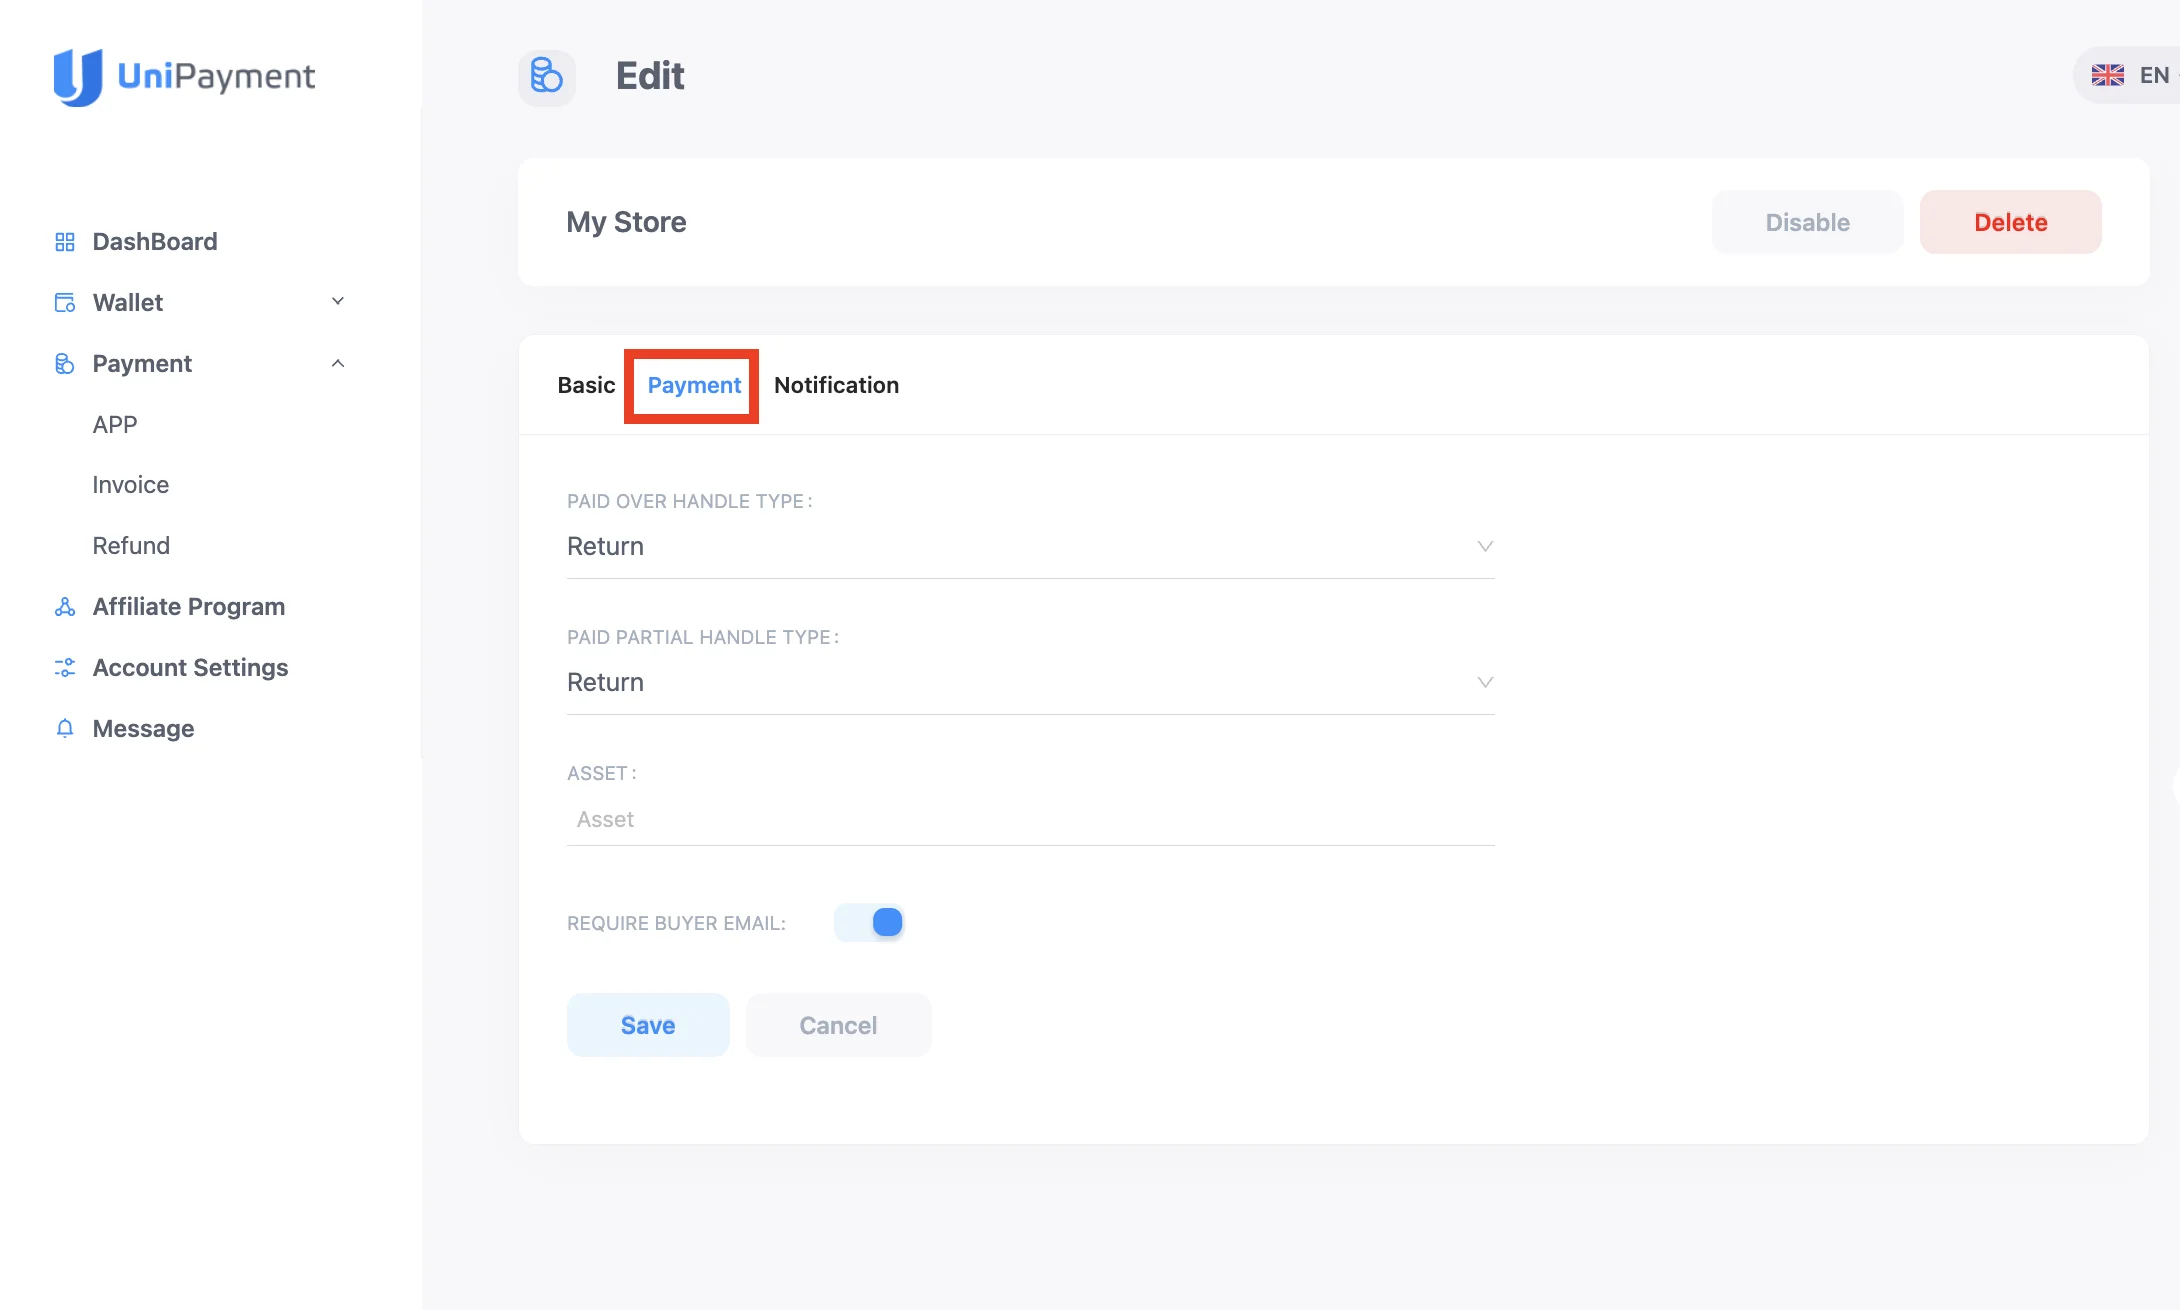
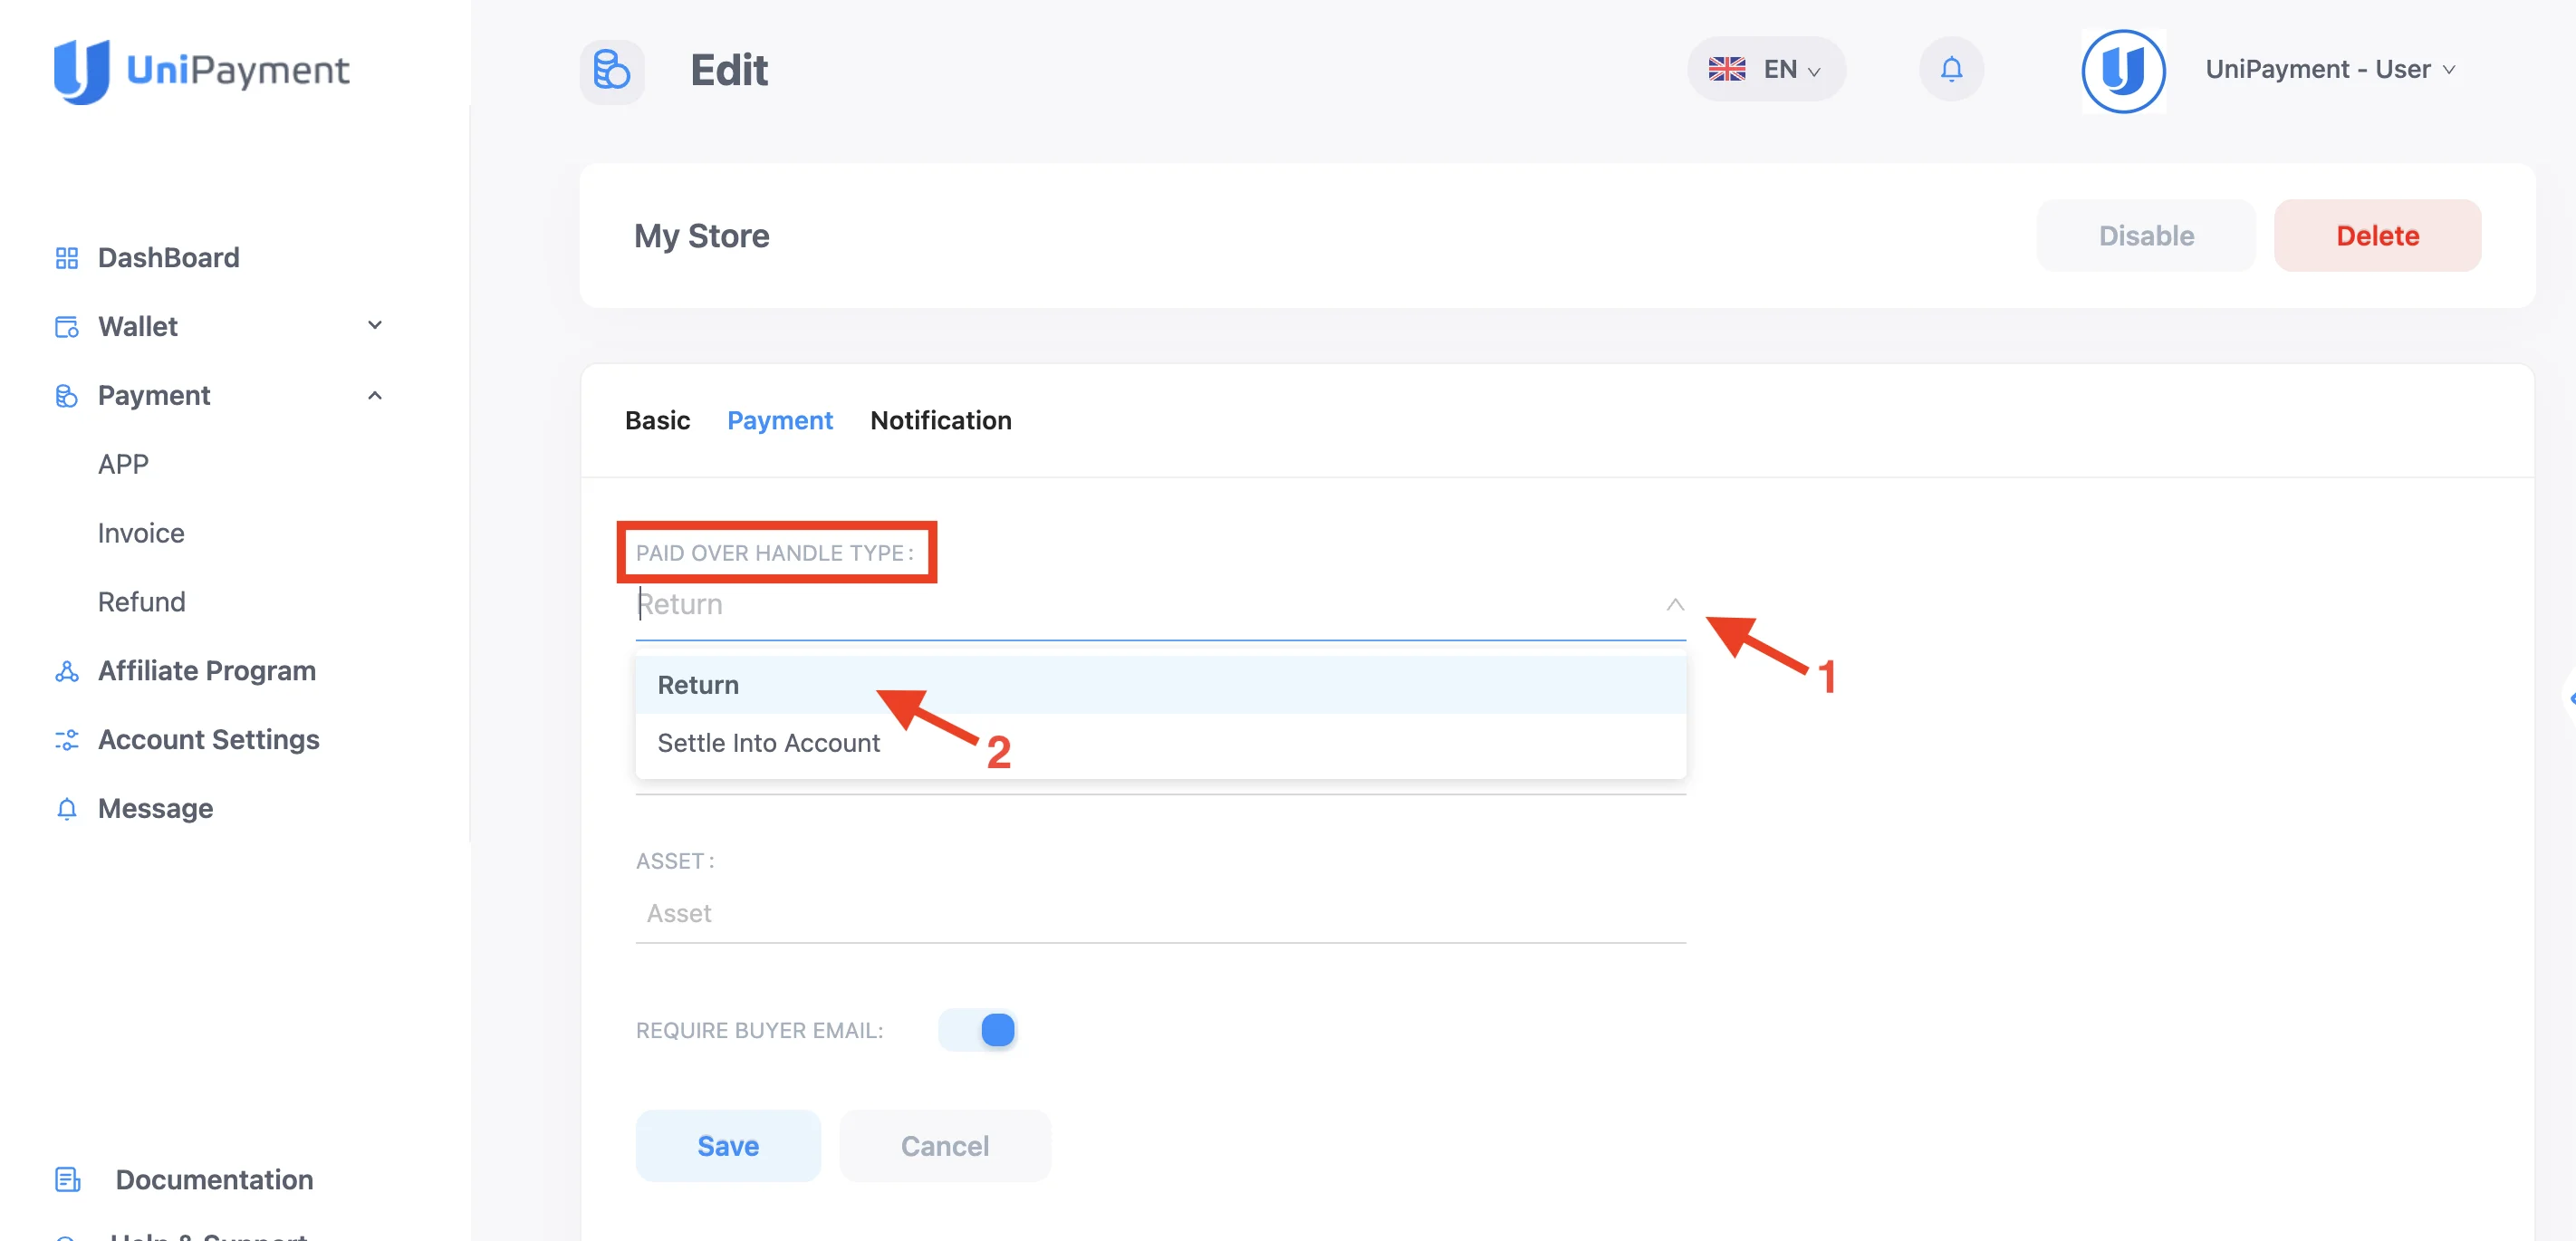
Paid Over Handle Type
A. Return
If your customer pays more than your current invoice amount, and your setting is set to “Return”, a refund will be automatically generated to your customer. If the refund amount can cover the withdrawal fee, all excess funds will be credited into their account.
When you select “Return”, you cannot set parameters for the refund option. For example, if you choose “Return” and the customer pays $102, the $100 will be credited to your account, and a $2 refund will be generated at the same time (assuming that $2 has been fully covered the corresponding blockchain network withdrawal fees).
B. Settle Into Account
If your customer pays more than your current invoice amount, and your setting is set to “Settle Into Account”, whether or not an automatic refund form can be generated depends on the parameter you set in “Overpayment allowed ratio”. You can set the overpayment ratio from 0% to 100%.
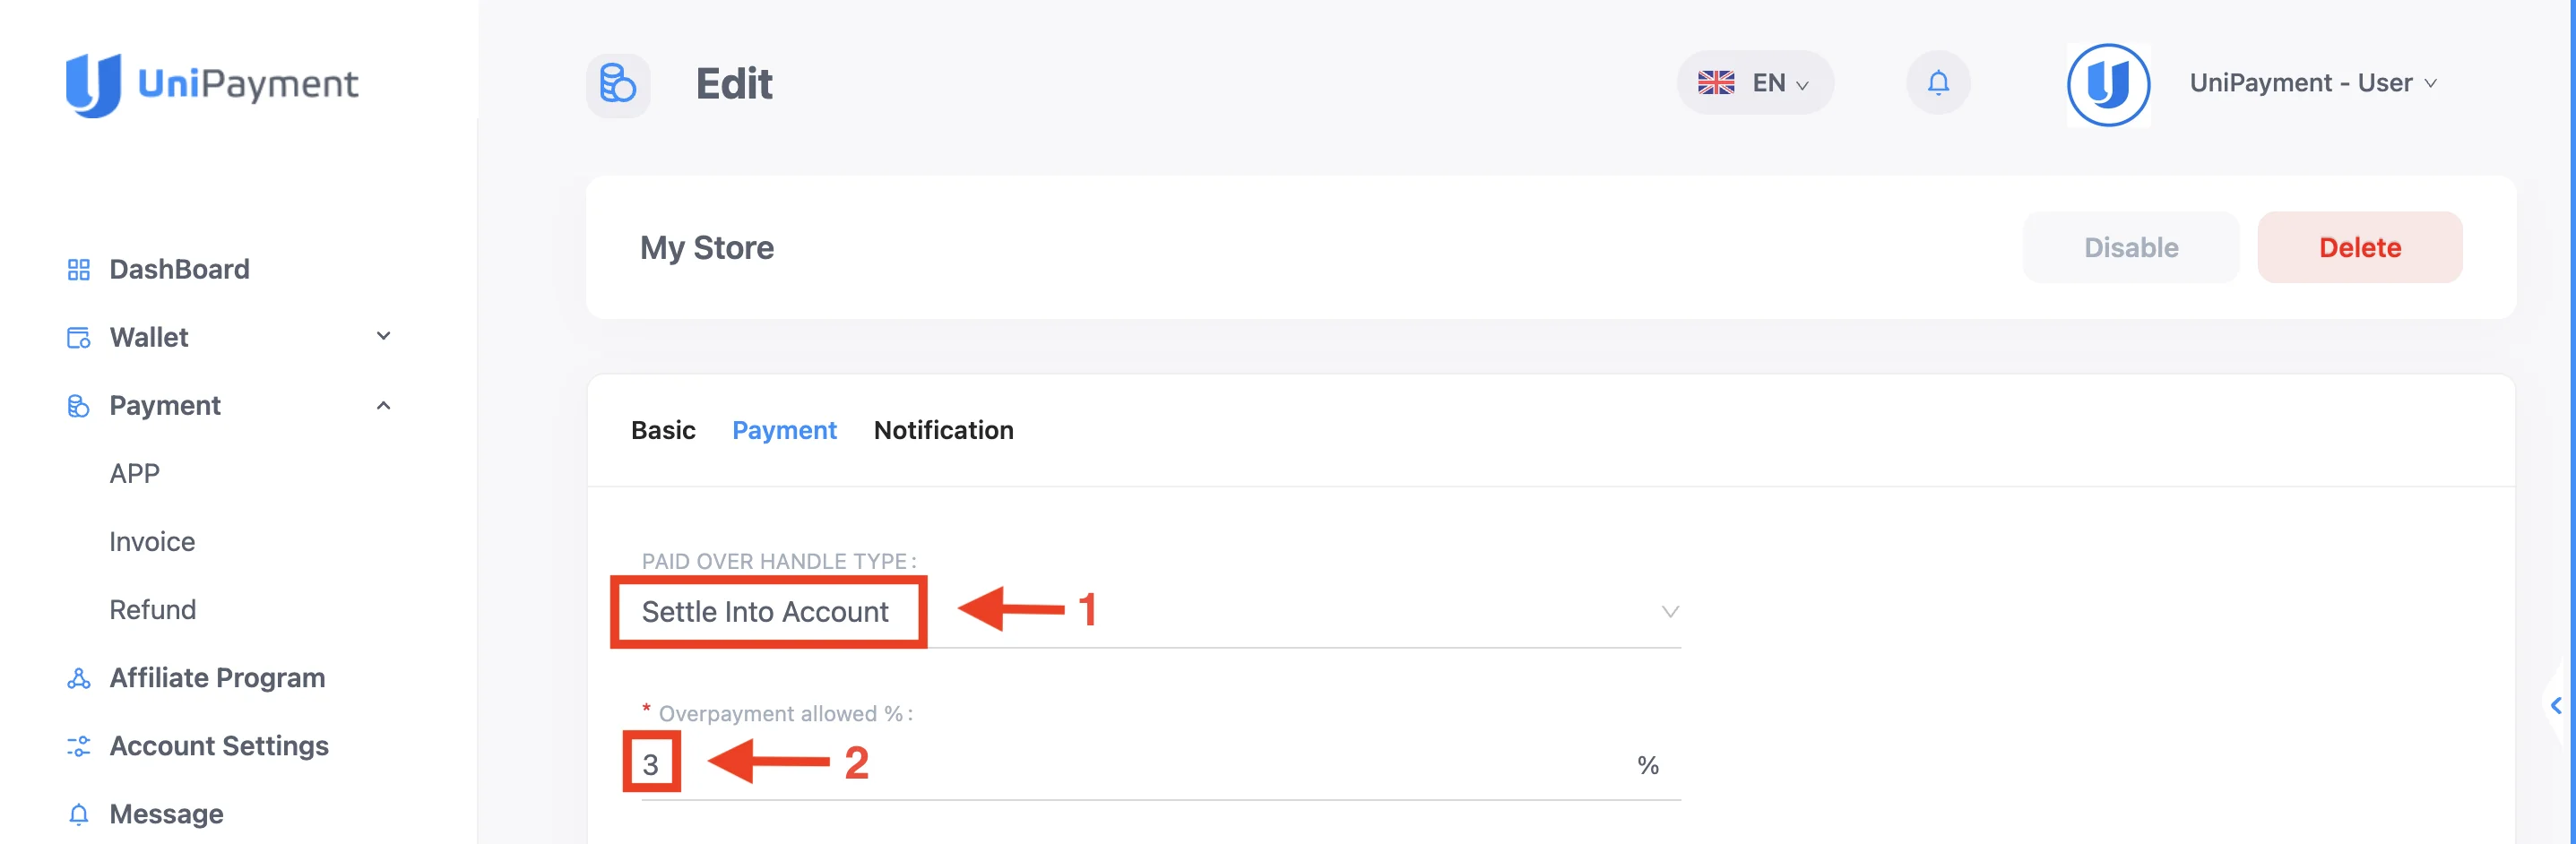
Example:
You set the “Overpayment allowed ratio” to 3%, and the invoice amount is $100.
Situation 1:
If your customer pays $102, then all $102 will be credited to your account, and no refund will be generated. You need to manually refund the $2. Please refer to Manual Refund Guide.
Situation 2:
If your customer pays $103, then $100 will be credited to your account, and a refund of $3 will be automatically generated.
Paid Partial Handle Type
A. Return
If your customer underpays your current invoice amount and your setting is set to “Return”, the funds you receive will be automatically refunded to your customer in full.
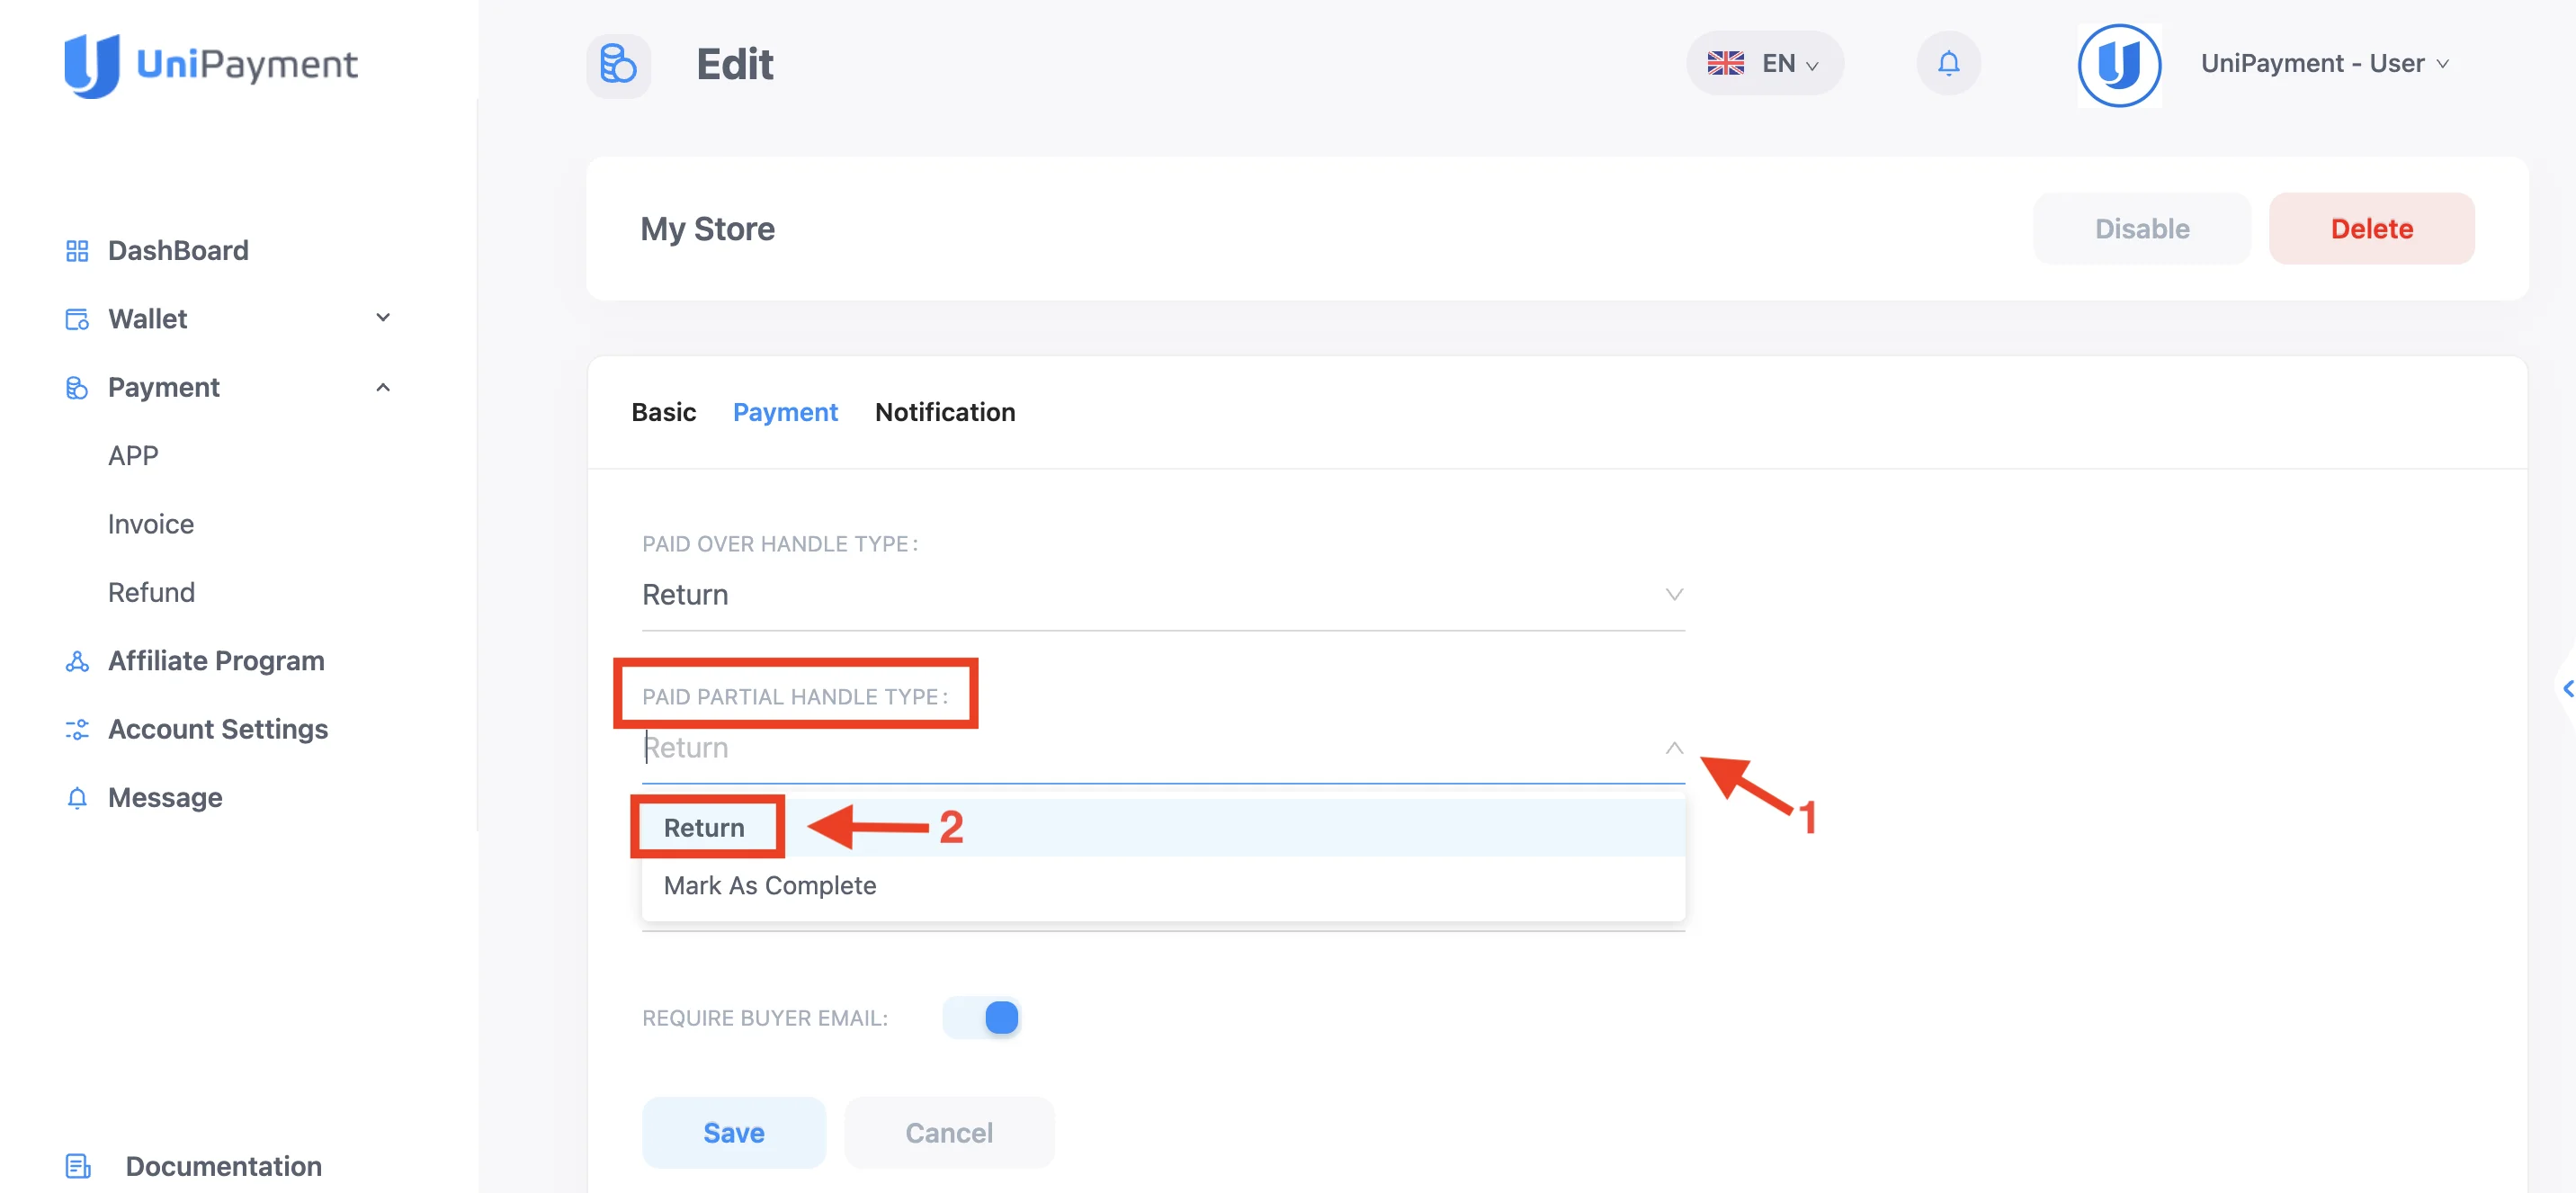
B. Mark As Complete
If your customer underpays your current invoice amount and your setting is set to “Mark as Complete”, the funds you receive will be automatically credited depending on the parameters you set in the “Underpayment allowed ratio”. You can set the underpayment ratio from 0% to 100%.
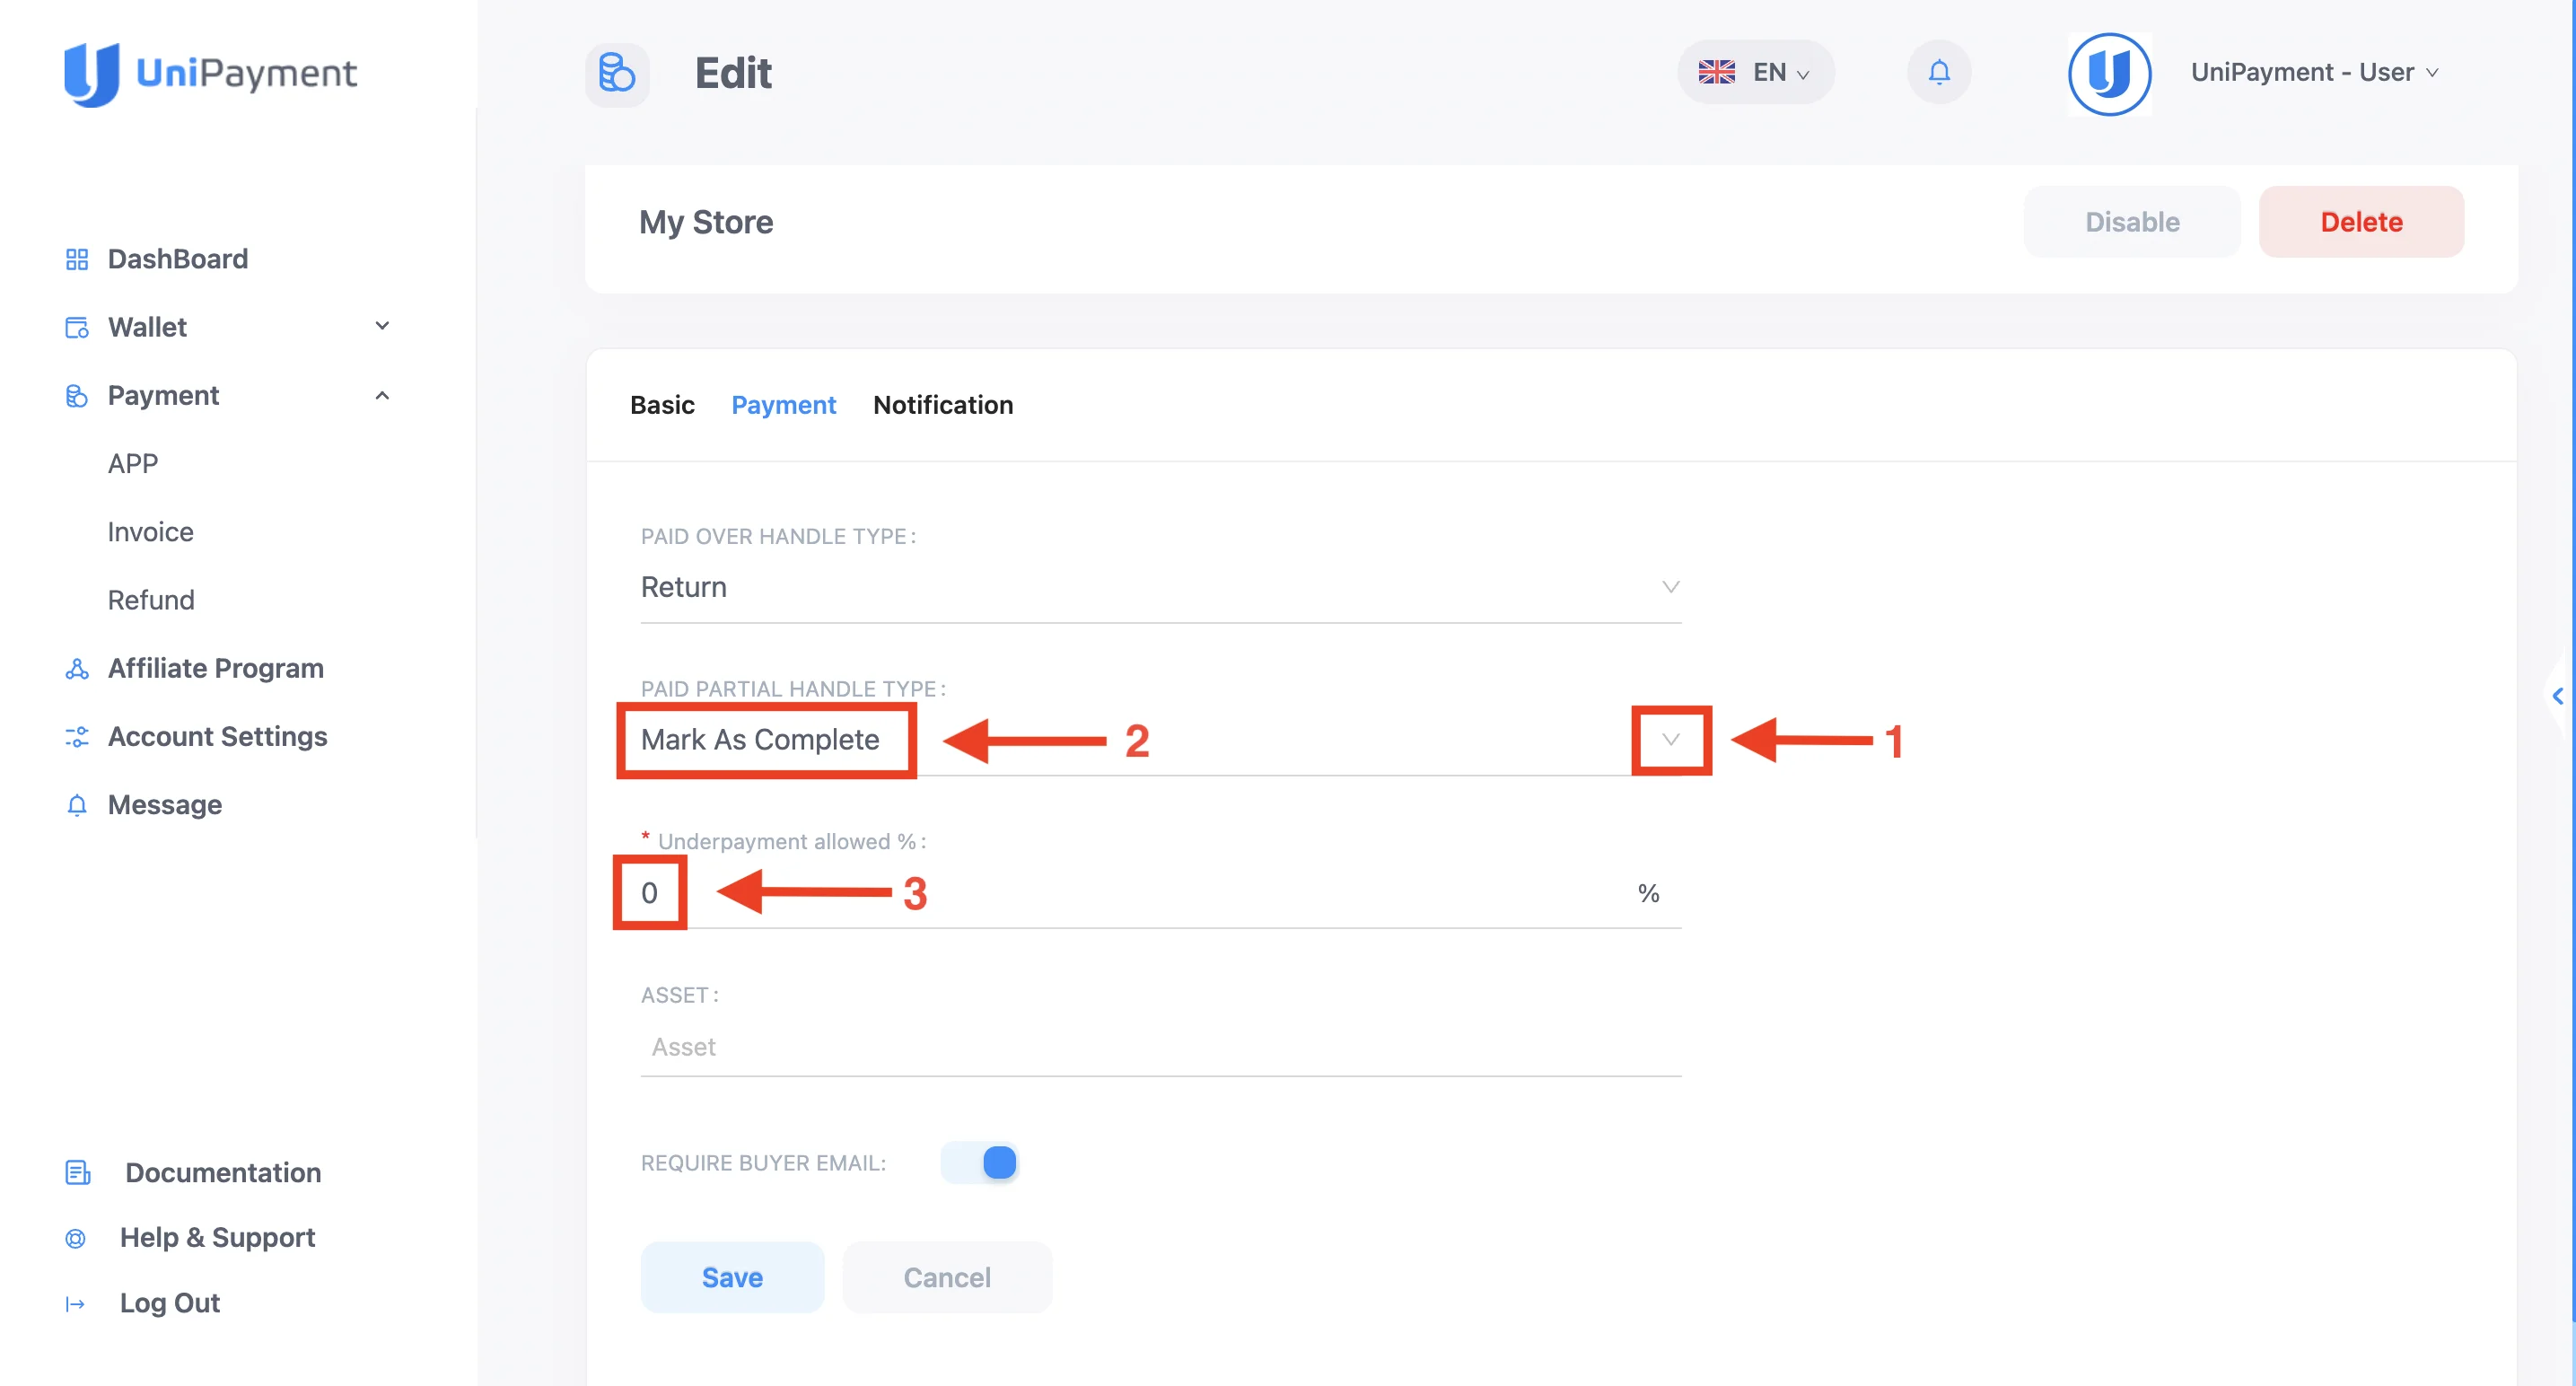
For example, if you set 3%, it means that when the payment ratio is greater than 97%, the funds received will be automatically credited, and the order status will be displayed as “Complete(Paid Partial)”.
If the payment ratio is less than 97% and the amount can cover the withdrawal fee of the corresponding blockchain network, an automatic refund form will be generated, and the order status will display “Expired (Paid Partial)”. In this case, the invoice status cannot be changed manually.
If the payment ratio is less than 97% but cannot cover the current network withdrawal fee, the funds will be credited in full, and the order status will display “Expired (Paid Partial)”. The invoice status cannot be changed manually here. If you need to make a refund, please refer to Manual Refund Guide.
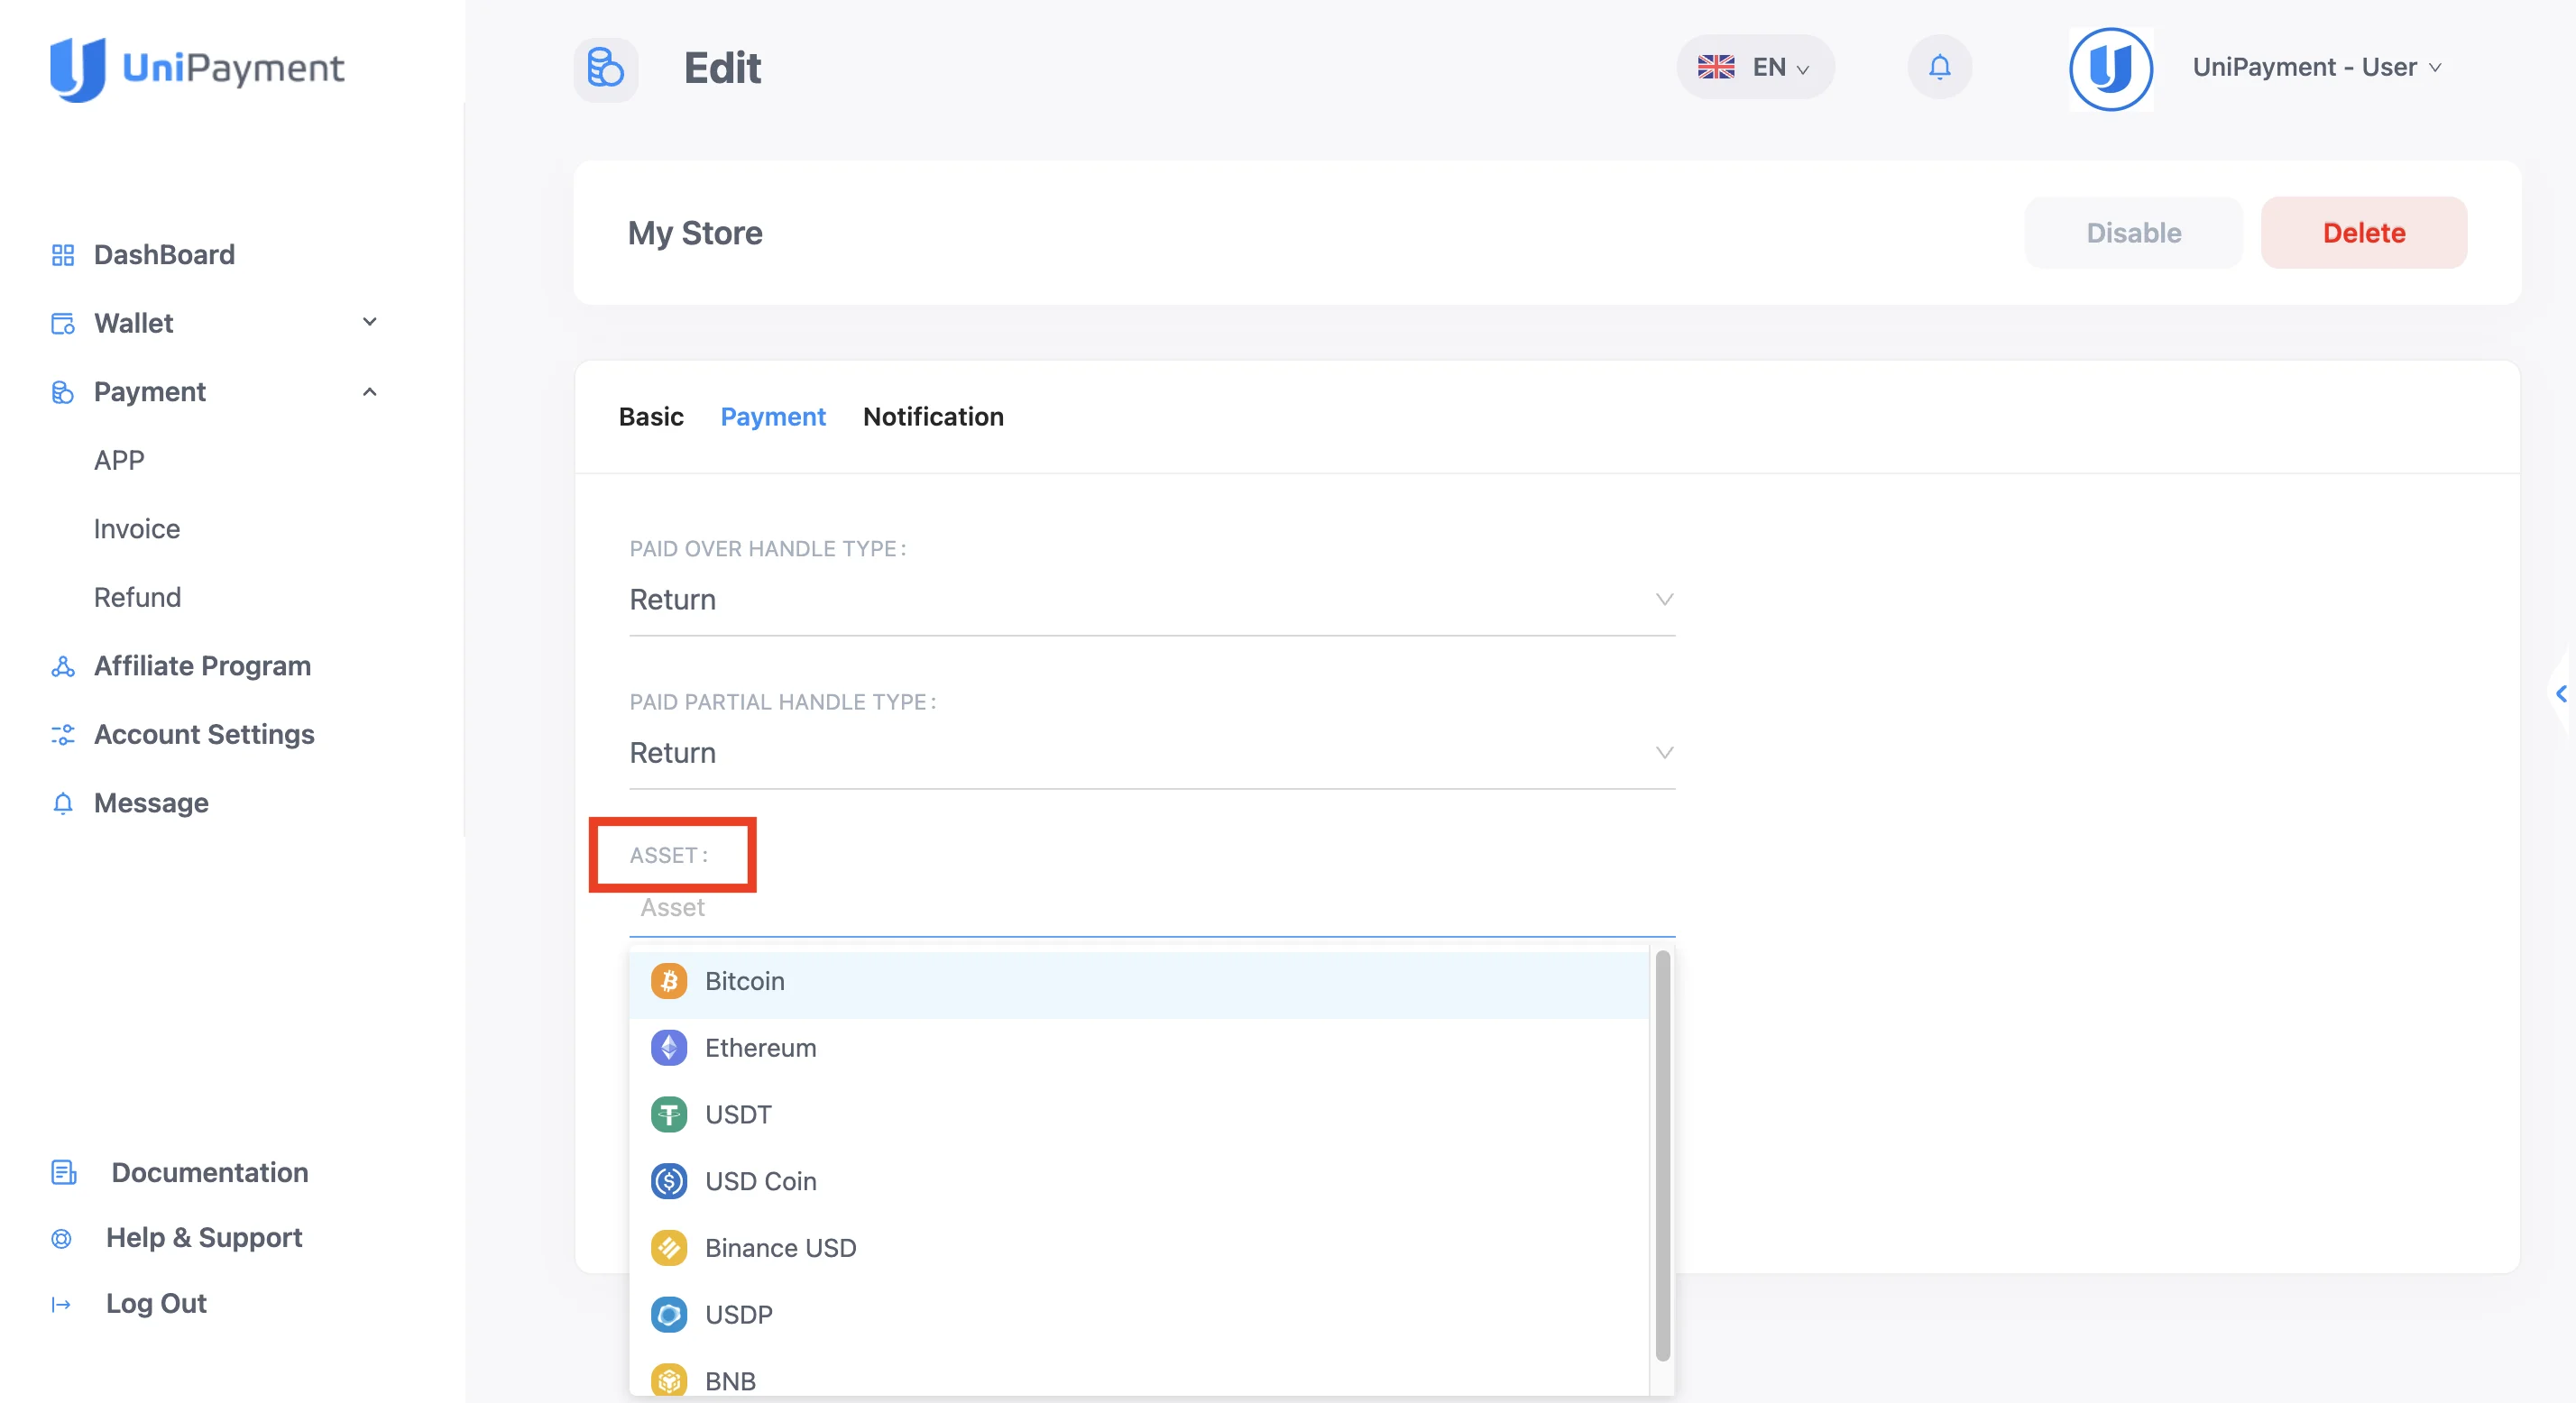
Asset
In the “Asset” option, you may select the coin that your APP can receive. You can add multiple assets, depending on your preference.
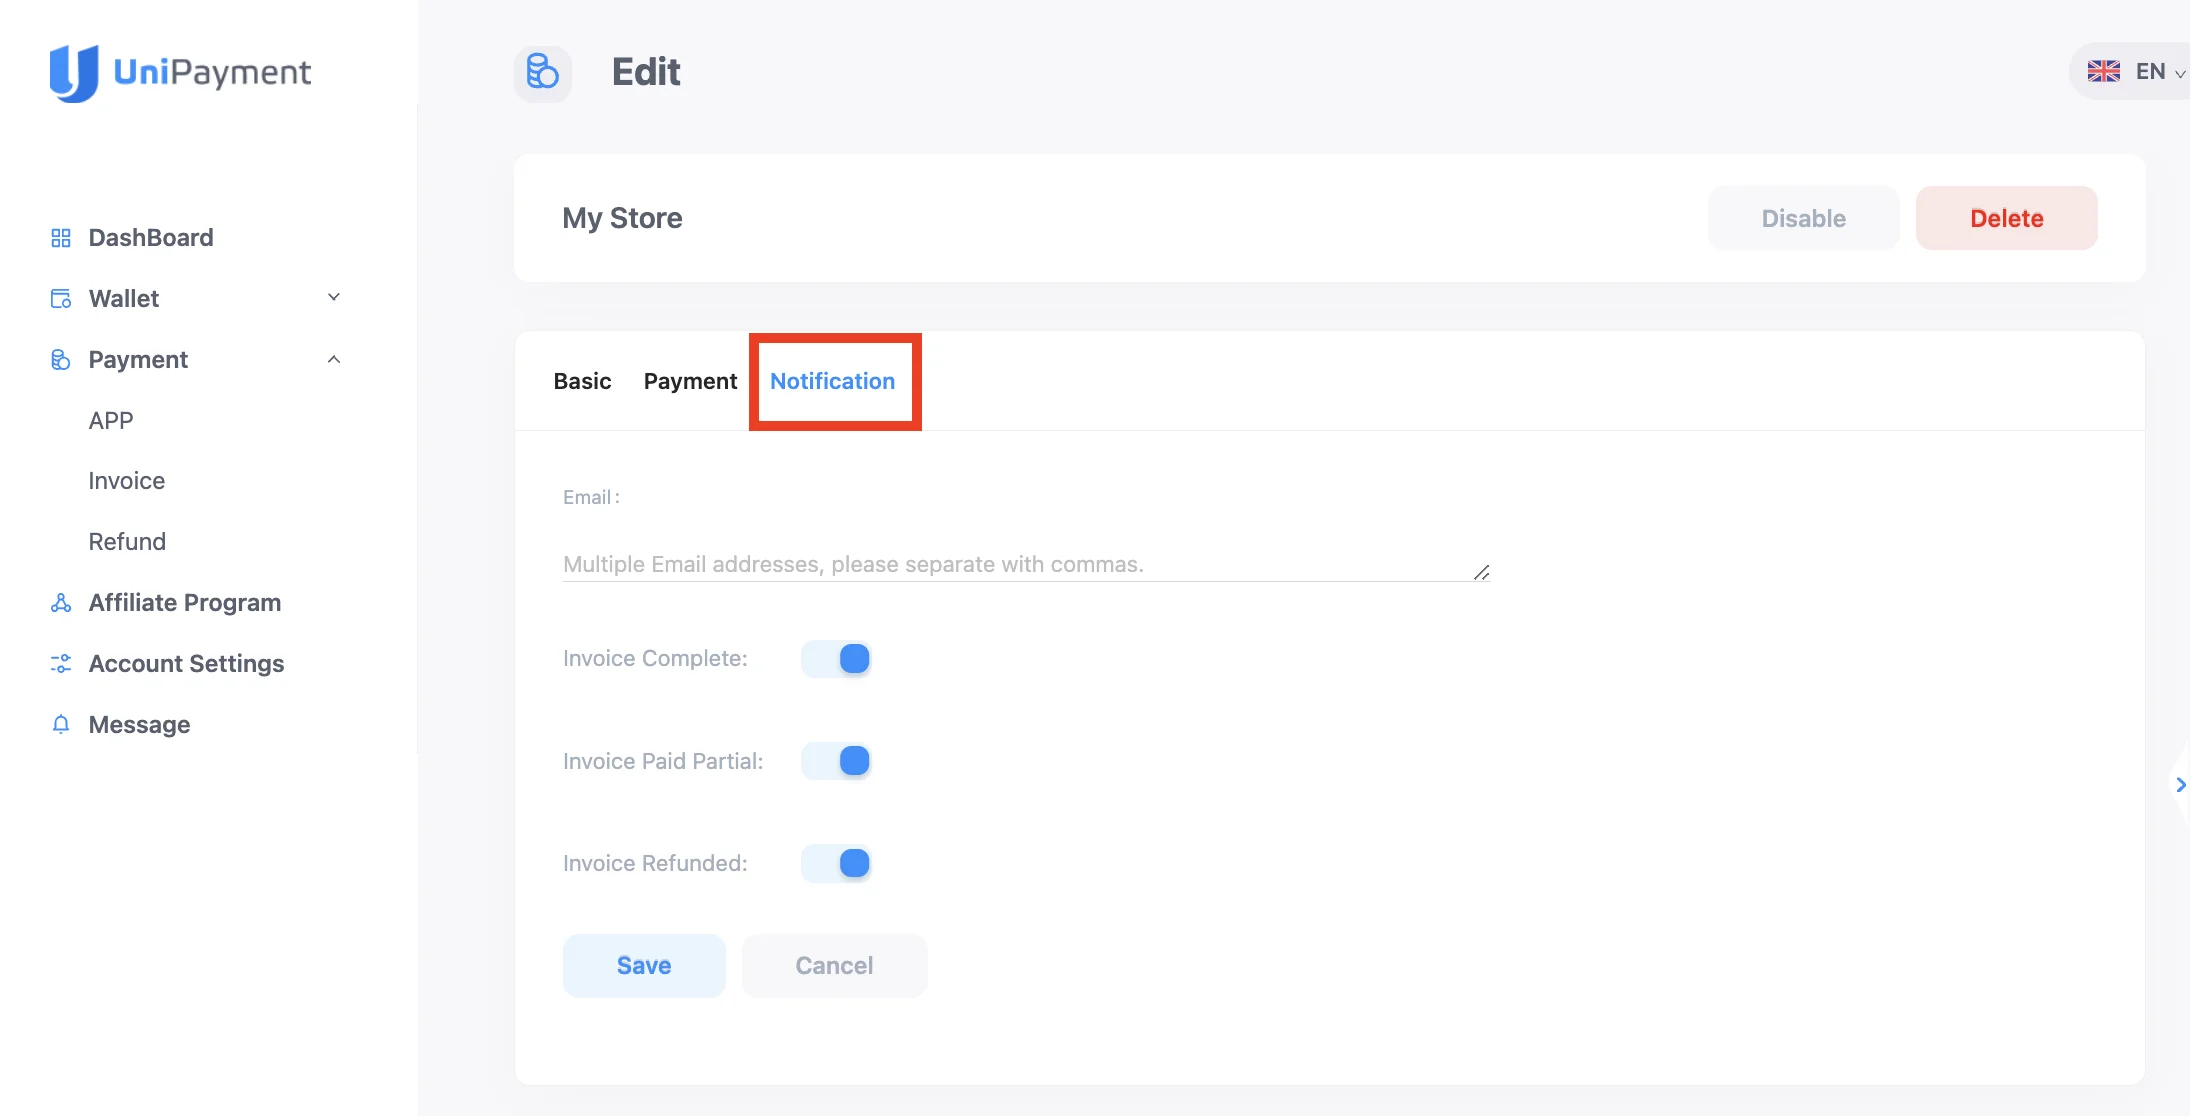
Section: Notification
In this option, you can add multiple email addresses and separate them by commas. The notification email of the status change will also be sent to the email address you entered.
The type of notification email is enabled by default, and you can disable it at any time.
Step 3:
Click the “Save” button, and the APP customization is completed!