Invoice Payment Process
Note: Due to version changes, there might be slight differences in the screenshots in this article, but the steps on how to do it have not changed.
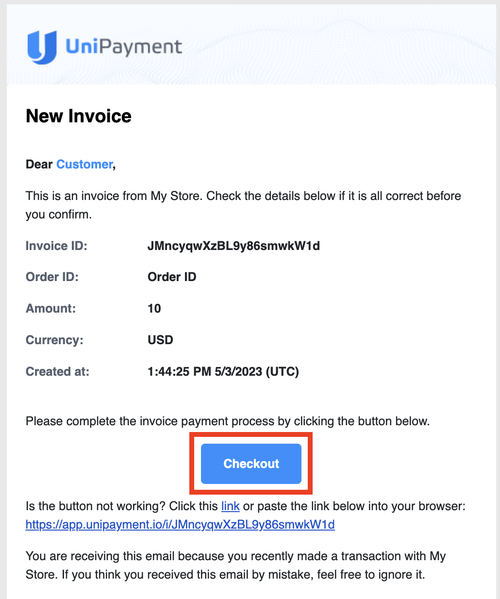
Step 1a: Customer receives an invoice by email
In the email when your customer clicks “Checkout”, they will be redirected to the invoice page.
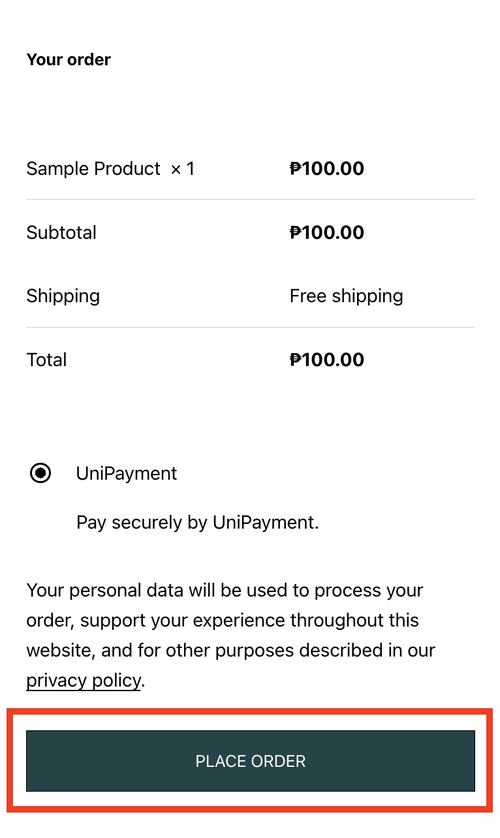
Step 1b: Customer checks out on the website
When a customer checkouts on the website of an e-commerce platform, they will be redirected to the invoice page directly.
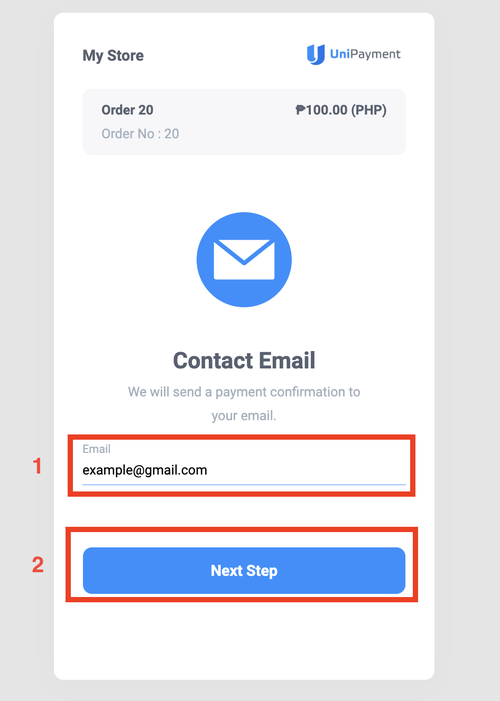
Step 2: Enter the email address of your customer
Check the invoice amount and enter the email address you’d like to receive payment confirmation (1). Then click, “Next Step” (2).
Step 3: Select payment currency
Choose from the accepted payment currency, then click “Next”.

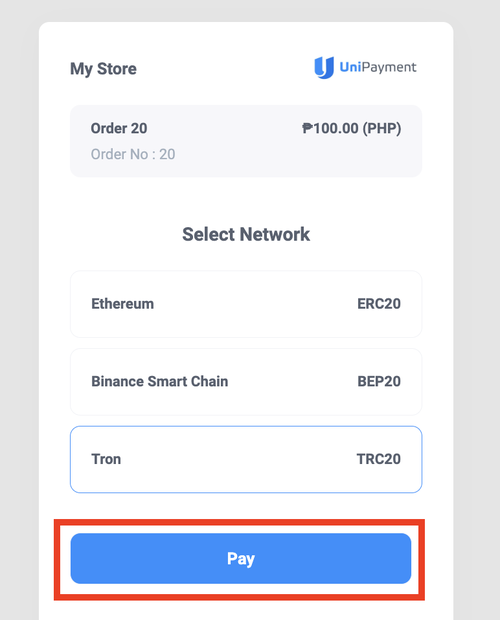
Step 4: Select payment network
Select the payment network, then click “Pay”.
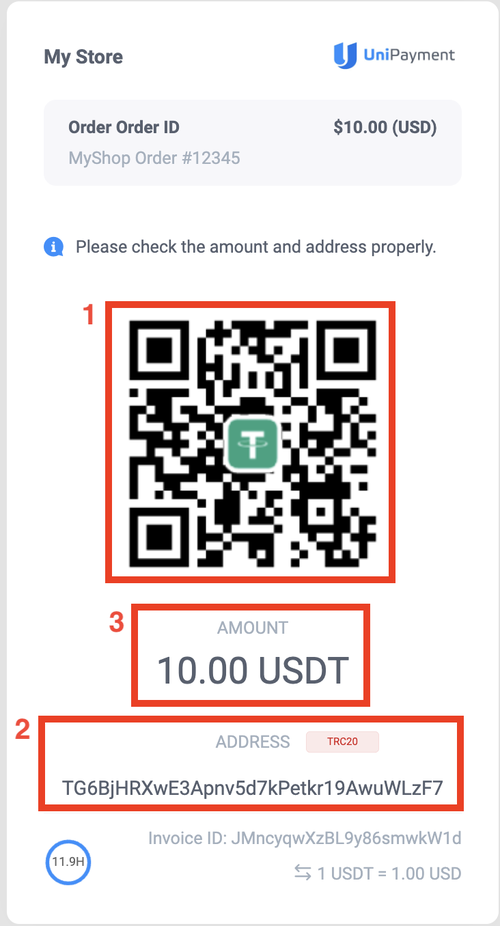
Step 4: Get payment address and amount
Once your customer is on the Checkout Page, they can either scan the QR code of the invoice (1) or copy the address (2) to their wallet to send the payment for the amount (3) of the invoice.
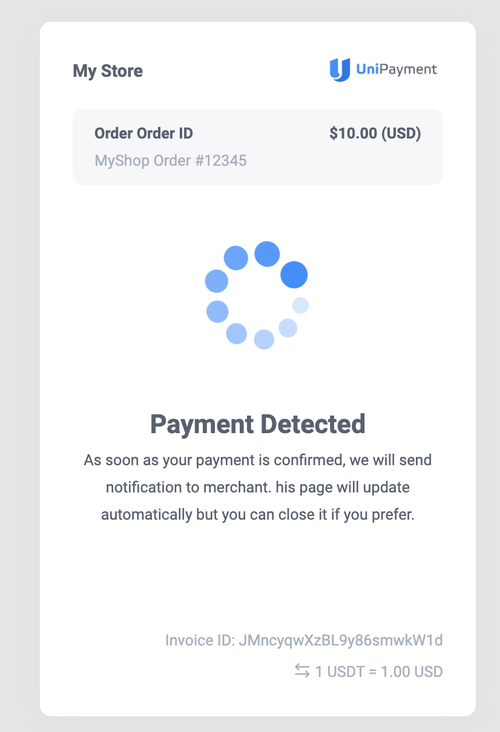
Step 5: Make payment
Once your customer pays the invoice, the invoice page will be automatically updated.
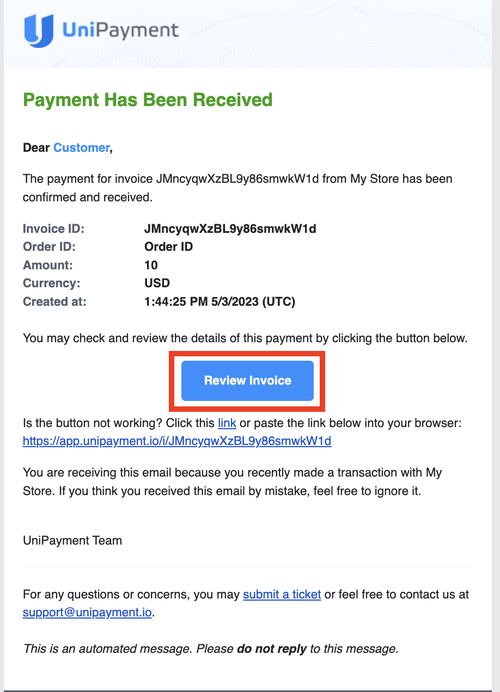
Step 6: Payment Completed
After the number of transaction confirmations surpasses the designated threshold, the invoice status will automatically change to "Complete."
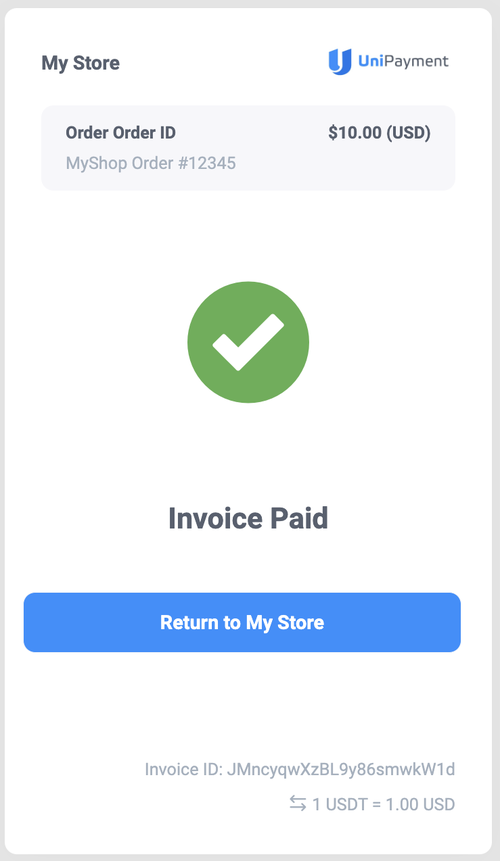
Upon completion of the payment, both you and your customer will receive a notification email containing the invoice details. To view the receipt and status of the invoice, simply click on "Review Invoice".