Enable or Disable Your Two-Factor Authentication / Multi-Factor Authentication
Note: Due to version changes, there might be slight differences in the screenshots in this article, but the steps on how to do it have not changed.
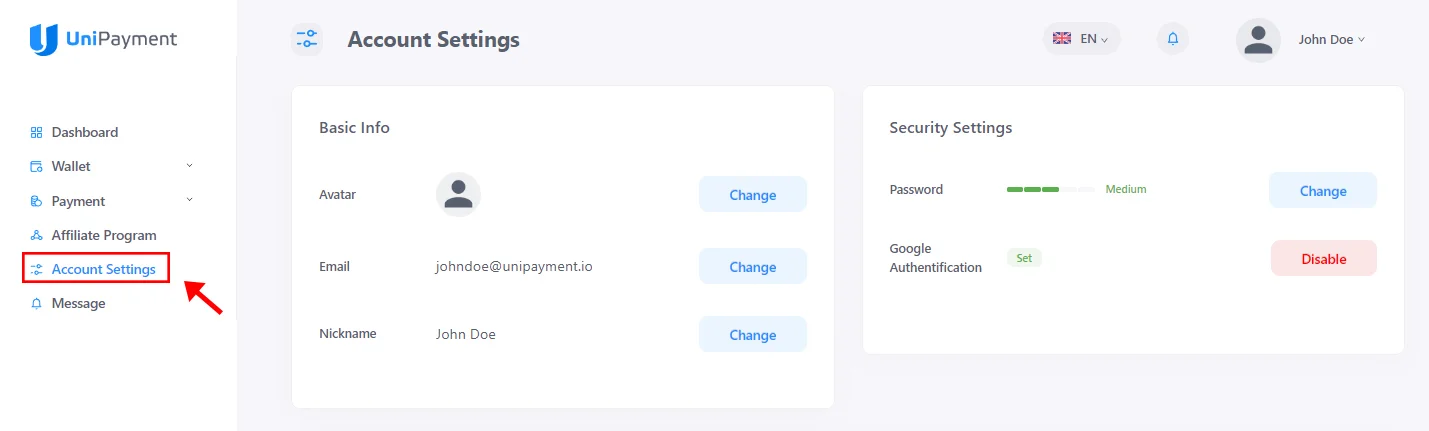
Step 1a:
Click “Account Settings” on the Navigation and the Basic Info and Security Settings page will appear. Under “Security Settings”, you can view if your Google Authentication for two-factor authentication (2FA) has been set and you have the ability to enable or disable it
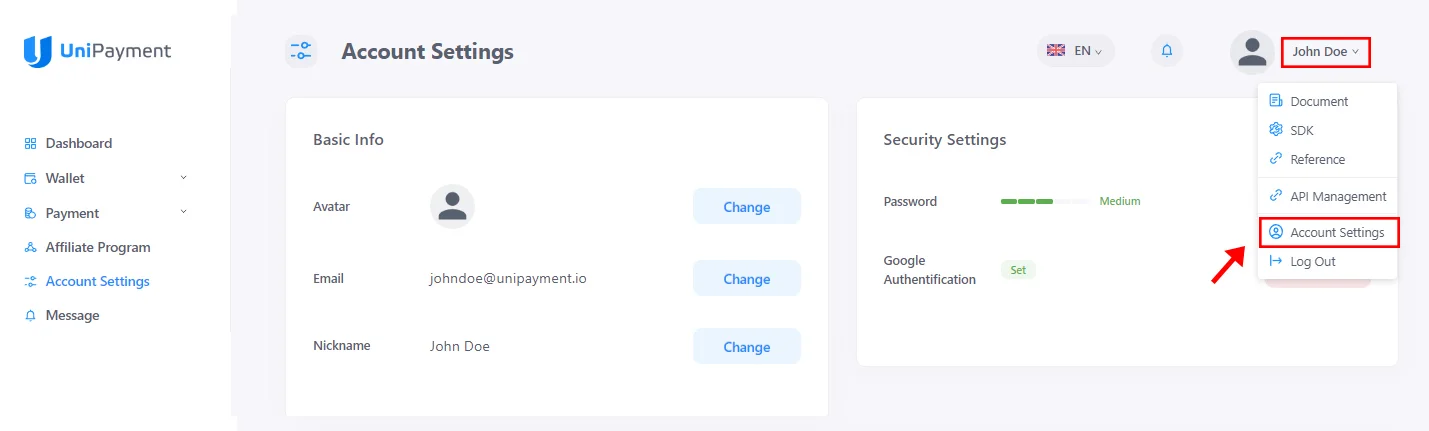
Step 1b:
Click your name in the upper right corner of the admin panel. Select “Account Settings” from the dropdown menu. The Basic Info and Security Settings page will appear. Under “Security Settings”, you can view if your Google Authentication for two-factor authentication (2FA) has been set and you have the ability to enable or disable it
Step 2:
Enabling Your Two-Factor Authentication (2FA) or Multi-Factor Authentication (MFA)
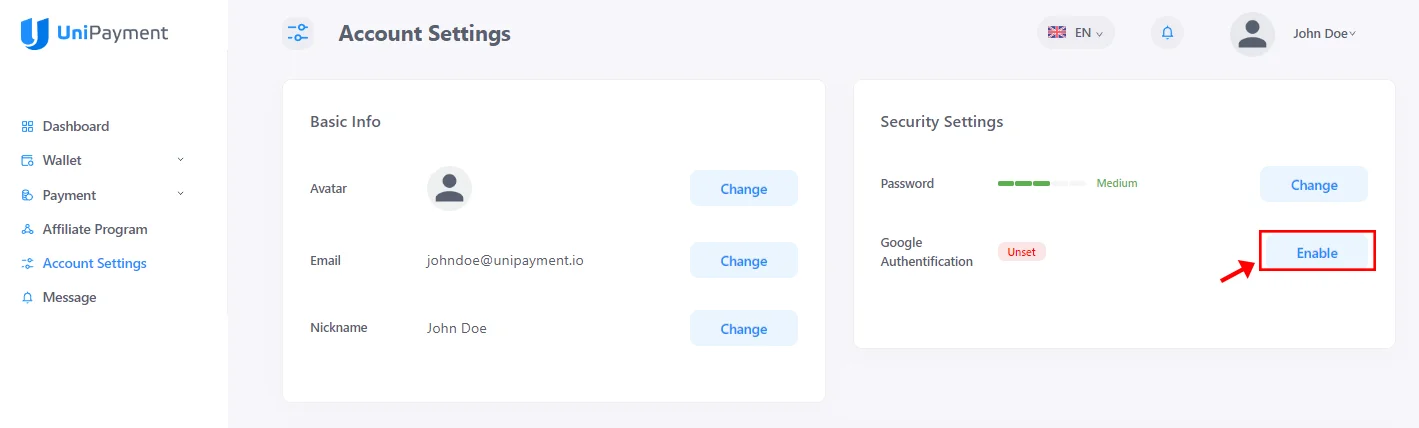
Your Google Authentification will look like the image below if it is disabled. It will show that it is “Unset”.
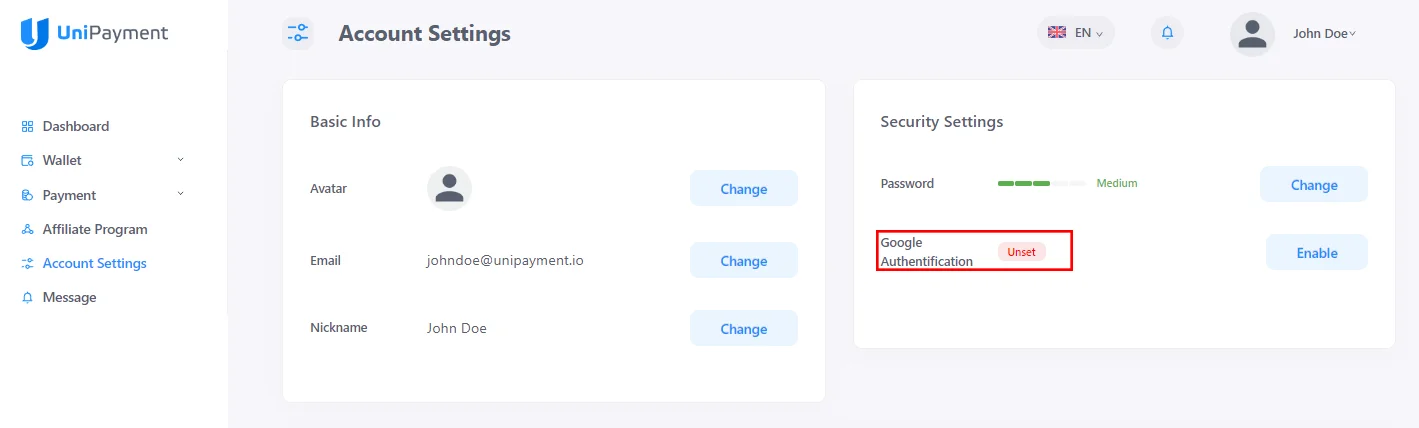
To set it for activation, click the “Enable” button on the right side.
Step 3:
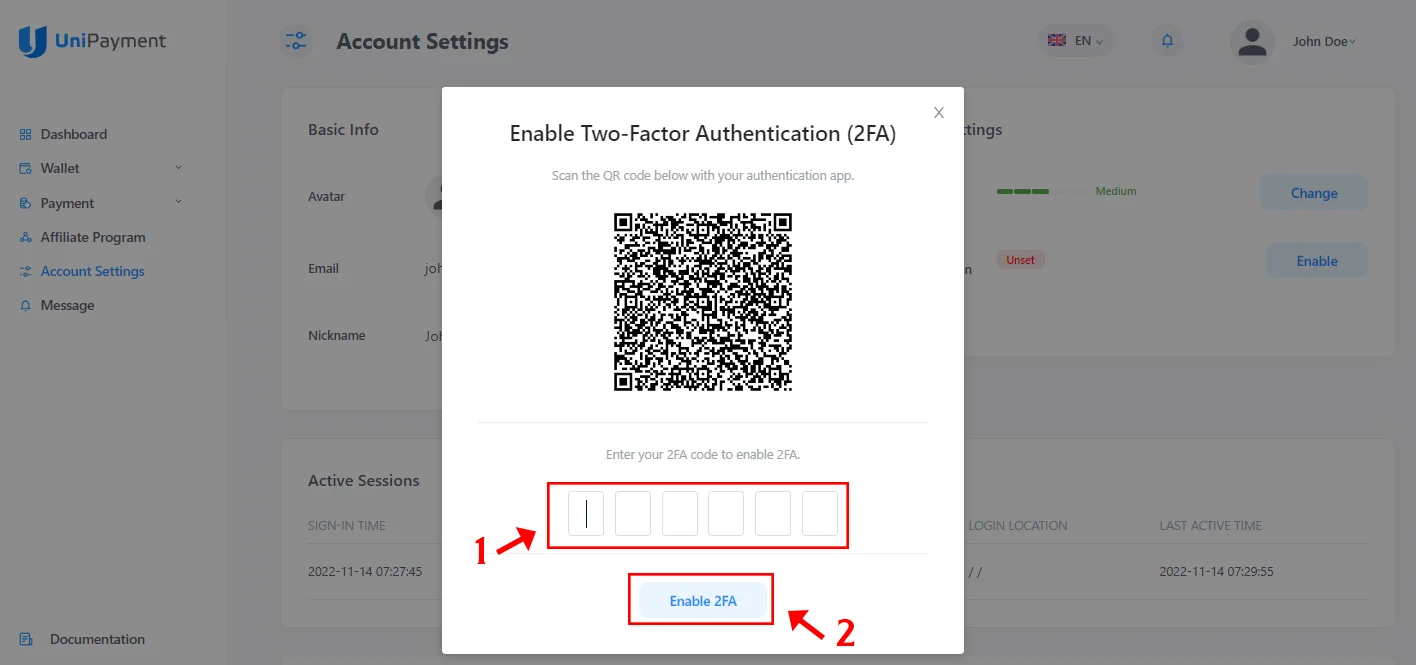
A pop-up box that contains a QR code for scanning will appear. Scan it using your mobile phone or authenticator app to generate the code in order to enable the two-factor authentication. Once a code is available, enter the 6 digit code and click “Enable 2FA” to confirm.
Notes:
● After enabling your 2FA, your UniPayment account will not be able to make any withdrawals or refunds within 24 hours. However, the creation and sending of invoices will not be affected.
● If you have re-enabled your 2FA, please make sure to delete the old 2FA in your authenticator app before re-scanning the QR code to prevent getting an error.
Step 4:
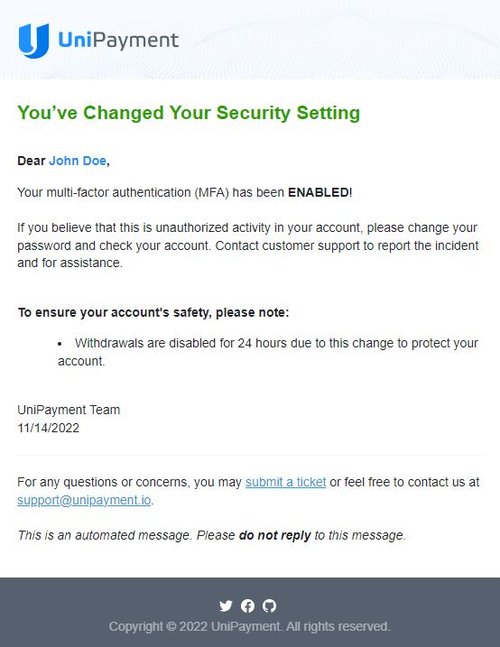
After enabling the 2FA or MFA, you can check your mailbox. You should receive an email notification like the image below informing you that you have changed your 2FA/MFA status successfully.
Step 5:
Disabling Your Two-Factor Authentication (2FA) or Multi-Factor Authentication (MFA)
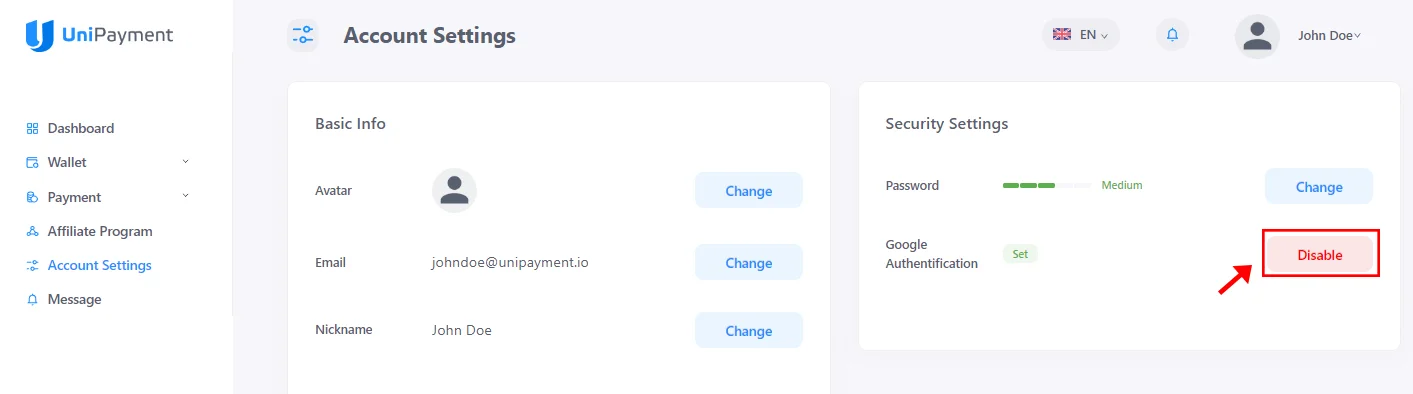
Your Google Authentification will look like the image below if it is enabled. It will show that it is “Set”.
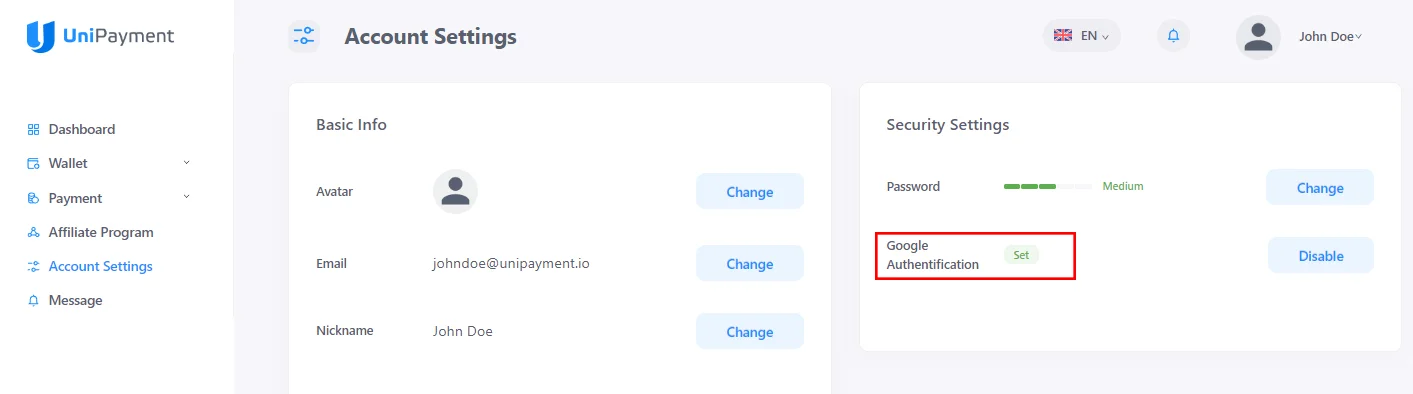
To set it for activation, click the “Disable” button on the right side.
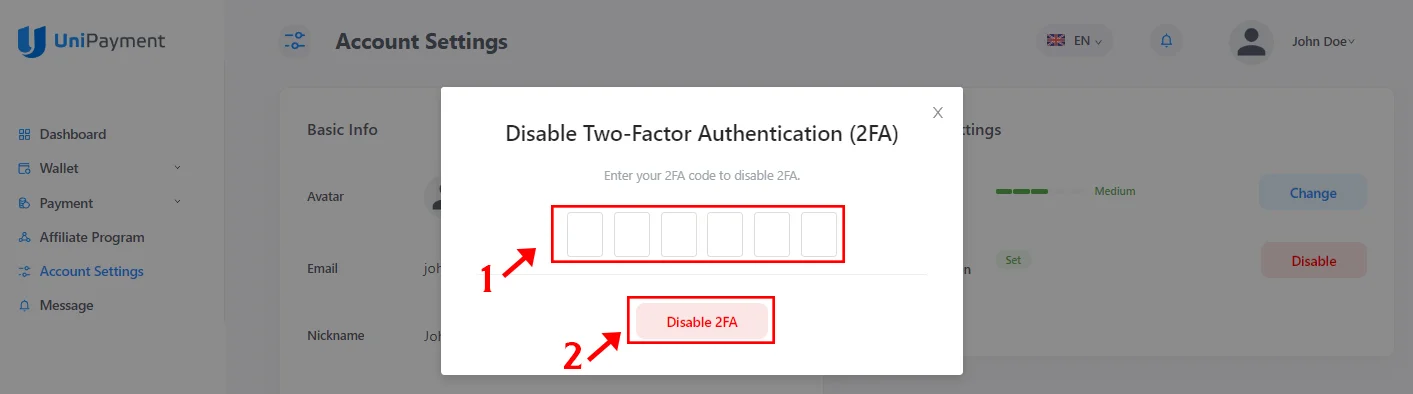
Step 6:
A pop-up box will appear asking for a Google Authentication code. Check your mobile phone or authenticator app to get the code in order to disable the two-factor authentication. Enter the 6 digit code and click “Disable 2FA” to confirm.
Notes:
● After disabling your 2FA, your UniPayment account will not be able to make any withdrawals or refunds within 24 hours. However, the creation and sending of invoices will not be affected.
● If you need to re-enable your 2FA, please scan the QR code again to generate a new 2FA code. Make sure to delete the old 2FA in your authenticator app before scanning the QR again to prevent getting an error.
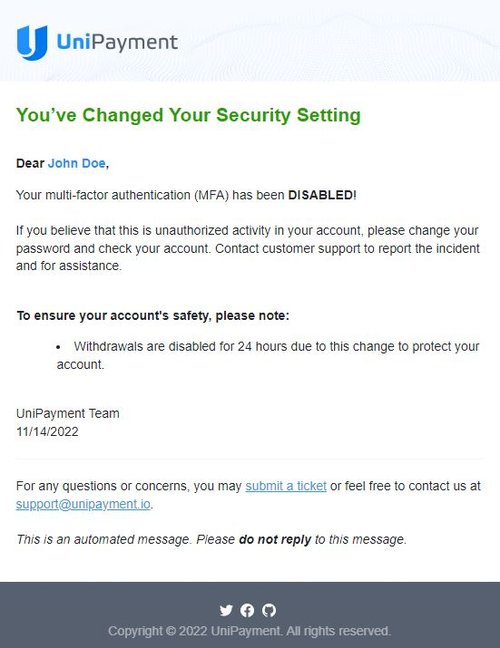
Step 7:
After disabling the 2FA or MFA, you can check your mailbox. You should receive an email notification like the image below informing you that you have changed your 2FA/MFA status successfully.