Withdrawal Operation Guide
Note: Due to version changes, there might be slight differences in the screenshots in this article, but the steps on how to do it have not changed.
For withdrawal transactions, please make sure and double-check that you have copied or entered the correct address. Any deposit, payout, or withdrawn amount sent by mistake on another blockchain or to an incompatible address may result in the loss of your funds forever. Note that UniPayment will not take any responsibility for it.
Step 1a:
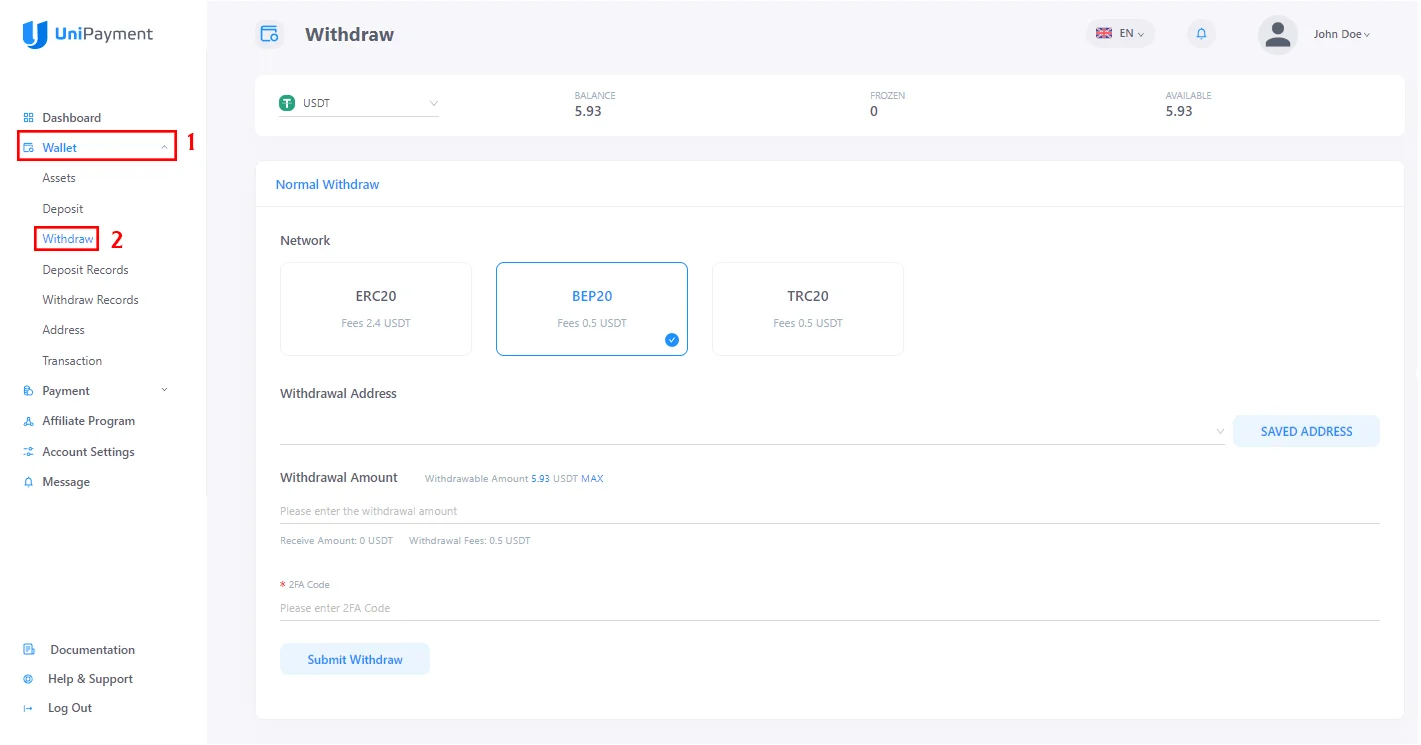
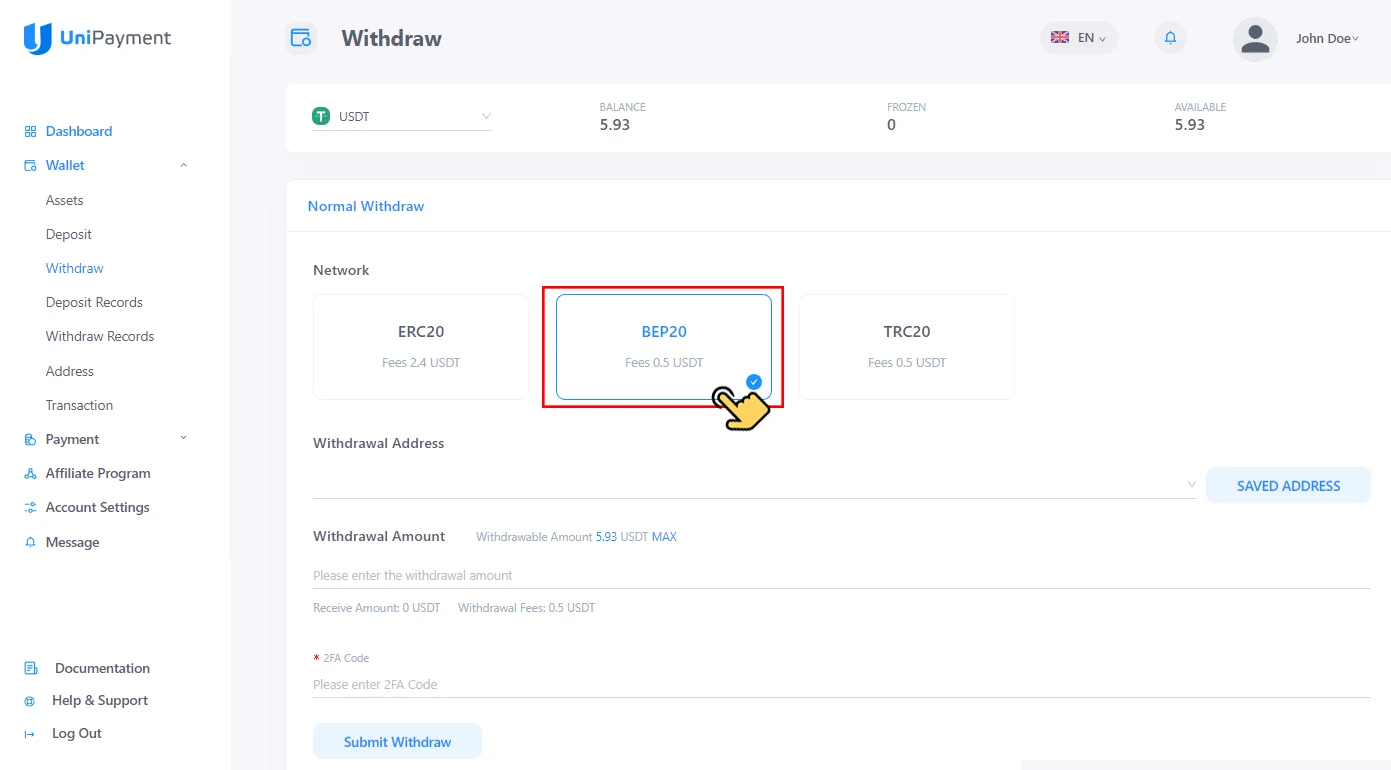
Click “Wallet” on the Navigation then click “Withdraw” under the Wallet menu. The Withdraw page will appear where you can do all your withdrawal transactions. You will also find your total balance, the total frozen amount of assets, and the available amount you can withdraw per cryptocurrency. The available networks that support your selected coin are also shown with the corresponding transaction fees. The fields for your withdrawal address, amount to be withdrawn, and 2FA code will also be found on the page.(If you have 2FA turned on)
Step 1b:
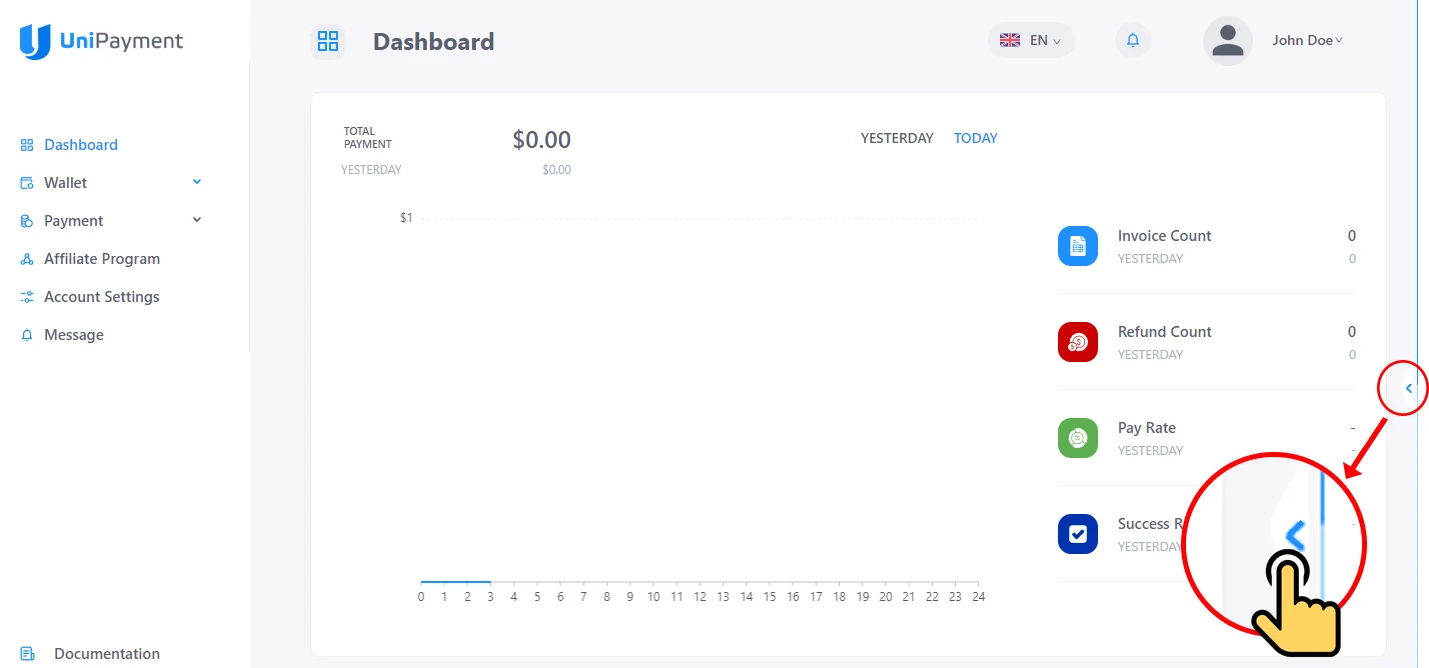
On the Dashboard page, look for the small arrow on the right side of your browser.
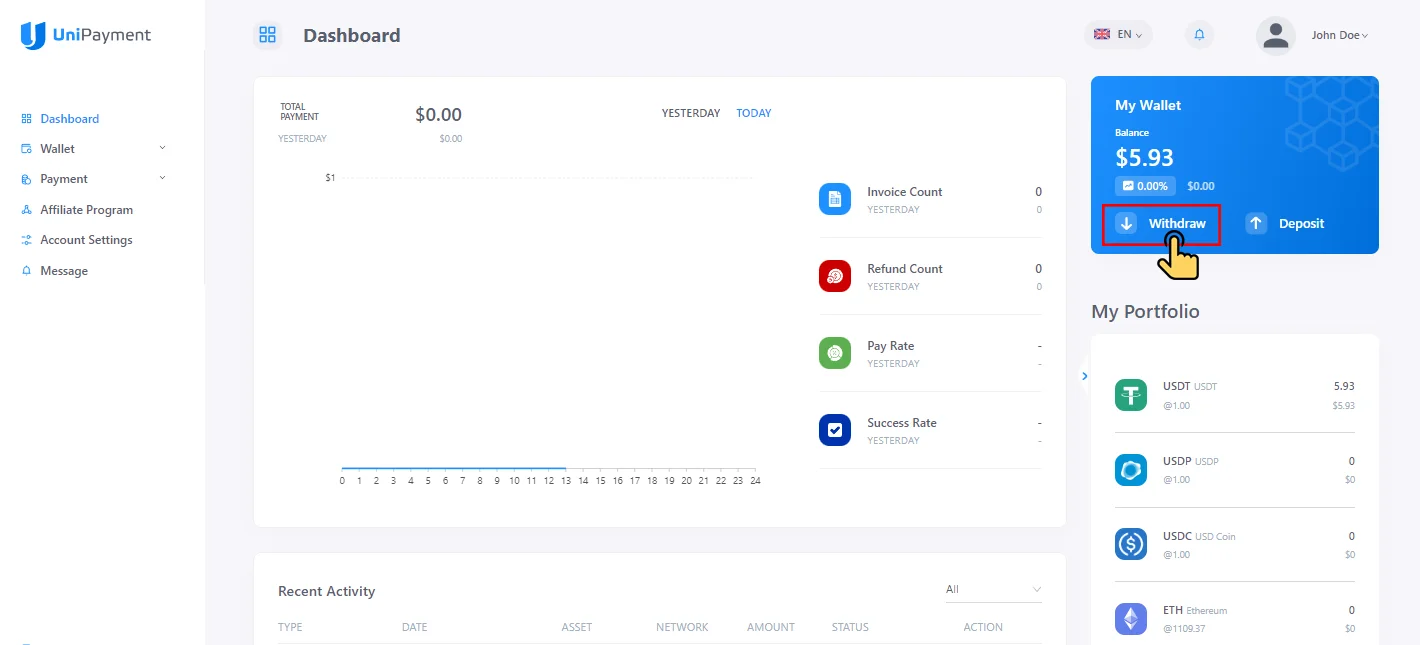
By clicking the arrow, you will have an overview of your wallet balance and your portfolio. You can also click the “Withdraw” button to be redirected to the withdraw page.
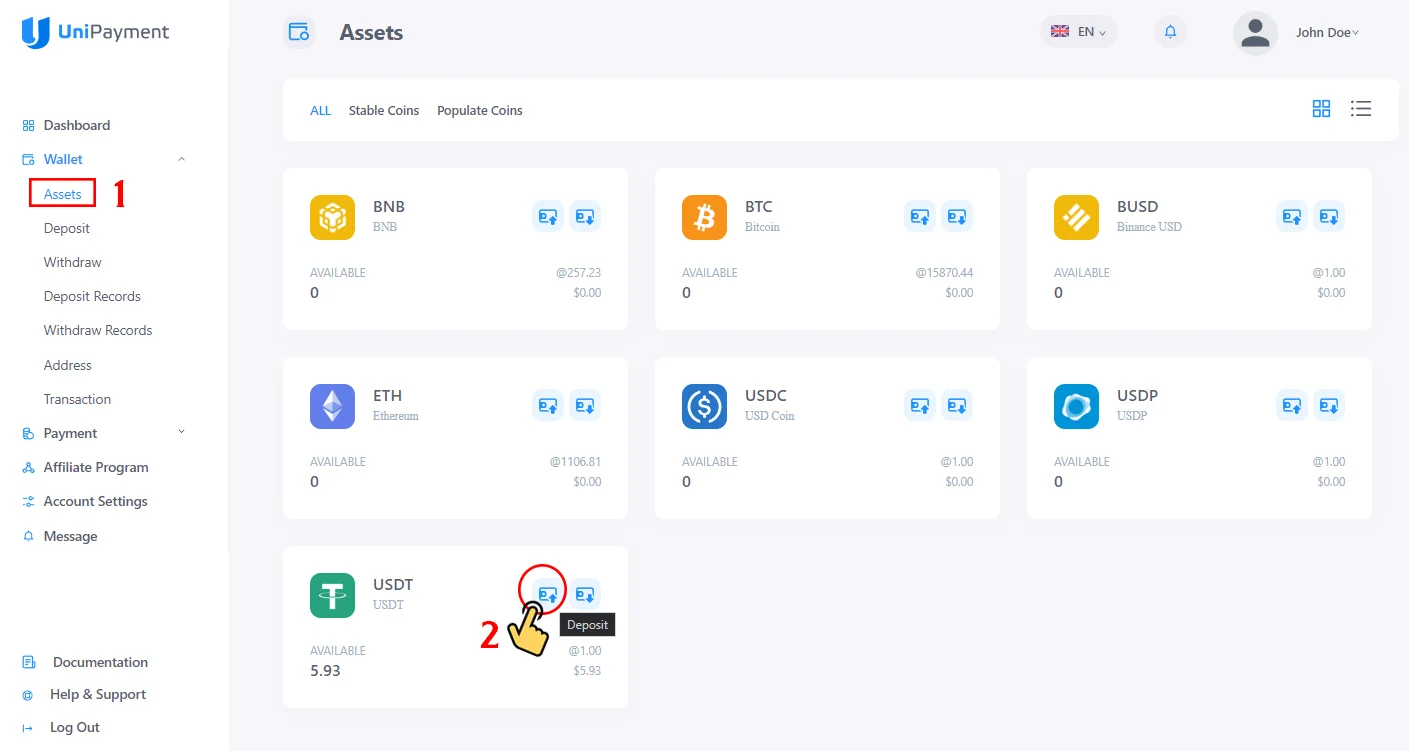
Step 1c:
If you are on the Assets page, you can also click the withdraw icon found beside your chosen cryptocurrency and you will then be redirected to the withdraw page.
Step 2:
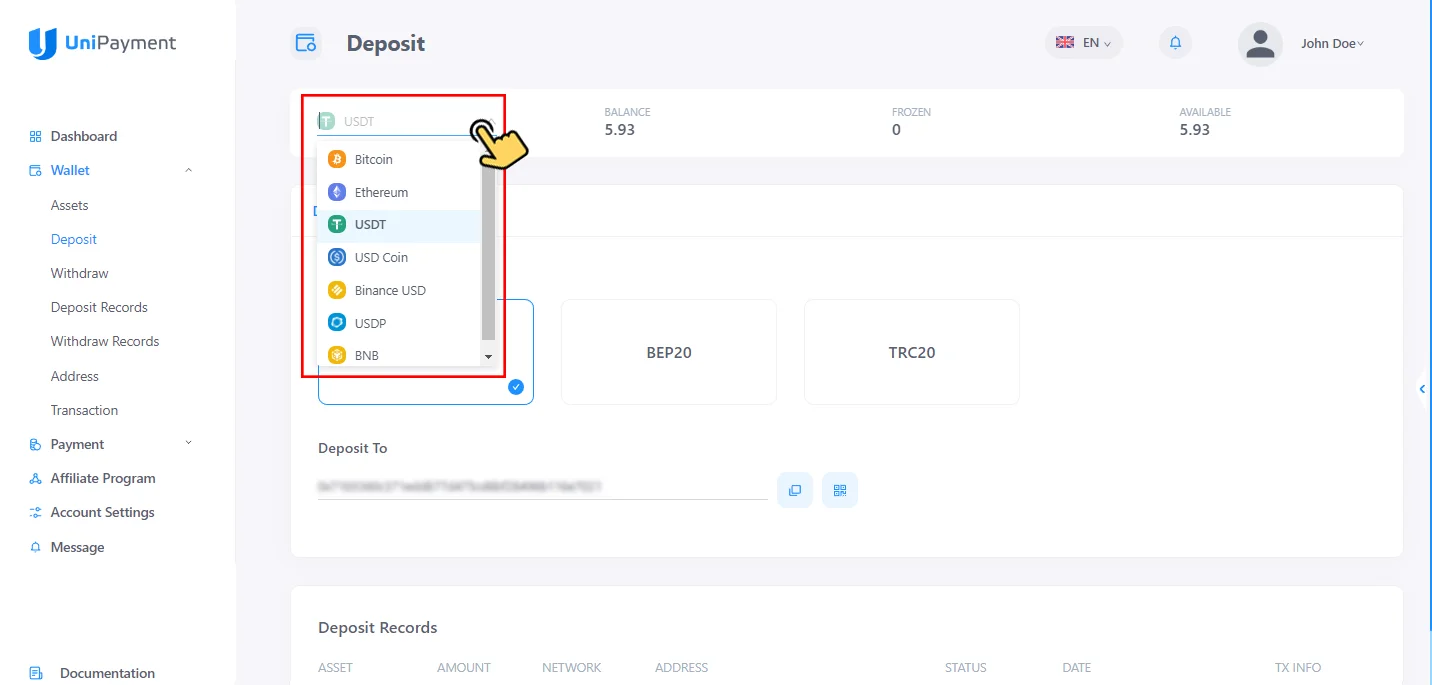
Choose a cryptocurrency from the dropdown list of UniPayment’s supported coins. As part of this demo, let’s choose USDT.
Step 3:
The next step is to select your chosen network. For this demo, let’s choose BEP20 for USDT withdrawal.
Step 4:
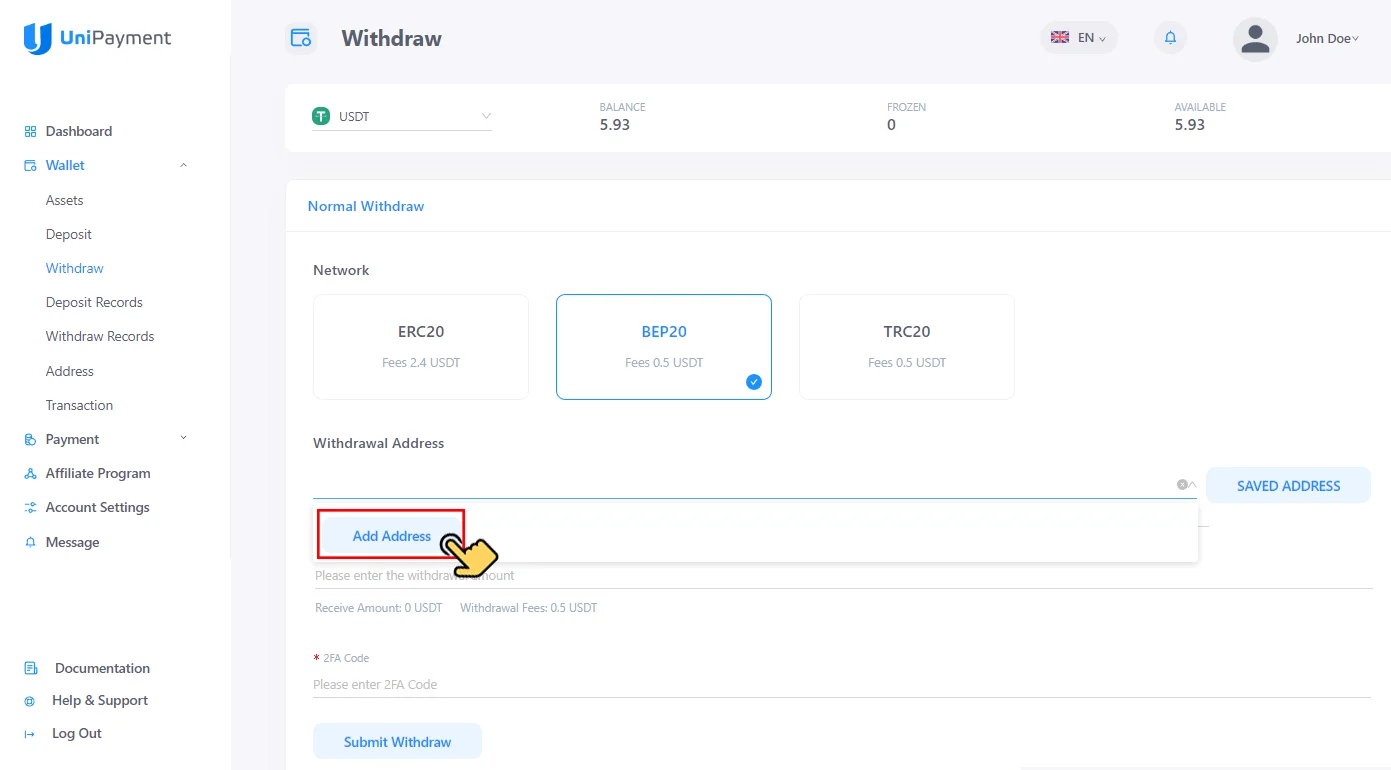
Then click the Withdrawal Text Field area and a dropdown will appear where you can click the “Add Address” button. Click it to add the address details for your withdrawal. your chosen network. For this demo, let’s choose BEP20 for USDT withdrawal.
Step 5:
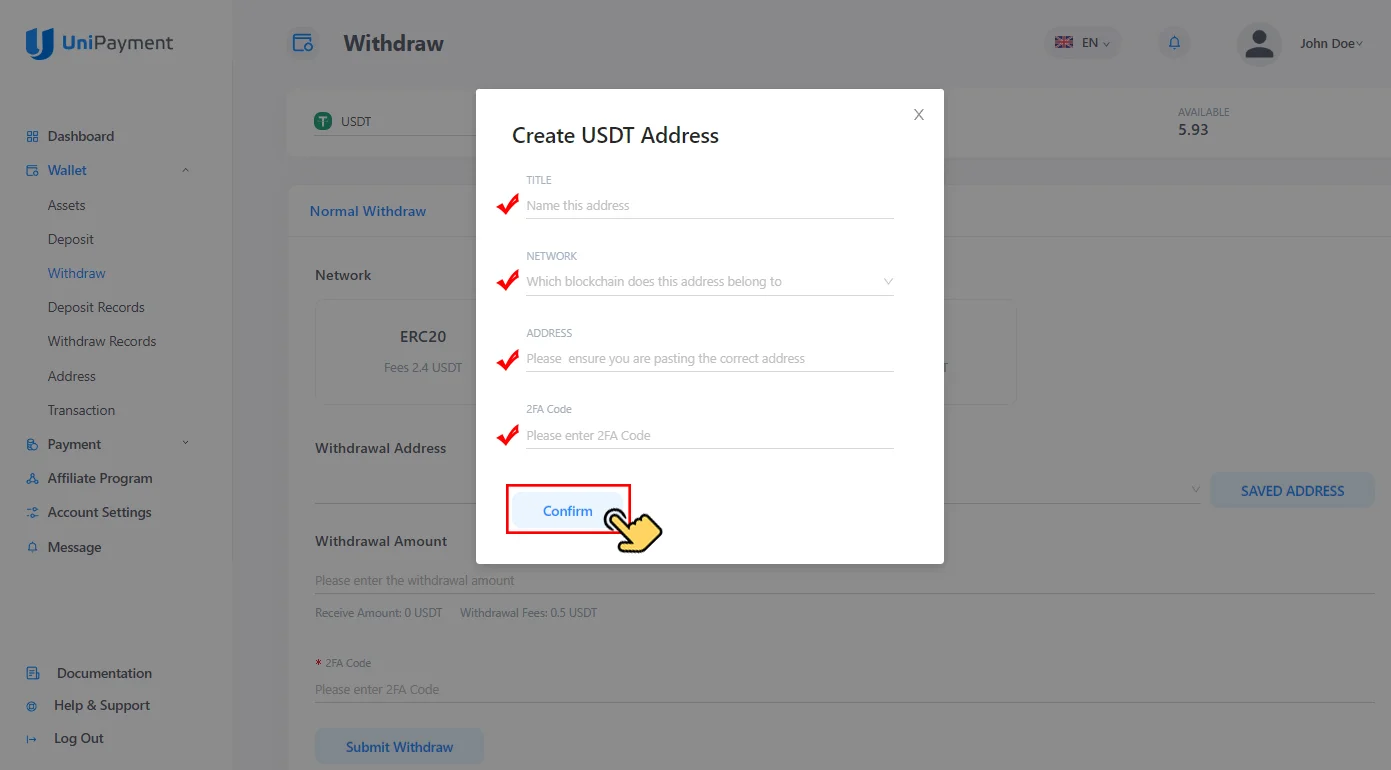
A pop-up box will appear where you can enter the wallet address where you will withdraw your funds. Enter a name or title for the address > select the network > enter the wallet address and make sure it is correct > get 2FA code on your authenticator app(If you have 2FA turned on). Click confirm once you have completed the form.
Step 6:
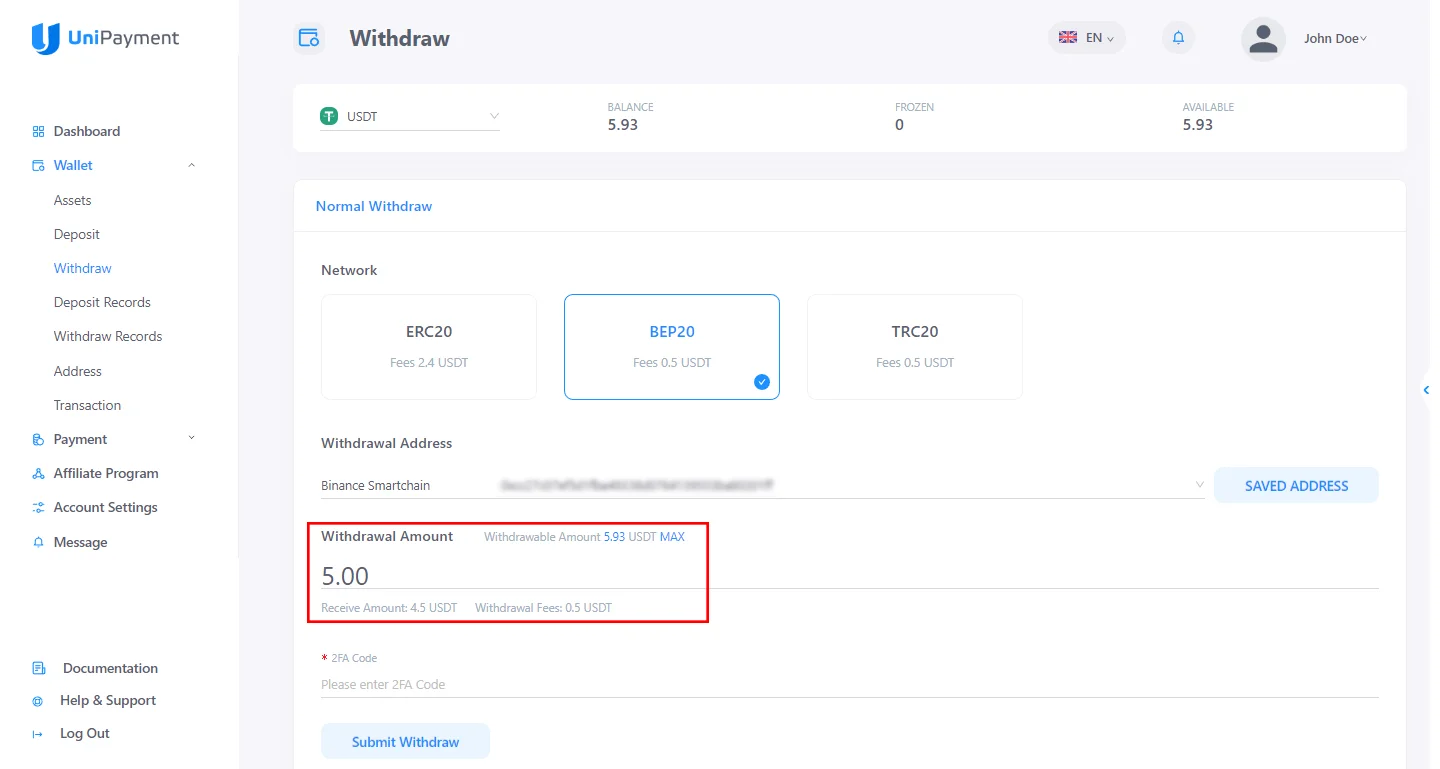
On the “Withdrawal Amount”, enter the amount you will withdraw. For this example, let’s withdraw 5.00 USDT. You will see the details of how much you will receive and the withdrawal fee. The withdrawal fee depends on the current gas fee of the network you choose.In this example,the withdrawal fee costs 0.5 USDT and the amount you will receive is 4.5 USDT
Step 7:
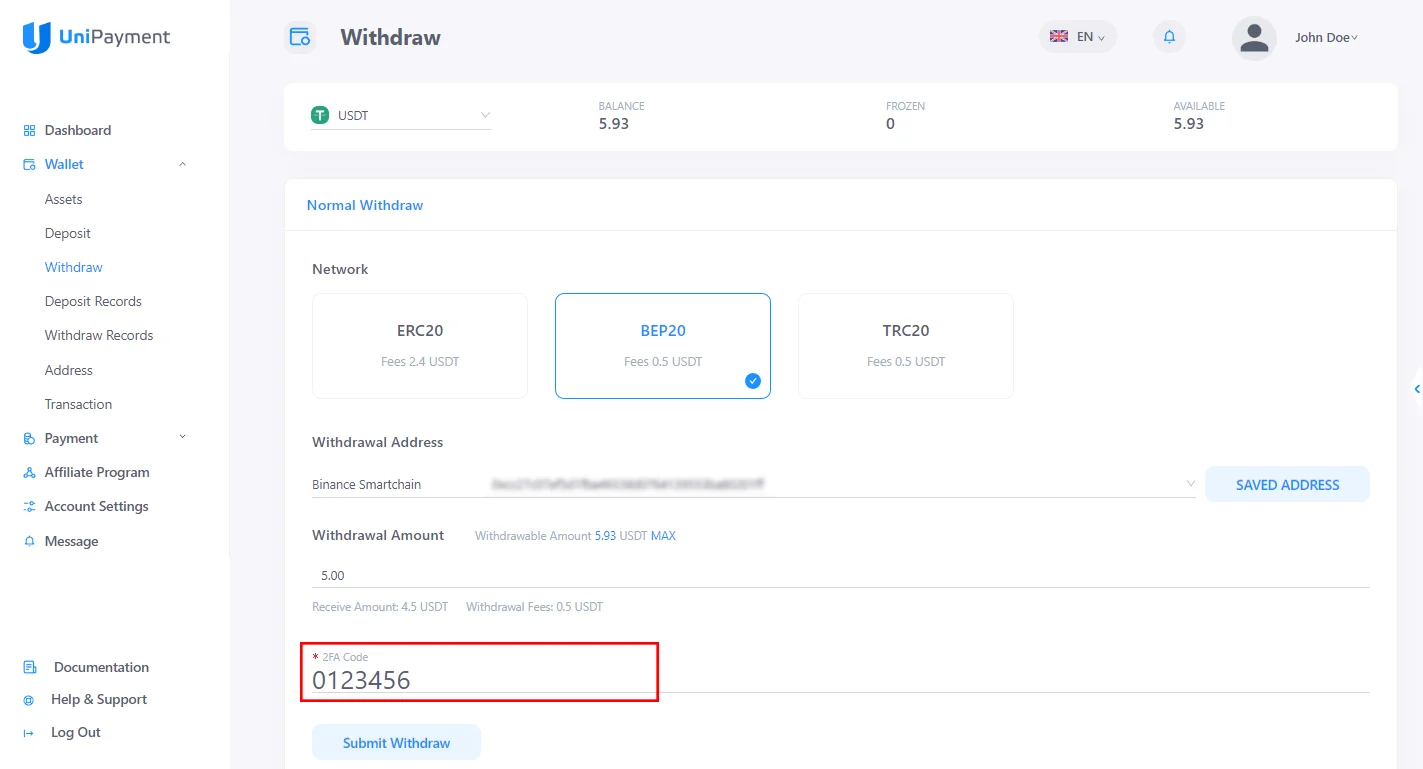
Enter the 2FA code you got from your authenticator app(If you have 2FA turned on).
Step 8:
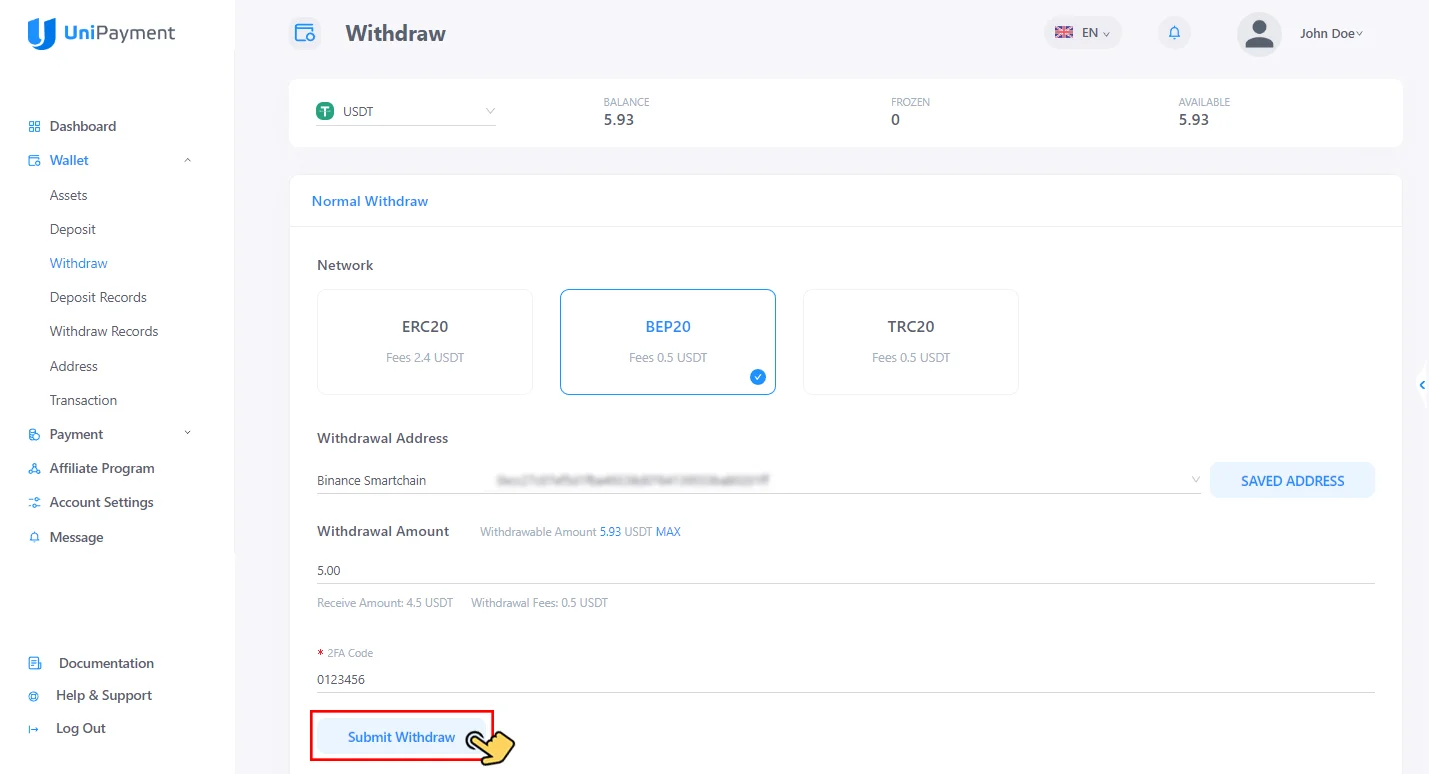
Click the “Submit Withdraw” button once done entering all the details needed for withdrawal.
Step 9:
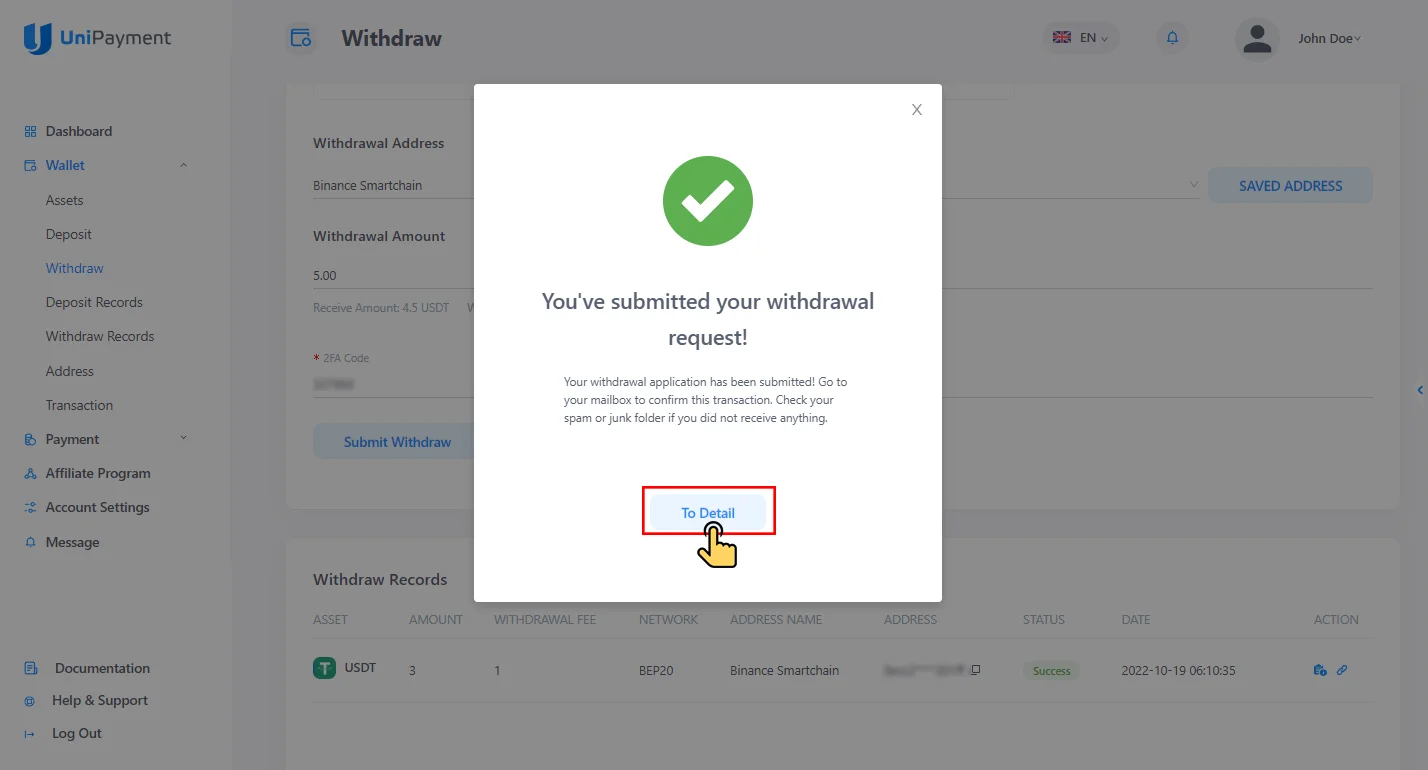
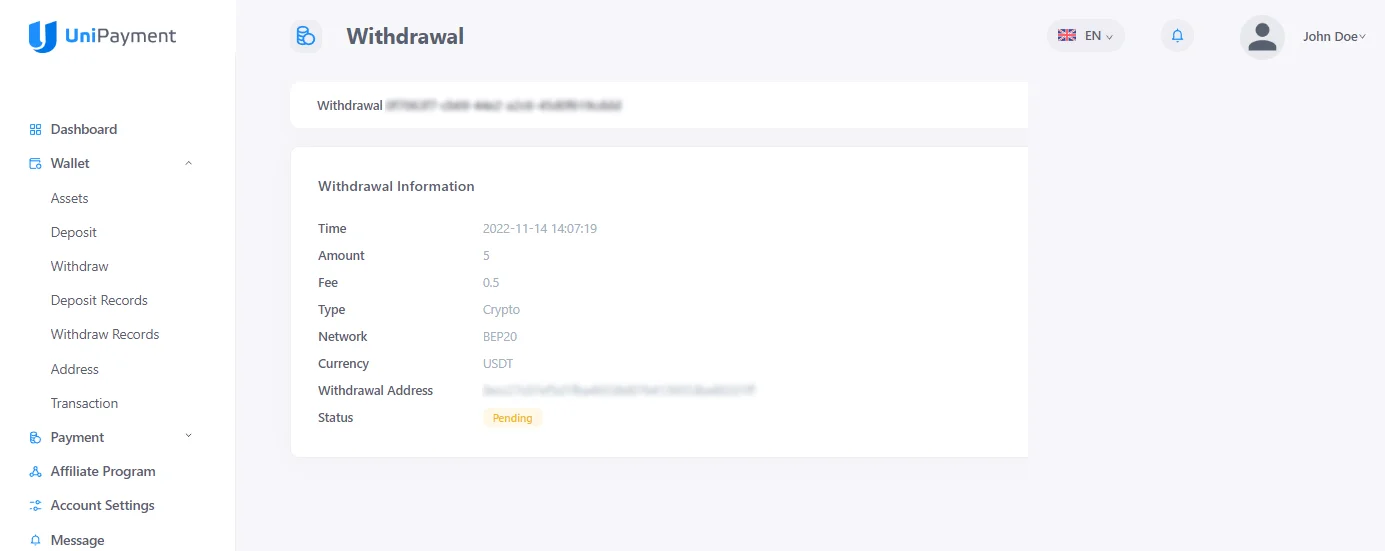
A pop-up window will appear informing you that you have submitted your withdrawal request successfully. You may click the “To Detail” button to check withdrawal information.
Step 10:
After a successful withdrawal request, UniPayment will send you a verification email to confirm that the withdrawal request was done by you. You will be asked to approve or cancel the withdrawal transaction.
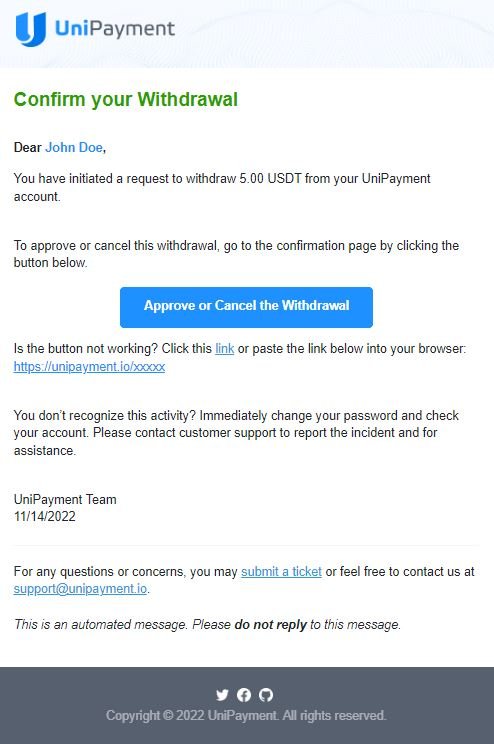
If you approve the transaction, you will be redirected to the UniPayment site. A notification message will appear informing you that your withdrawal request has been confirmed and is successful.
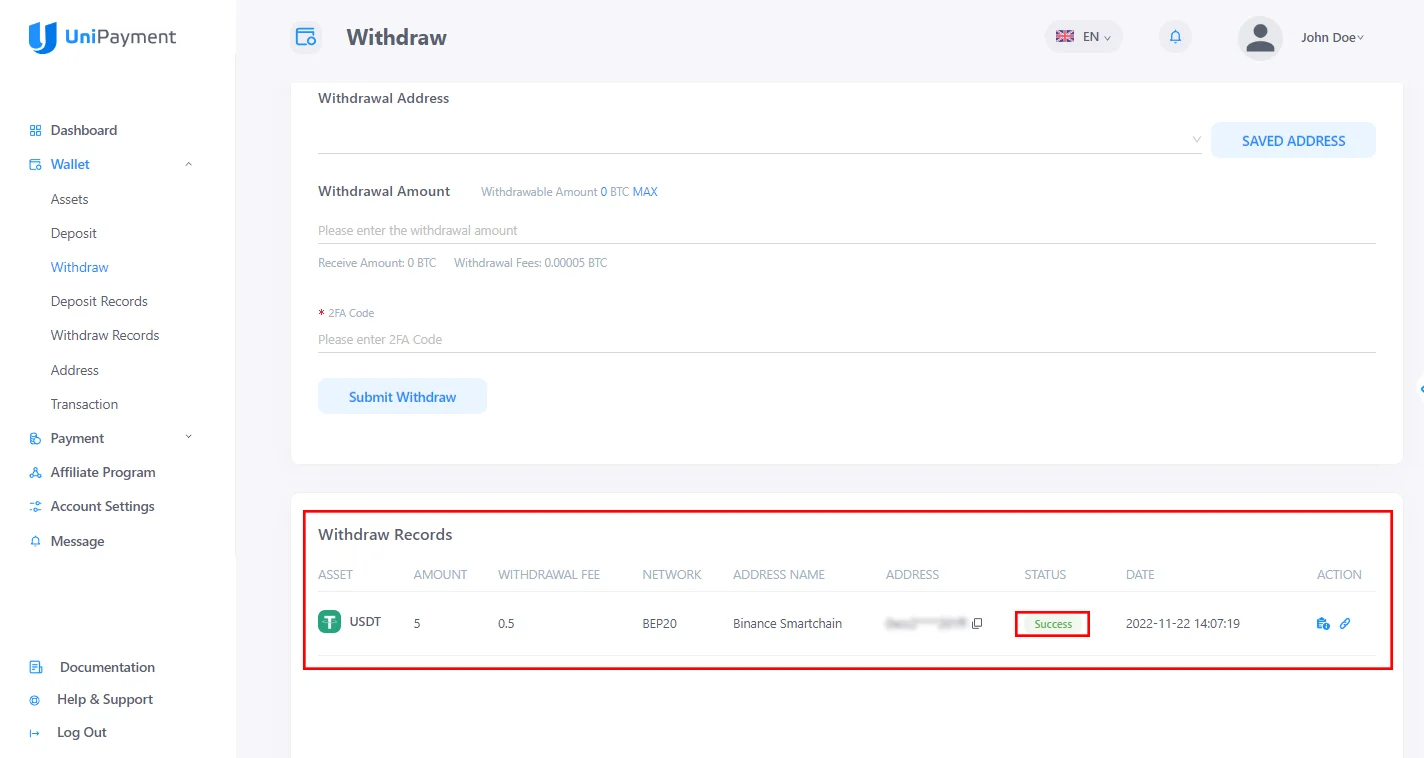
Your Withdraw Records should also show that the “Pending” status has changed to “Success” status. See the image below as an example.
Step 11:
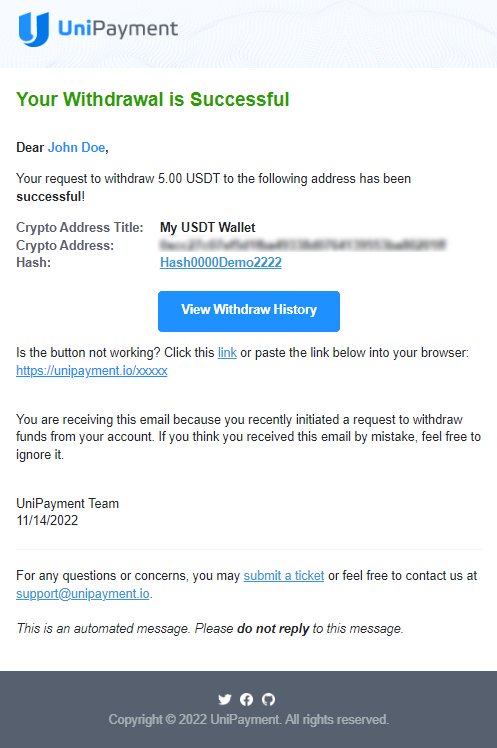
Once the withdrawal process has been successful, UniPayment will send you a notification email containing the withdrawal information to let you know that the withdrawal has been completed.
